Resources for your Keeper success
Learn how to deploy the Keeper Admin Console and End User Vault.
Learn how to deploy the Keeper Admin Console and End User Vault.
This is an abbreviated version of our full documentation library. If you need additional information, please visit the full Keeper Docs, linked below.
Helpful links
To learn some KeeperPAM basics, we have created a wizard that is integrated into the Vault. If you select the Docker install method, this wizard will create all the necessary vault records, configurations and a customized Docker Compose file for quickly standing up a sandbox environment in less than 3 minutes.

Records Created
The wizard will create the following in your vault:
Quick Start Video
We've created a helpful Keeper 101 video to set up your sandbox environment. Access the full KeeperPAM docs here.
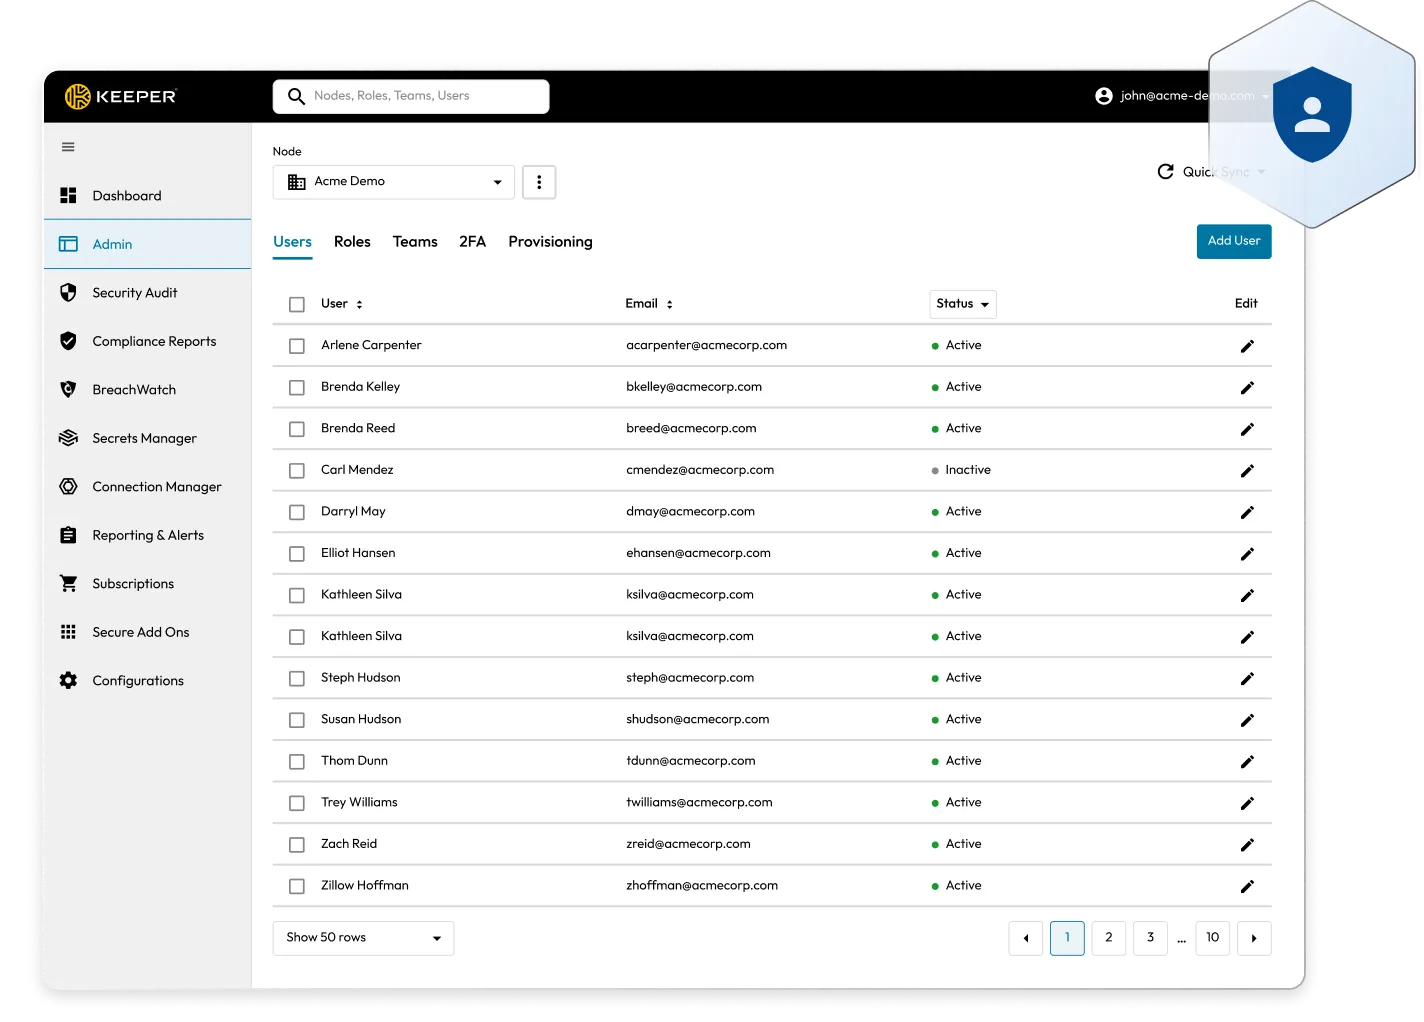
If you still need to do so, you must start a Keeper Business trial to access the admin console. You may start a trial here.
Next, log in to the Keeper Admin Console by following the instructions sent via email from the trial registration form.
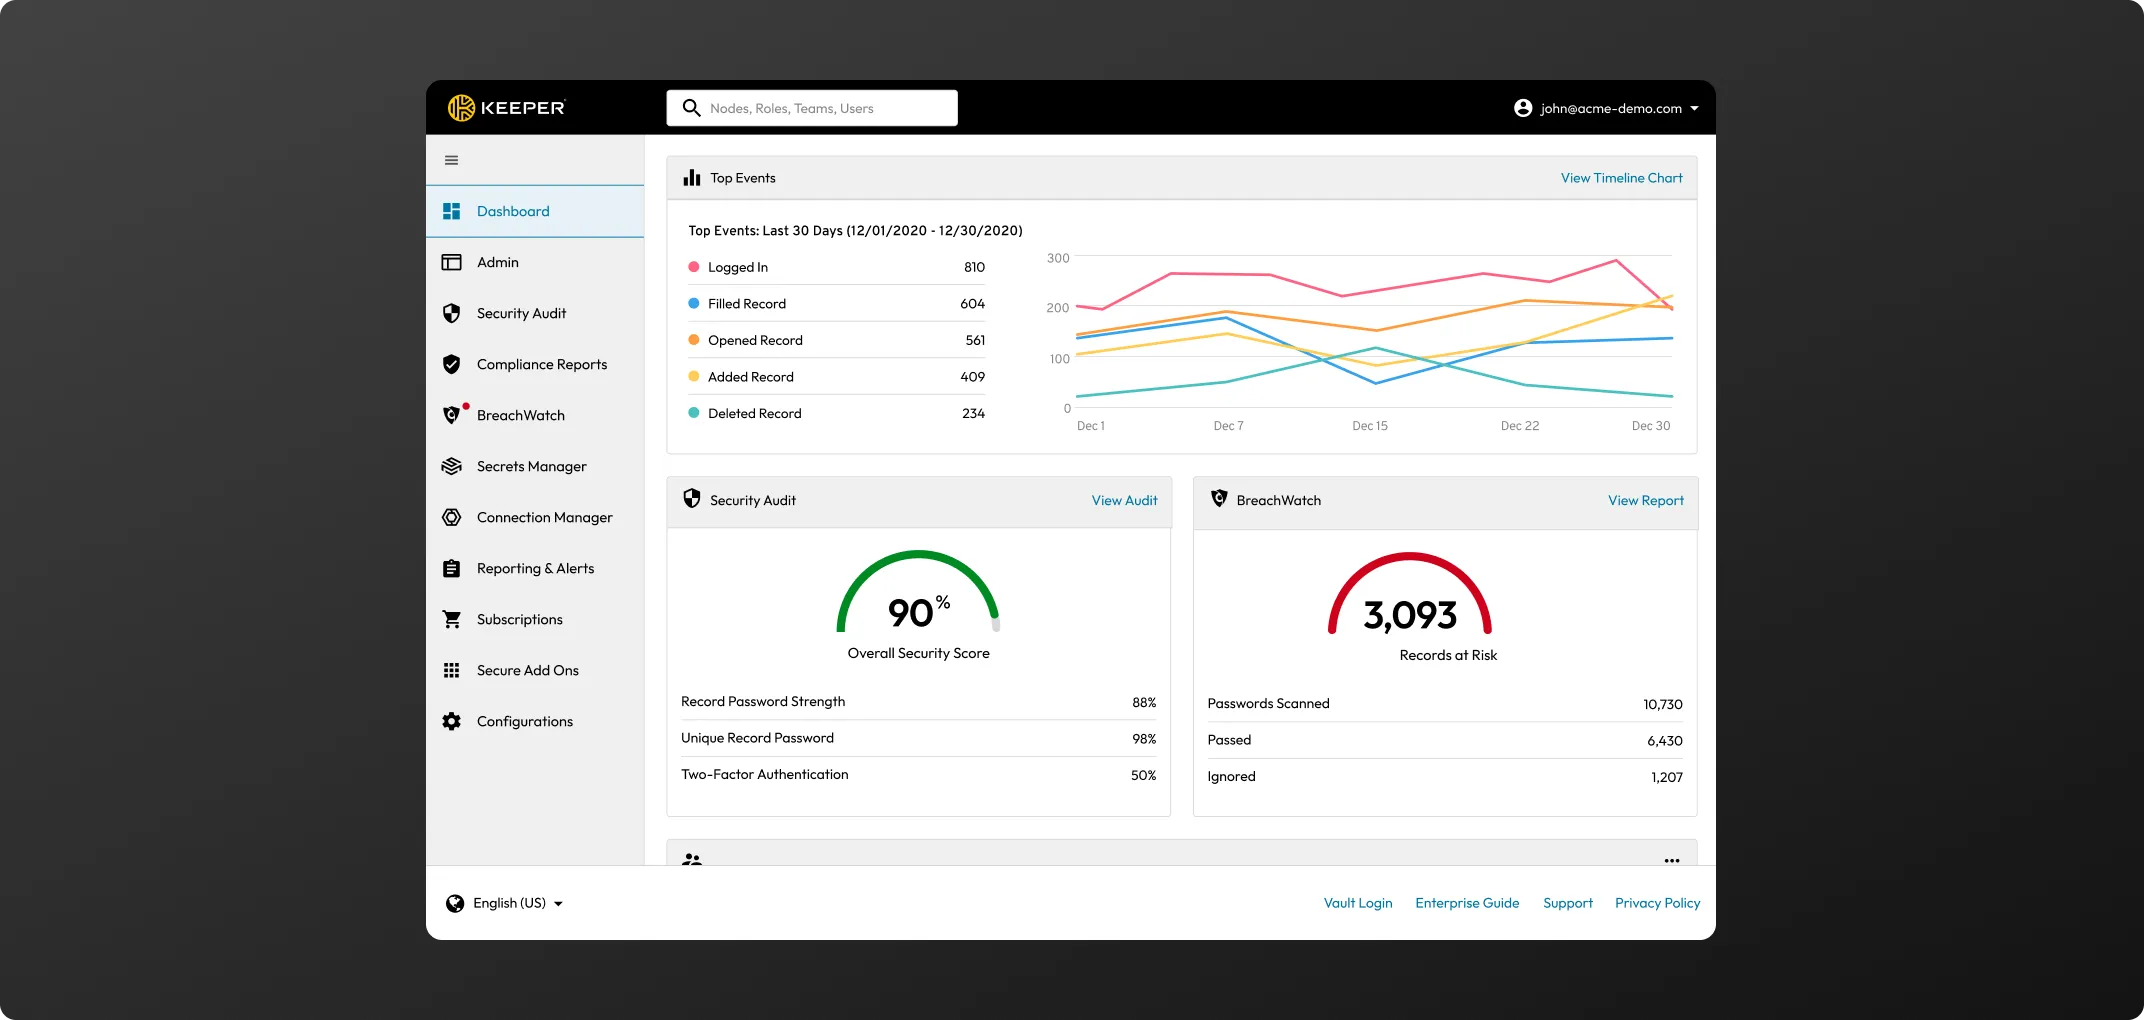
When you first log in to the Admin Console, you will land on the Dashboard which will provide an overview of high-level data on your user activity and overall security status.
The Dashboard provides oversight of the following:
The Admin tab is where the majority of your set-up and user deployment will take place. Here, is where you can access Nodes, Users, Roles, Teams and Two-Factor Authentication Settings.
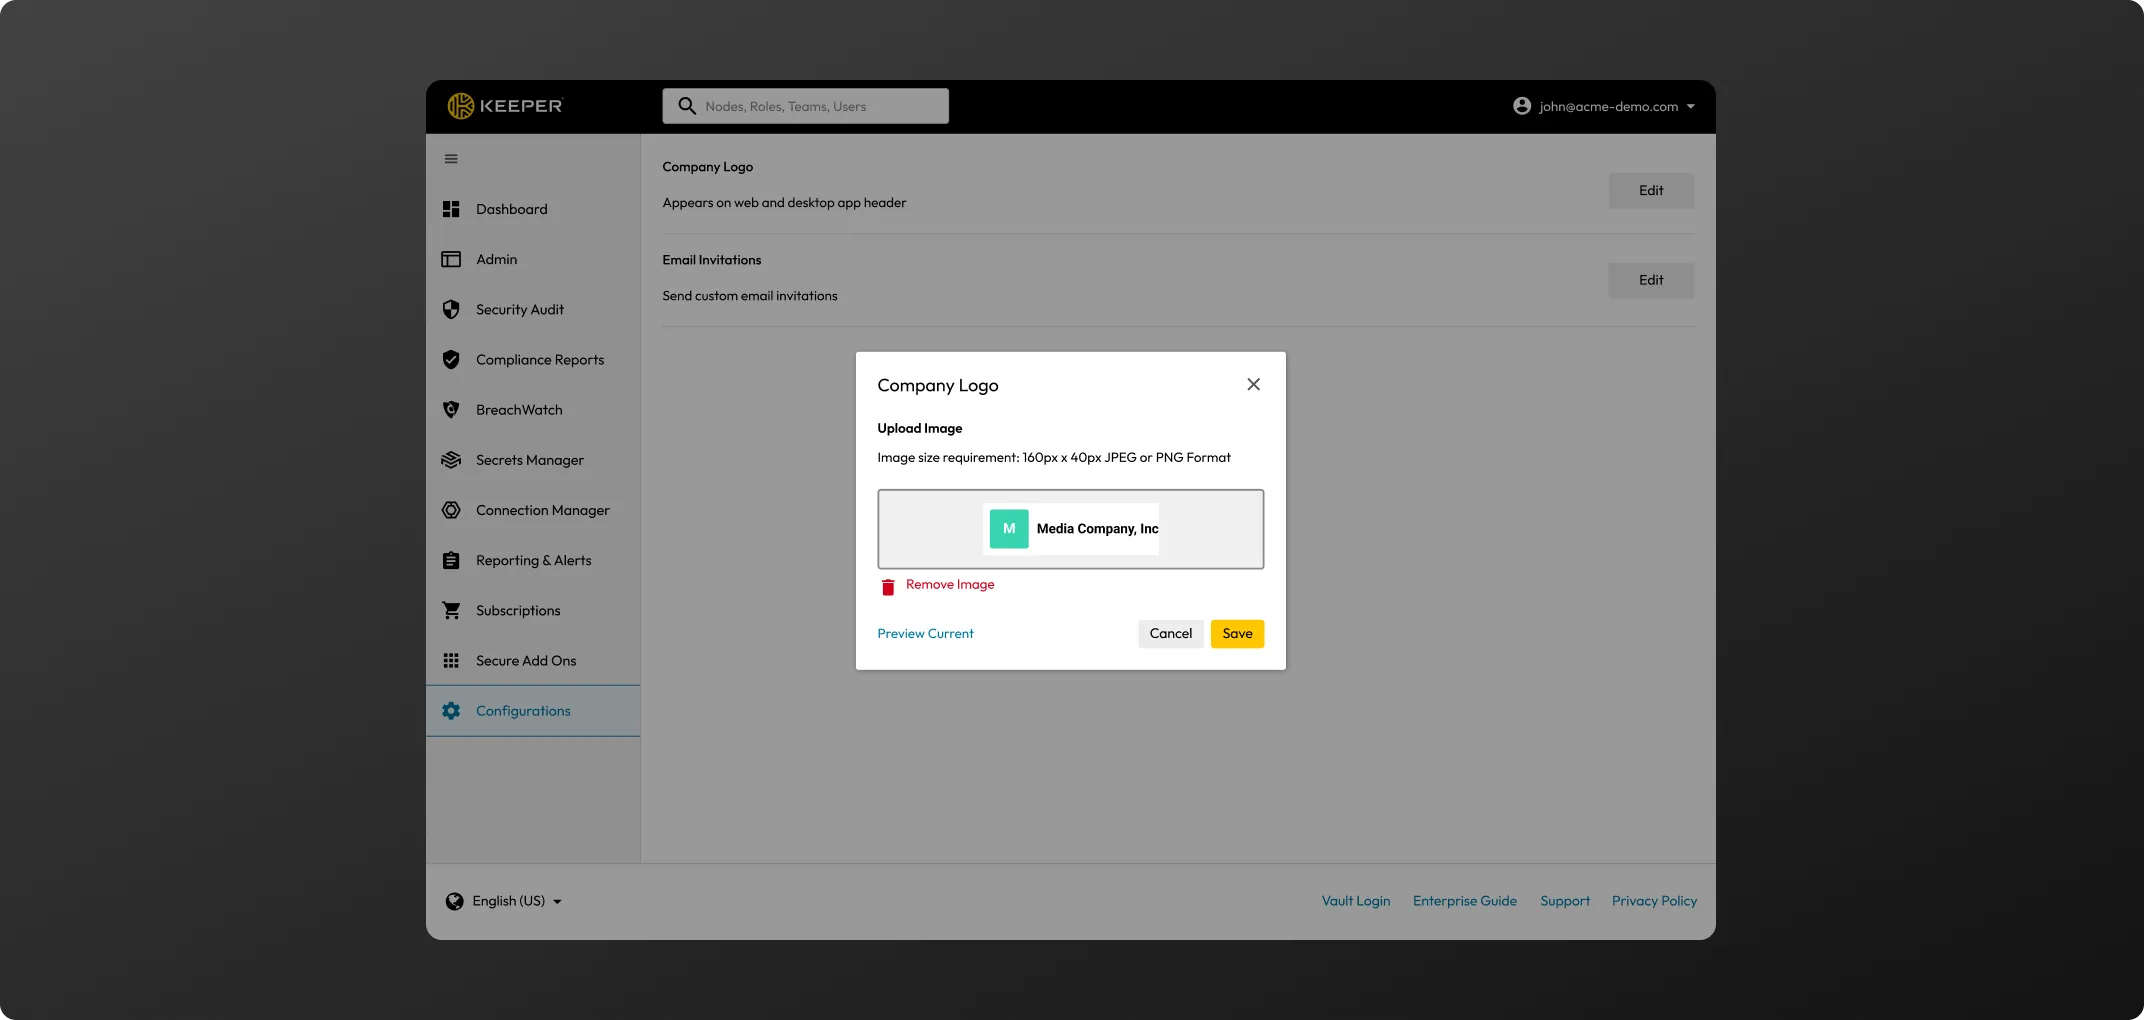
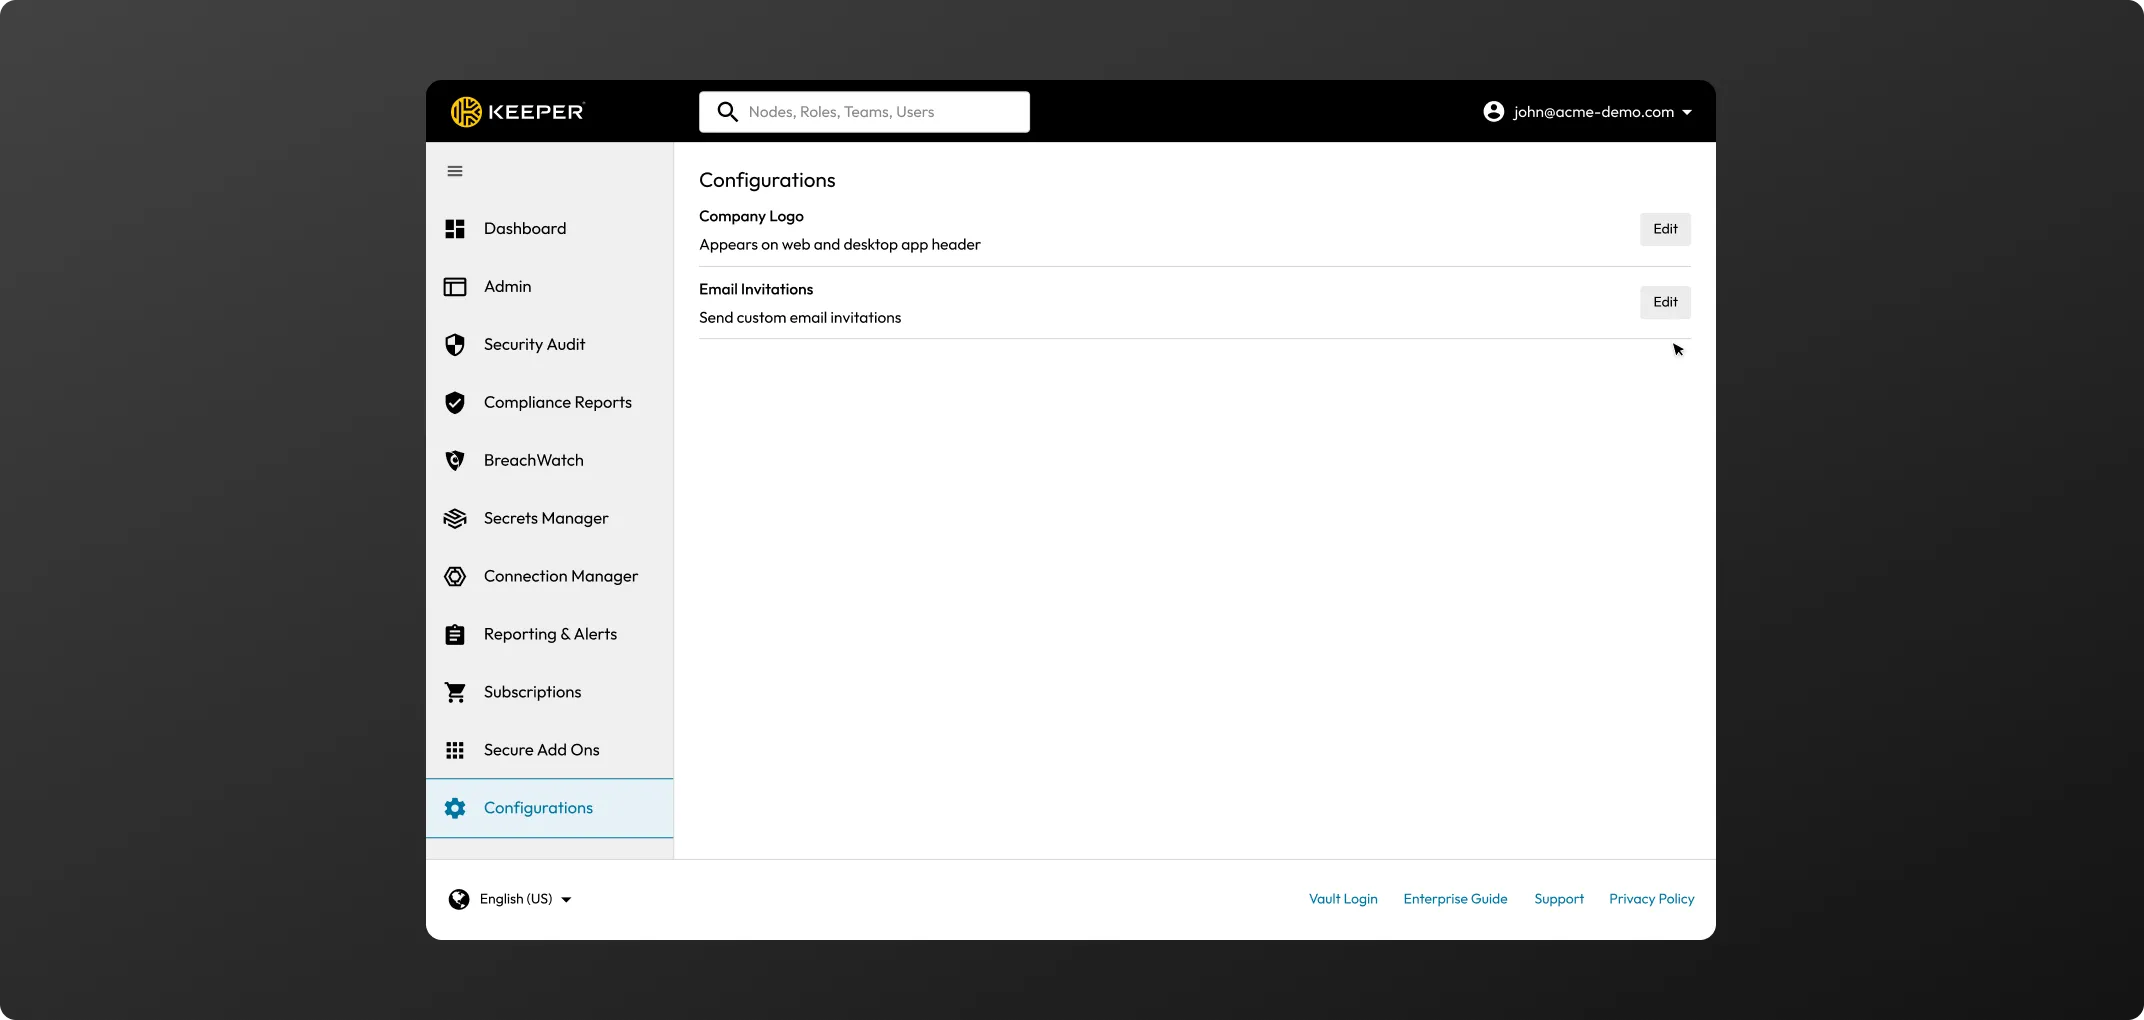
As a first step, we recommend uploading your company logo to the vault and customizing the email invitation that will invite your employees to create their Keeper Vault. These configurations are highly recommended as they have shown to help with quick user adoption of Keeper's software.
Click Configurations then click Edit next to "Company Logo" to upload your image file.
Click Configurations then Edit next to Email Invitation, then toggle "Send Custom Email Invitations" on.
Manual Provisioning - To add a small number of users manually through the user interface, follow these steps.
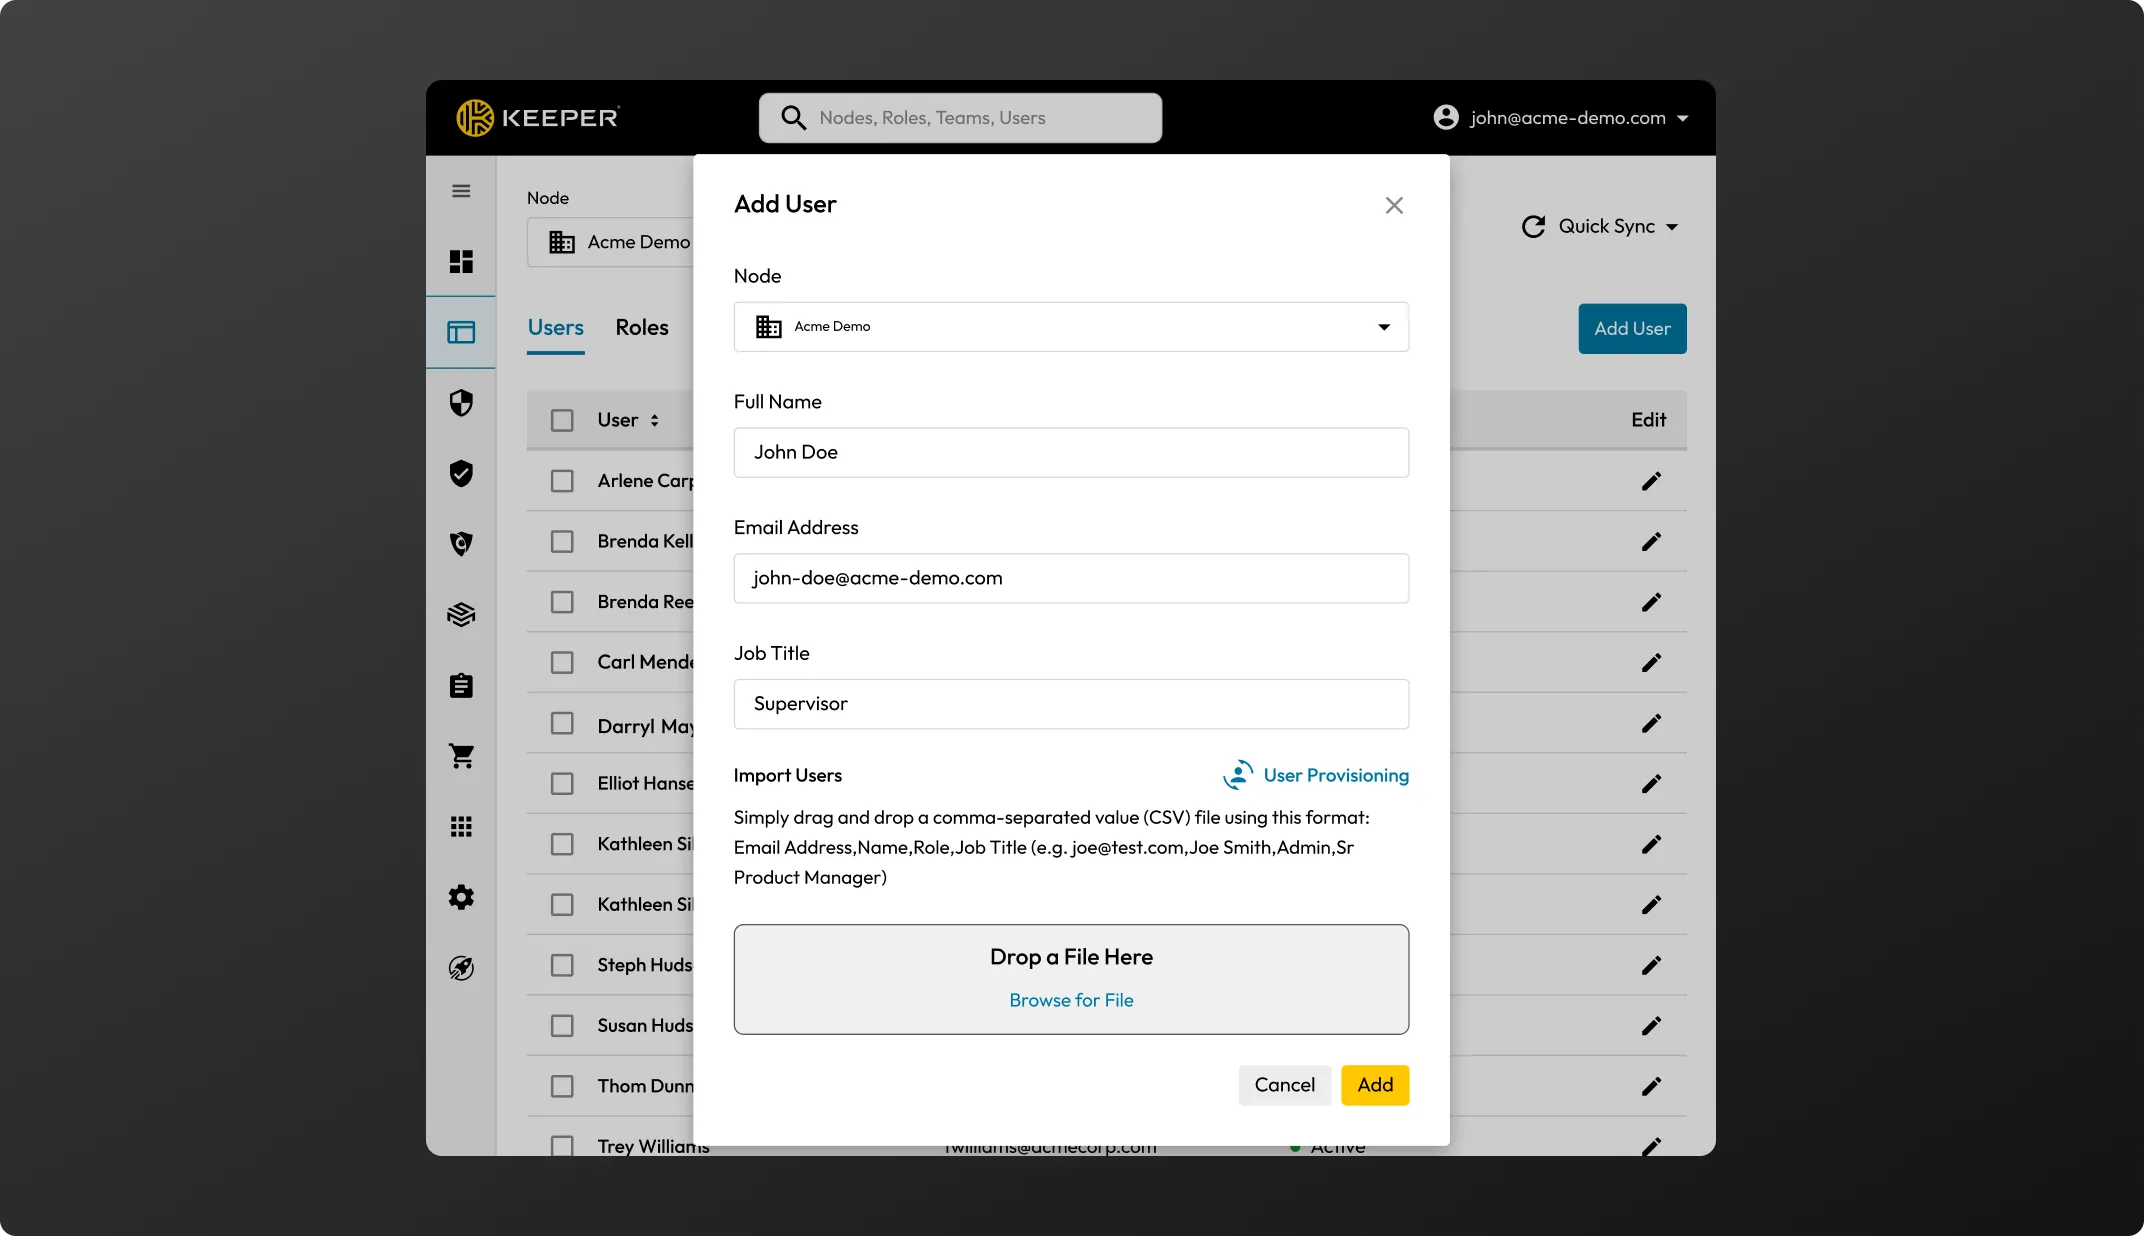
Bulk Provisioning via CSV - You can also import many users at once via a comma-delimited text file (.csv).
The file format for a CSV file upload is 3 columns: Email Address, Name, Role.
The Role field is optional. Keeper recommends you create a default, "General Employee" role and all users imported will be automatically applied to that role, for example:
Advanced Provisioning - Keeper supports the following advanced provisioning options. If you would like to test out one of these methods in your POC please contact your Keeper representative.
Keeper natively encrypts using AES 256-bit to protect data from cyber threats.
For organizations that require enhanced encryption or hosting solutions [AWS GovCloud (US) for example], please contact your sales representative.
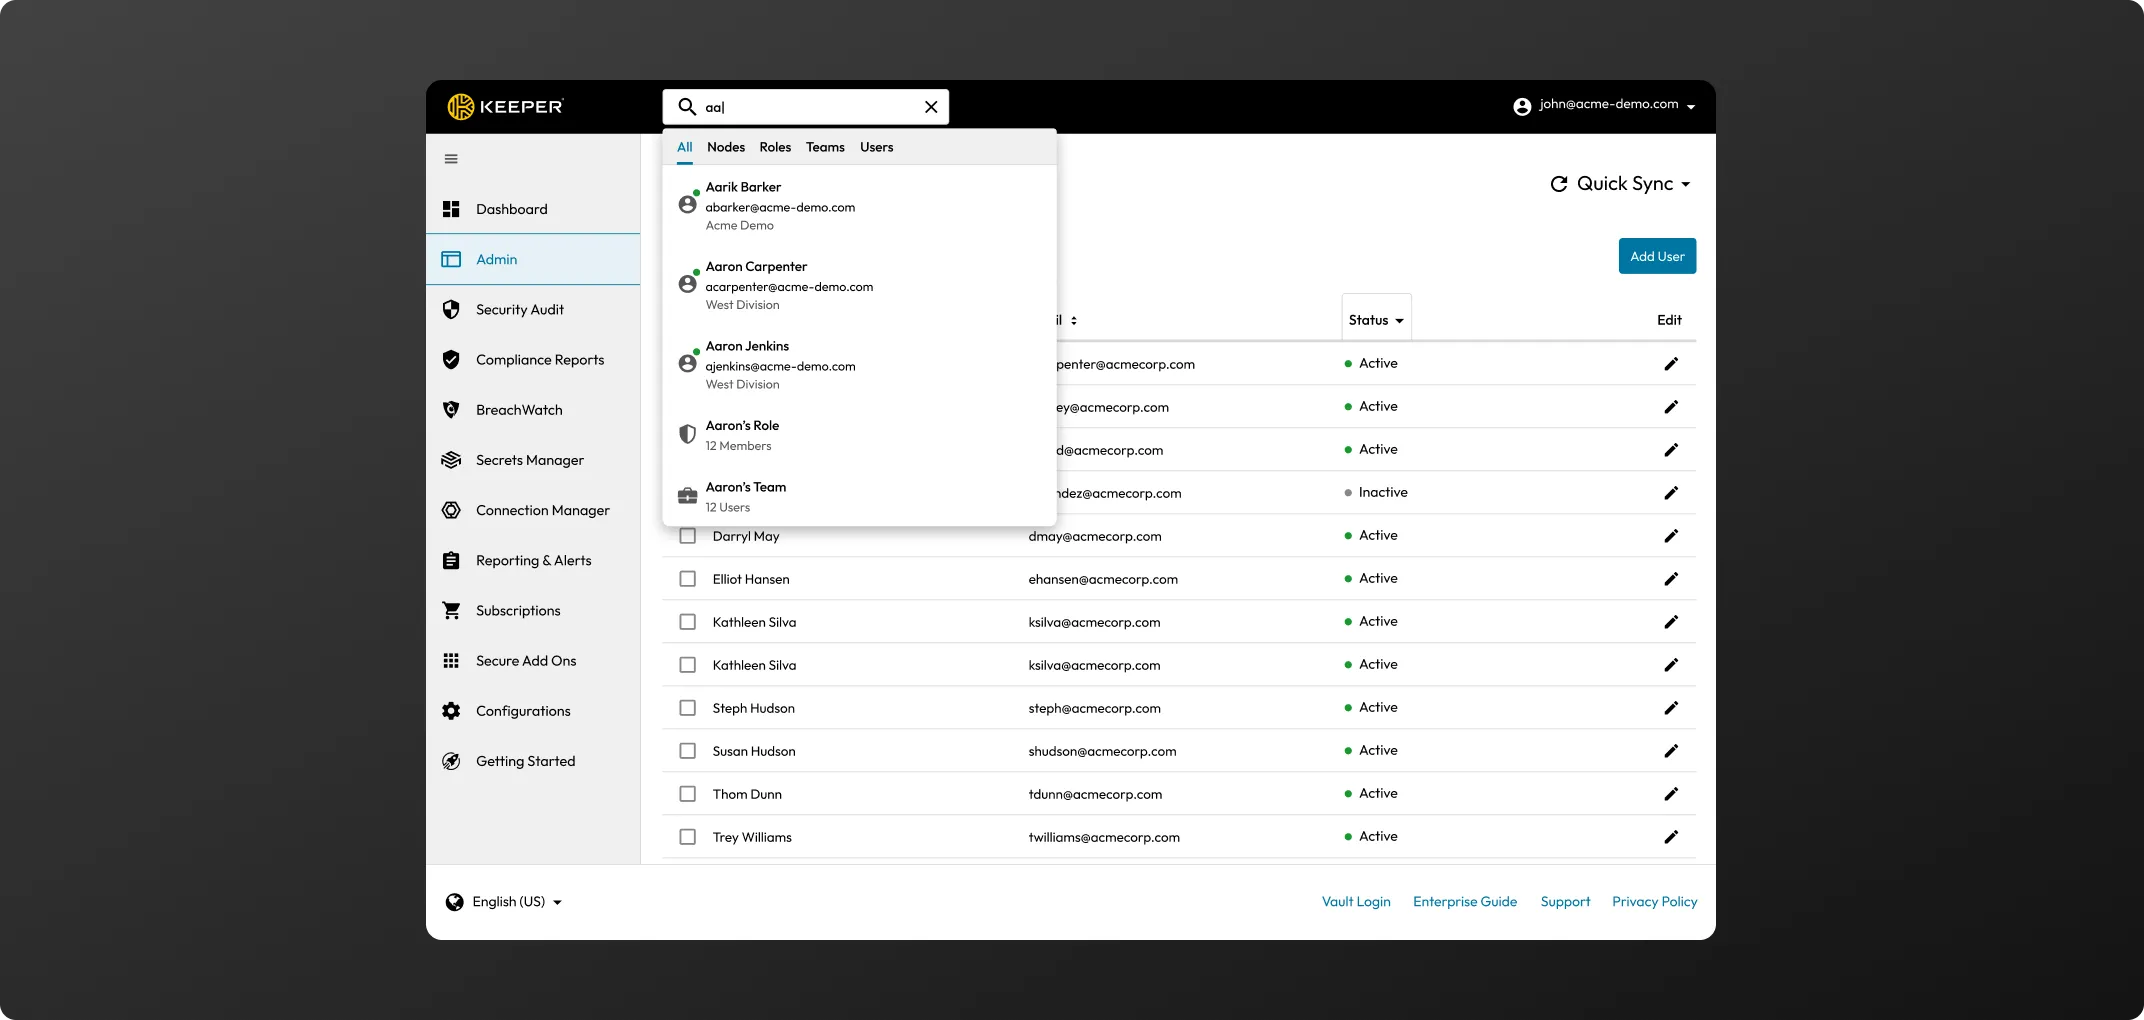
From the Admin Console - clicking on the Search field will open a dynamic Search tool that Searches across Nodes, Roles, Teams and Users.
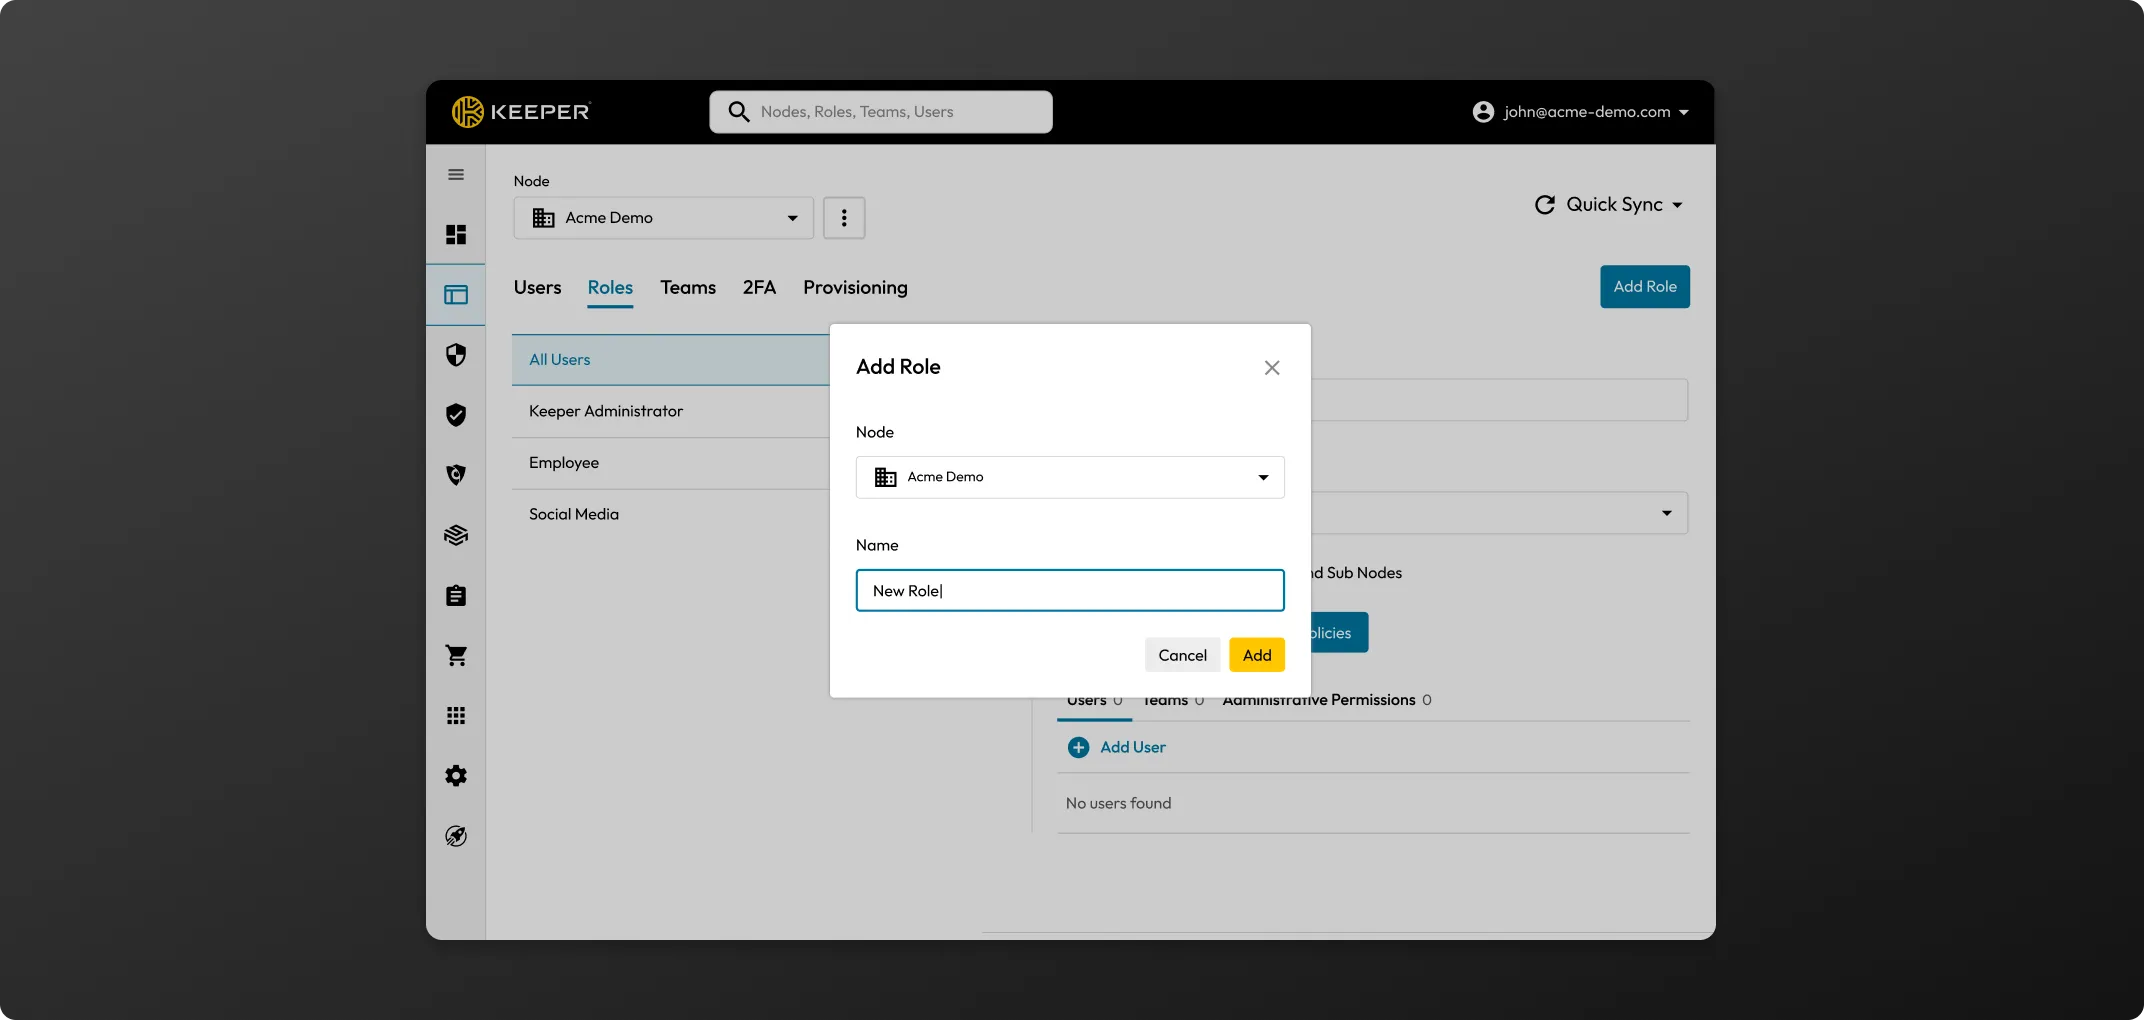
You can add roles manually through the Admin Console, automatically mapped via SCIM or assigned directly from Active Directory / LDAP through the Keeper Bridge.
(Smaller organizations might choose to administer Keeper as single level. In this scenario, all provisioned users, roles, and teams are accessed from the default Root Node.)
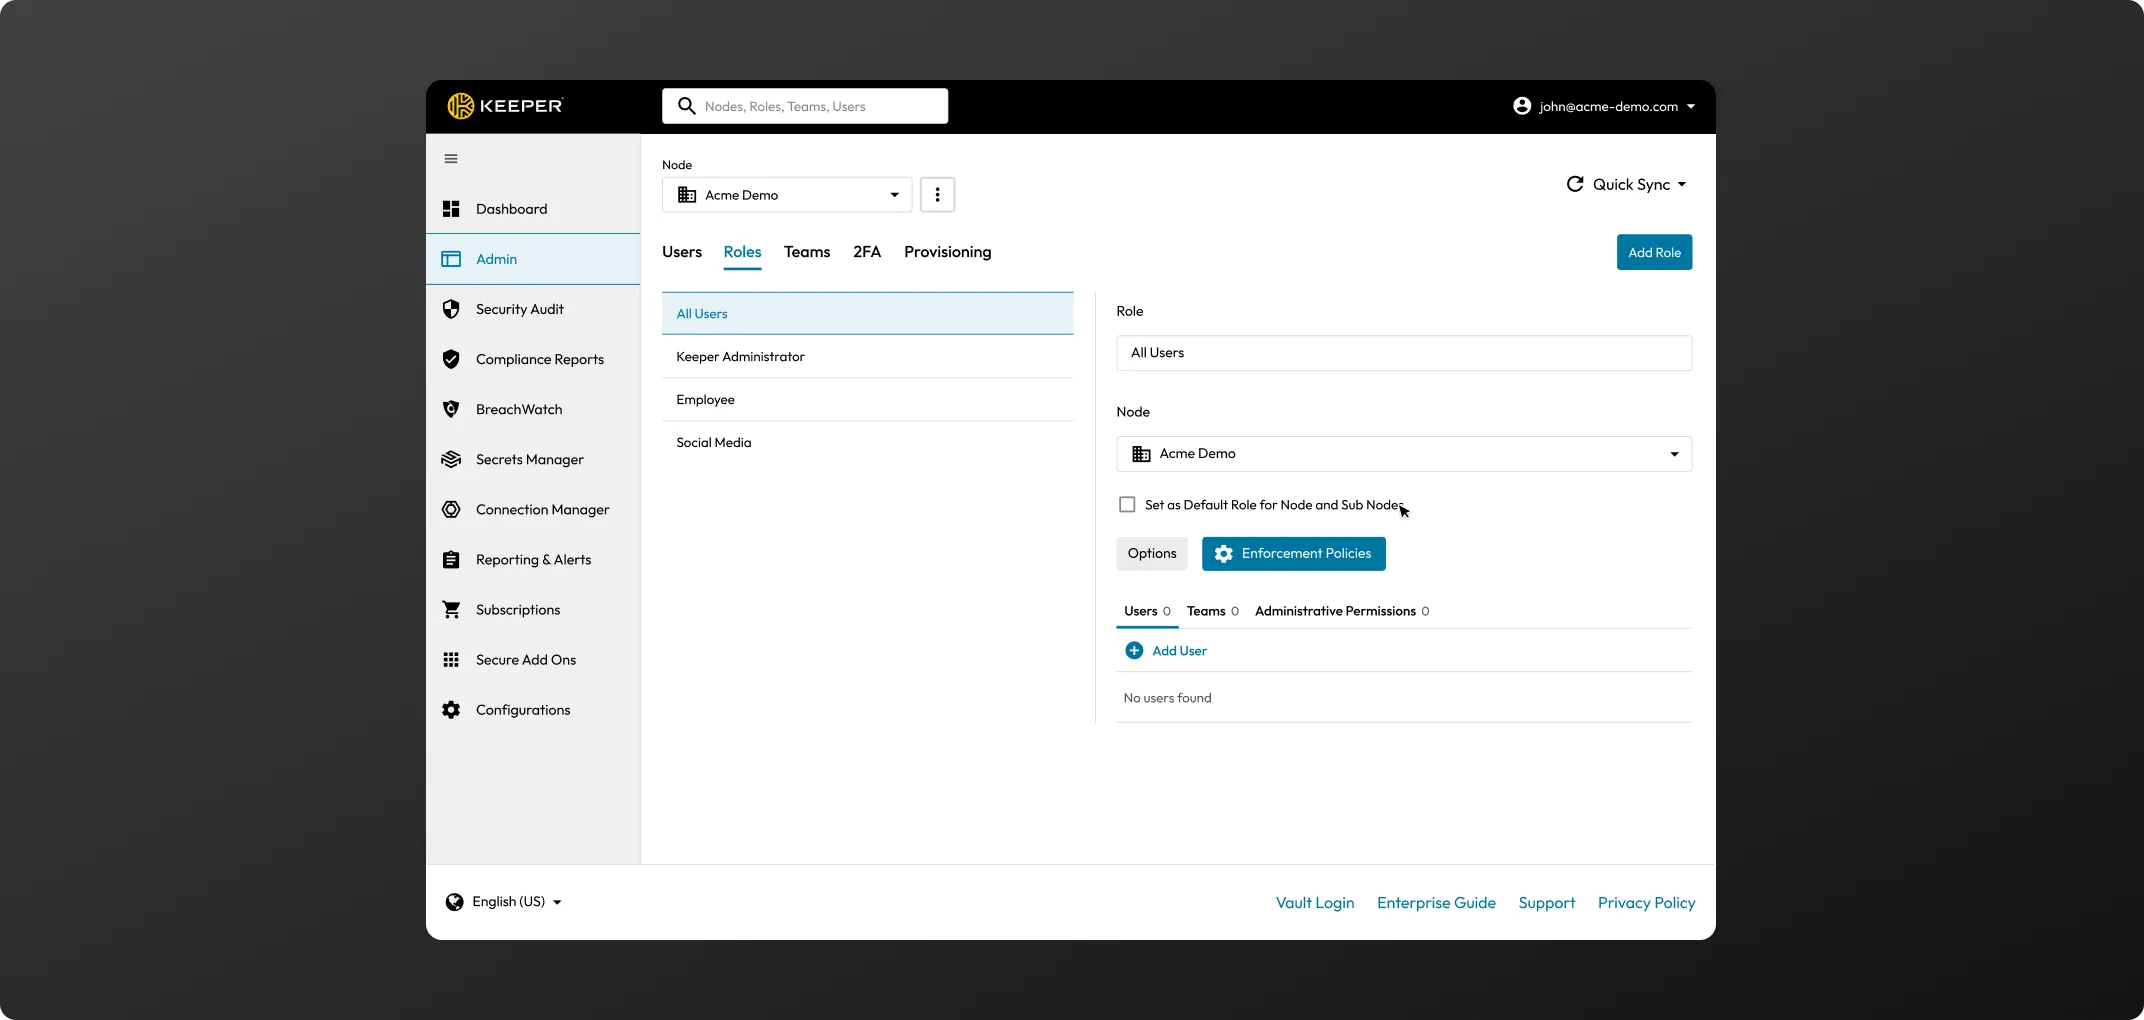
Click the Enforcement Policies button. Add criteria for each of the following options:
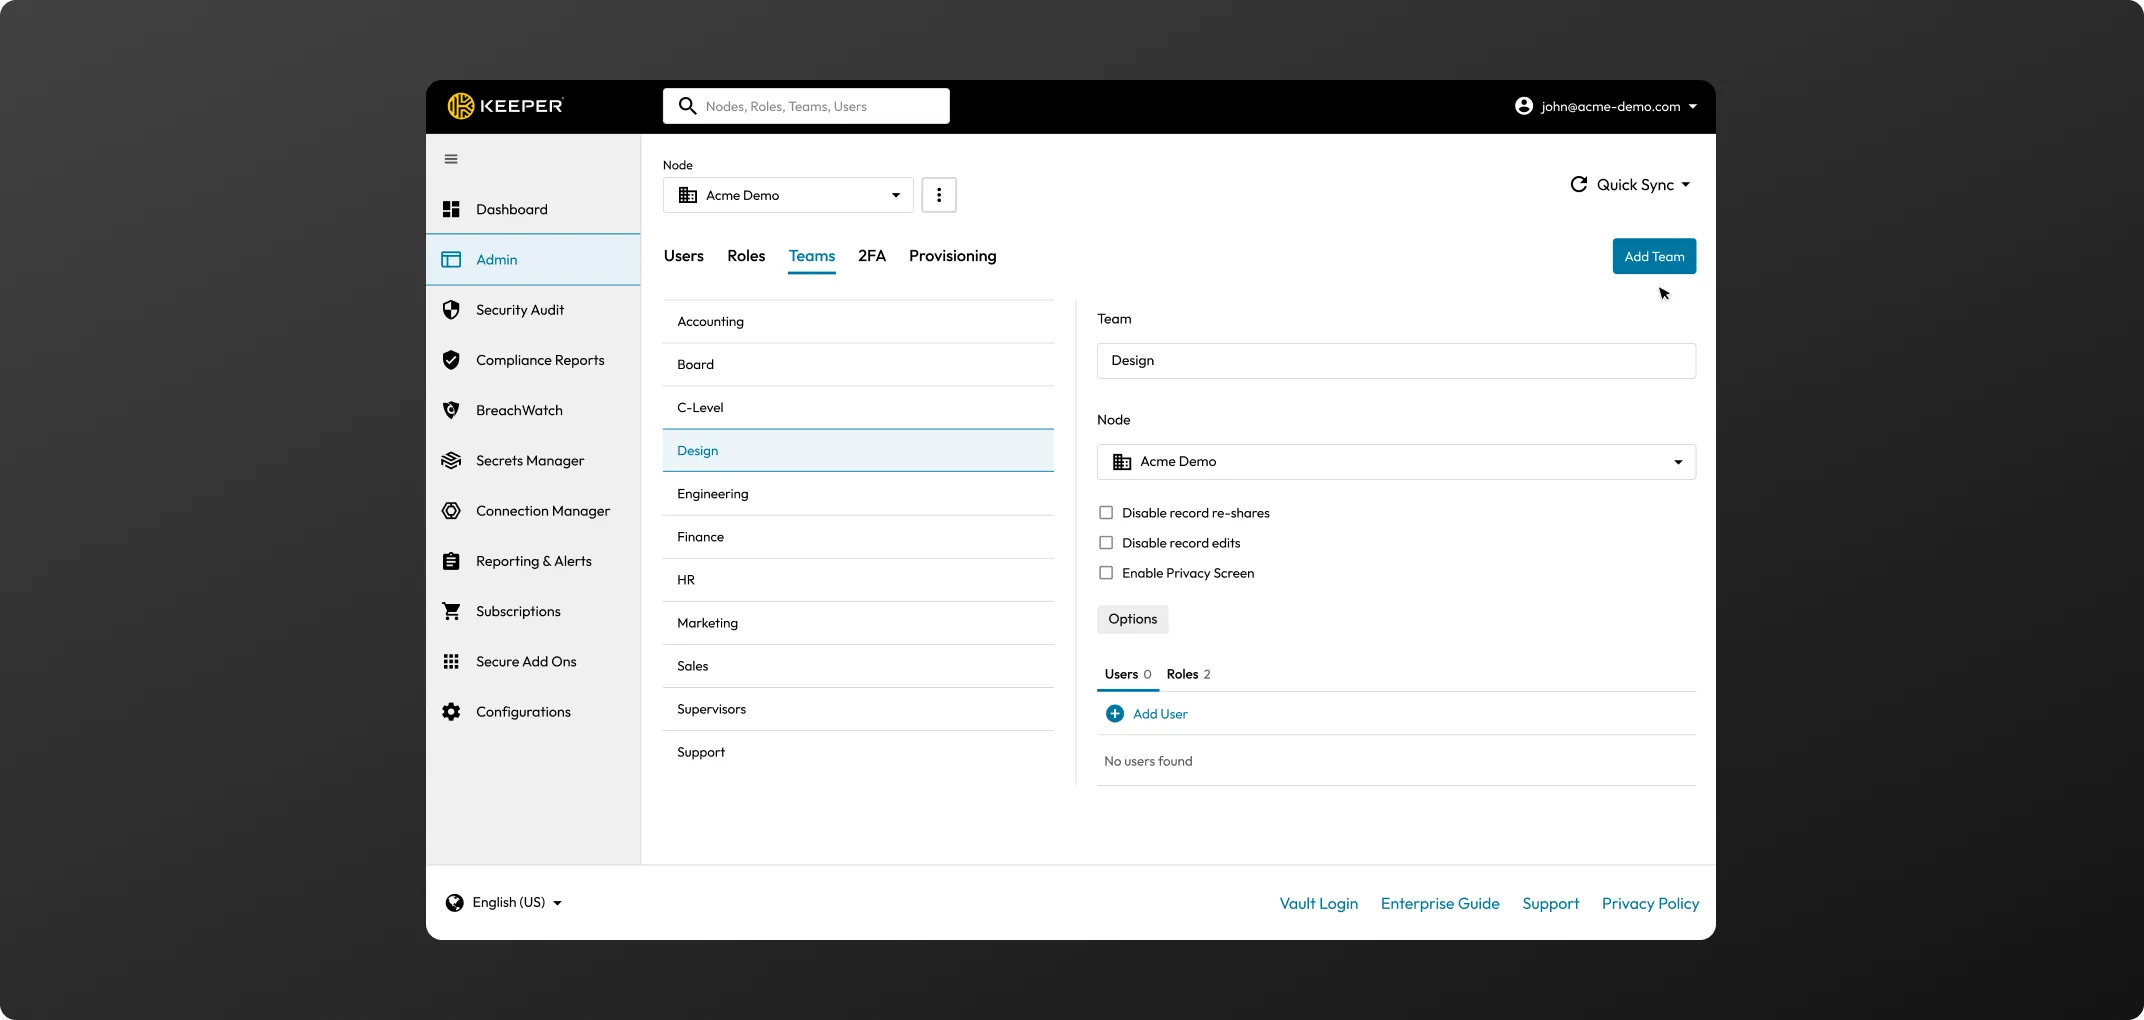
Click on “+” to add users to a team.
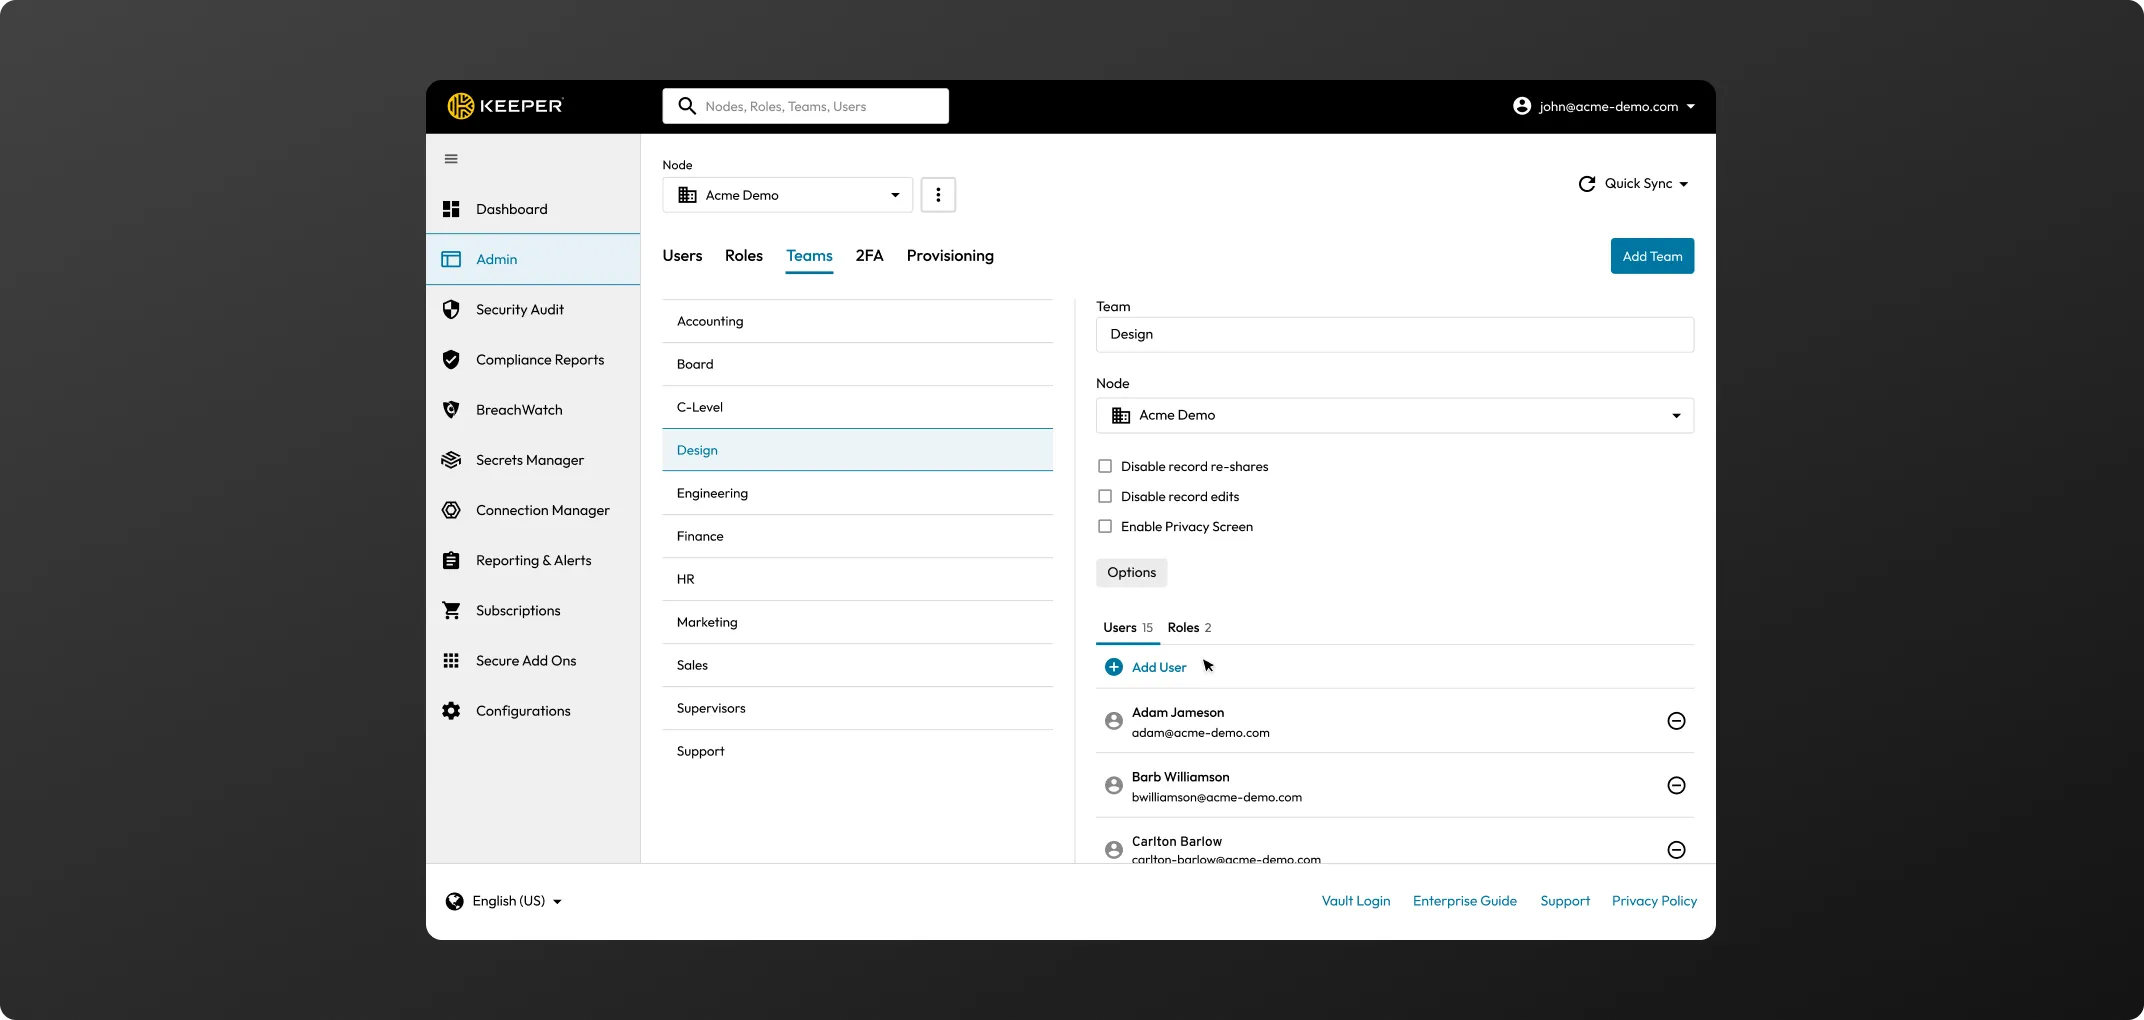
Navigate to Teams in the Admin Console. Select a team and click on the plus sign next to Roles to add a Team Role. The Team will then populate in the Role section, enabling the corresponding Enforcement Policies.

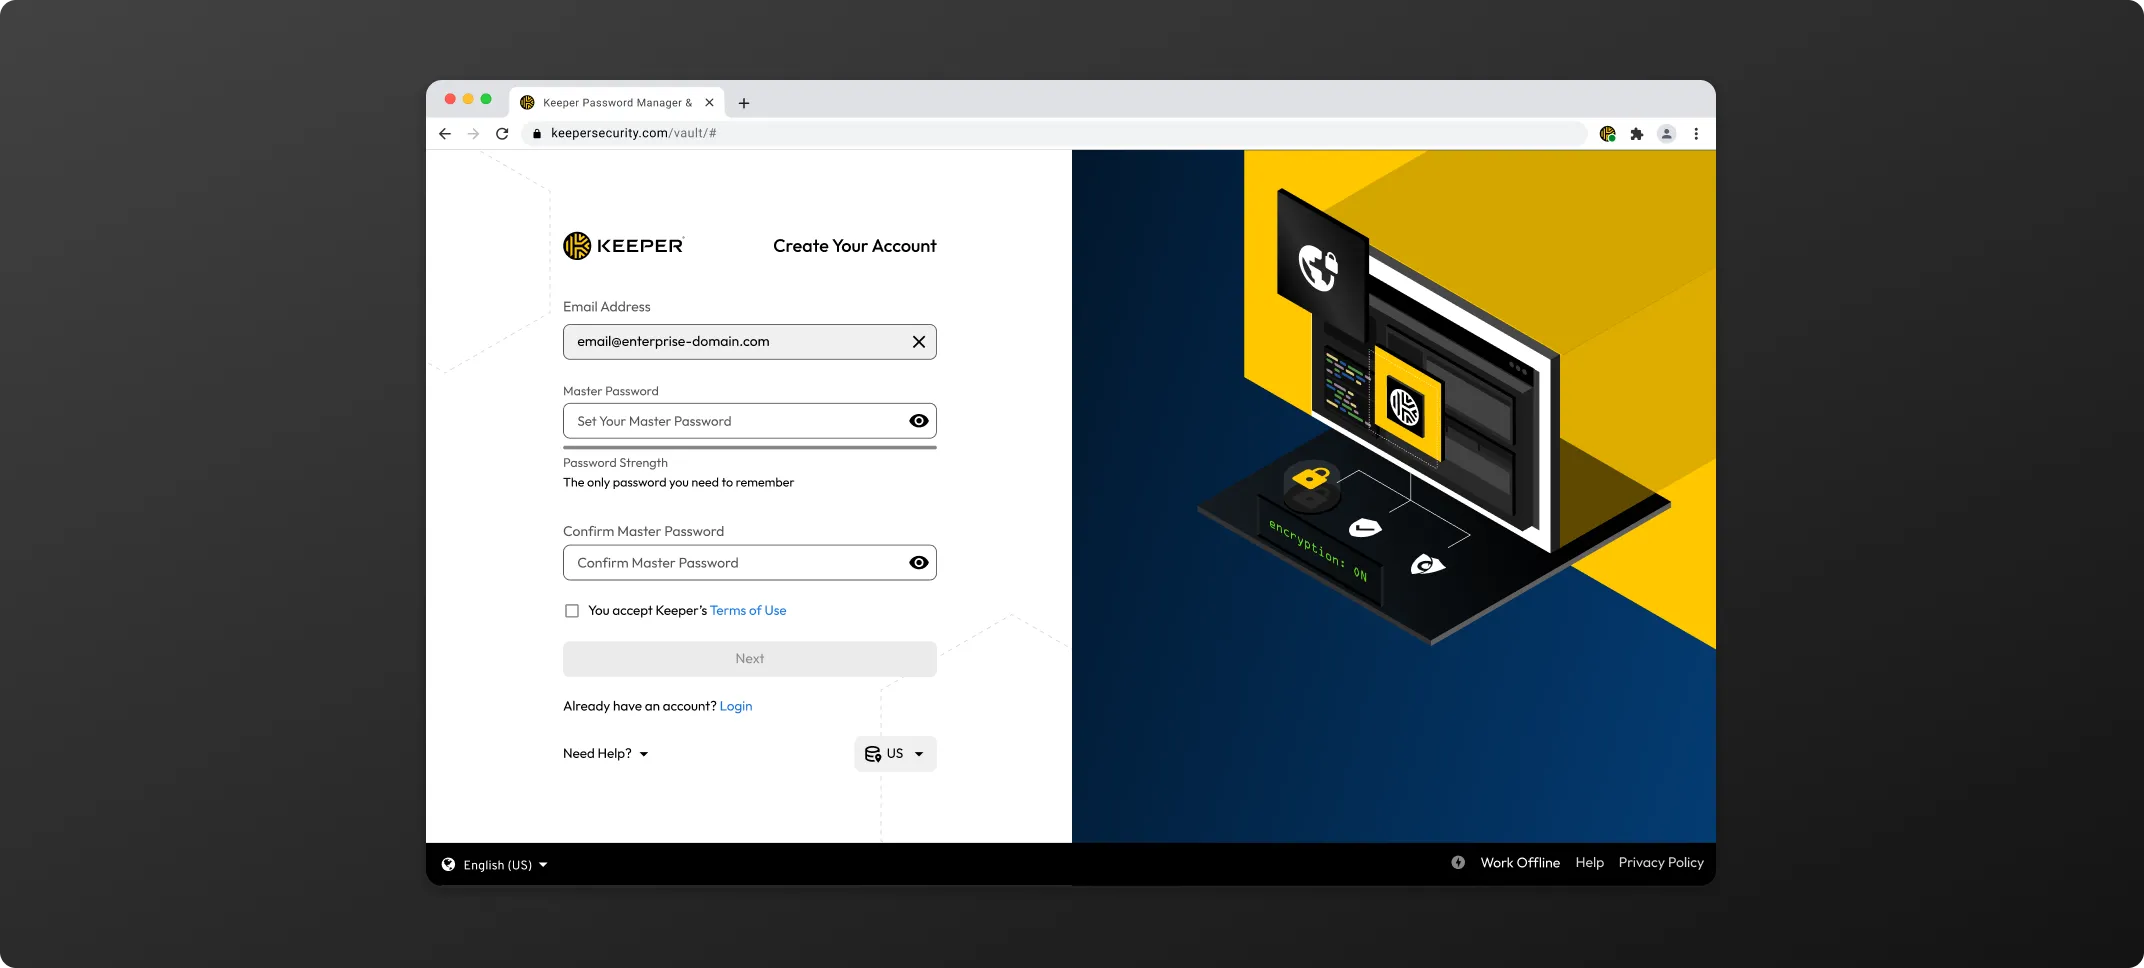
To create your Keeper account, first enter your email address then you will be asked to create and confirm a Master Password which will be the only password you have to remember.
To finalize your account and proceed to your vault, you will be asked to enter the security verification code that was sent to your email.
* Enterprise users who login with SSO do not require the selection of a Master Password.
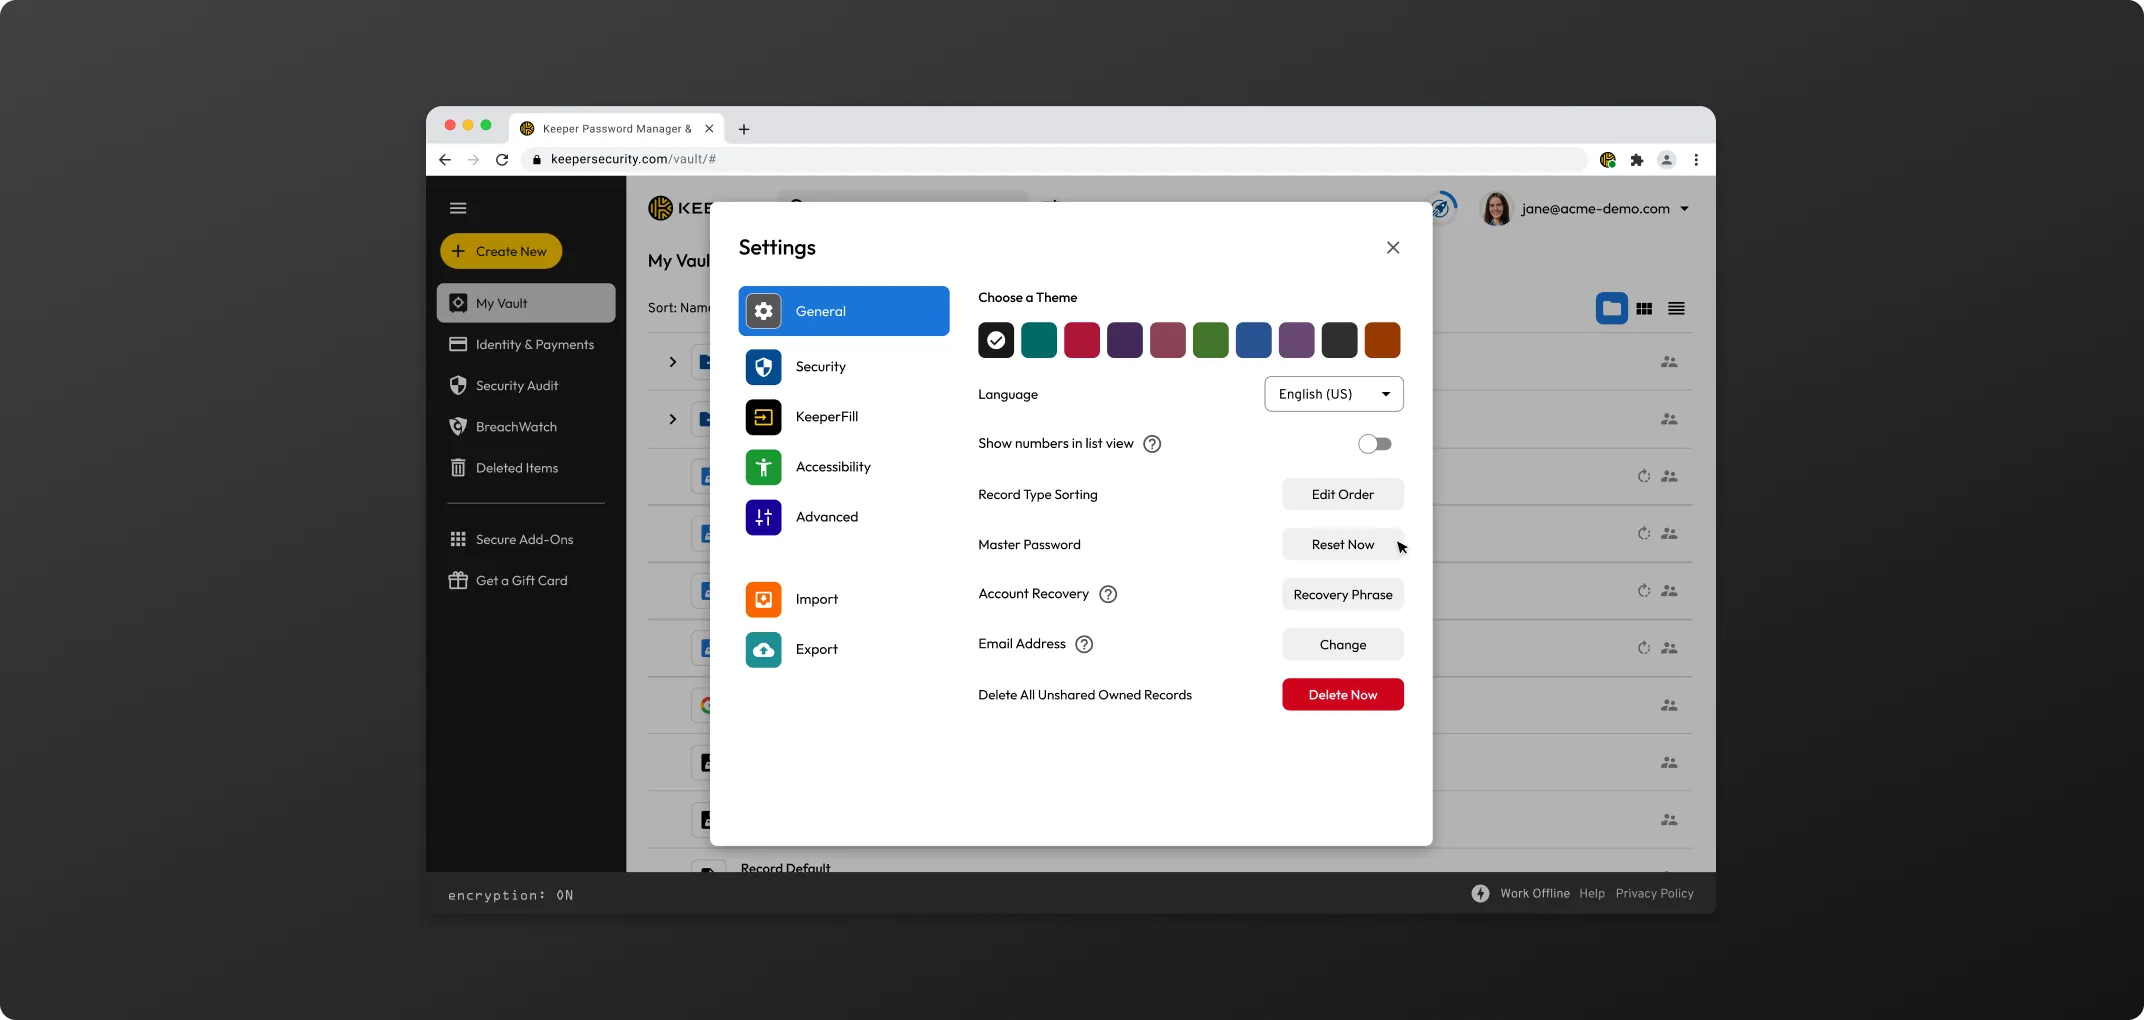
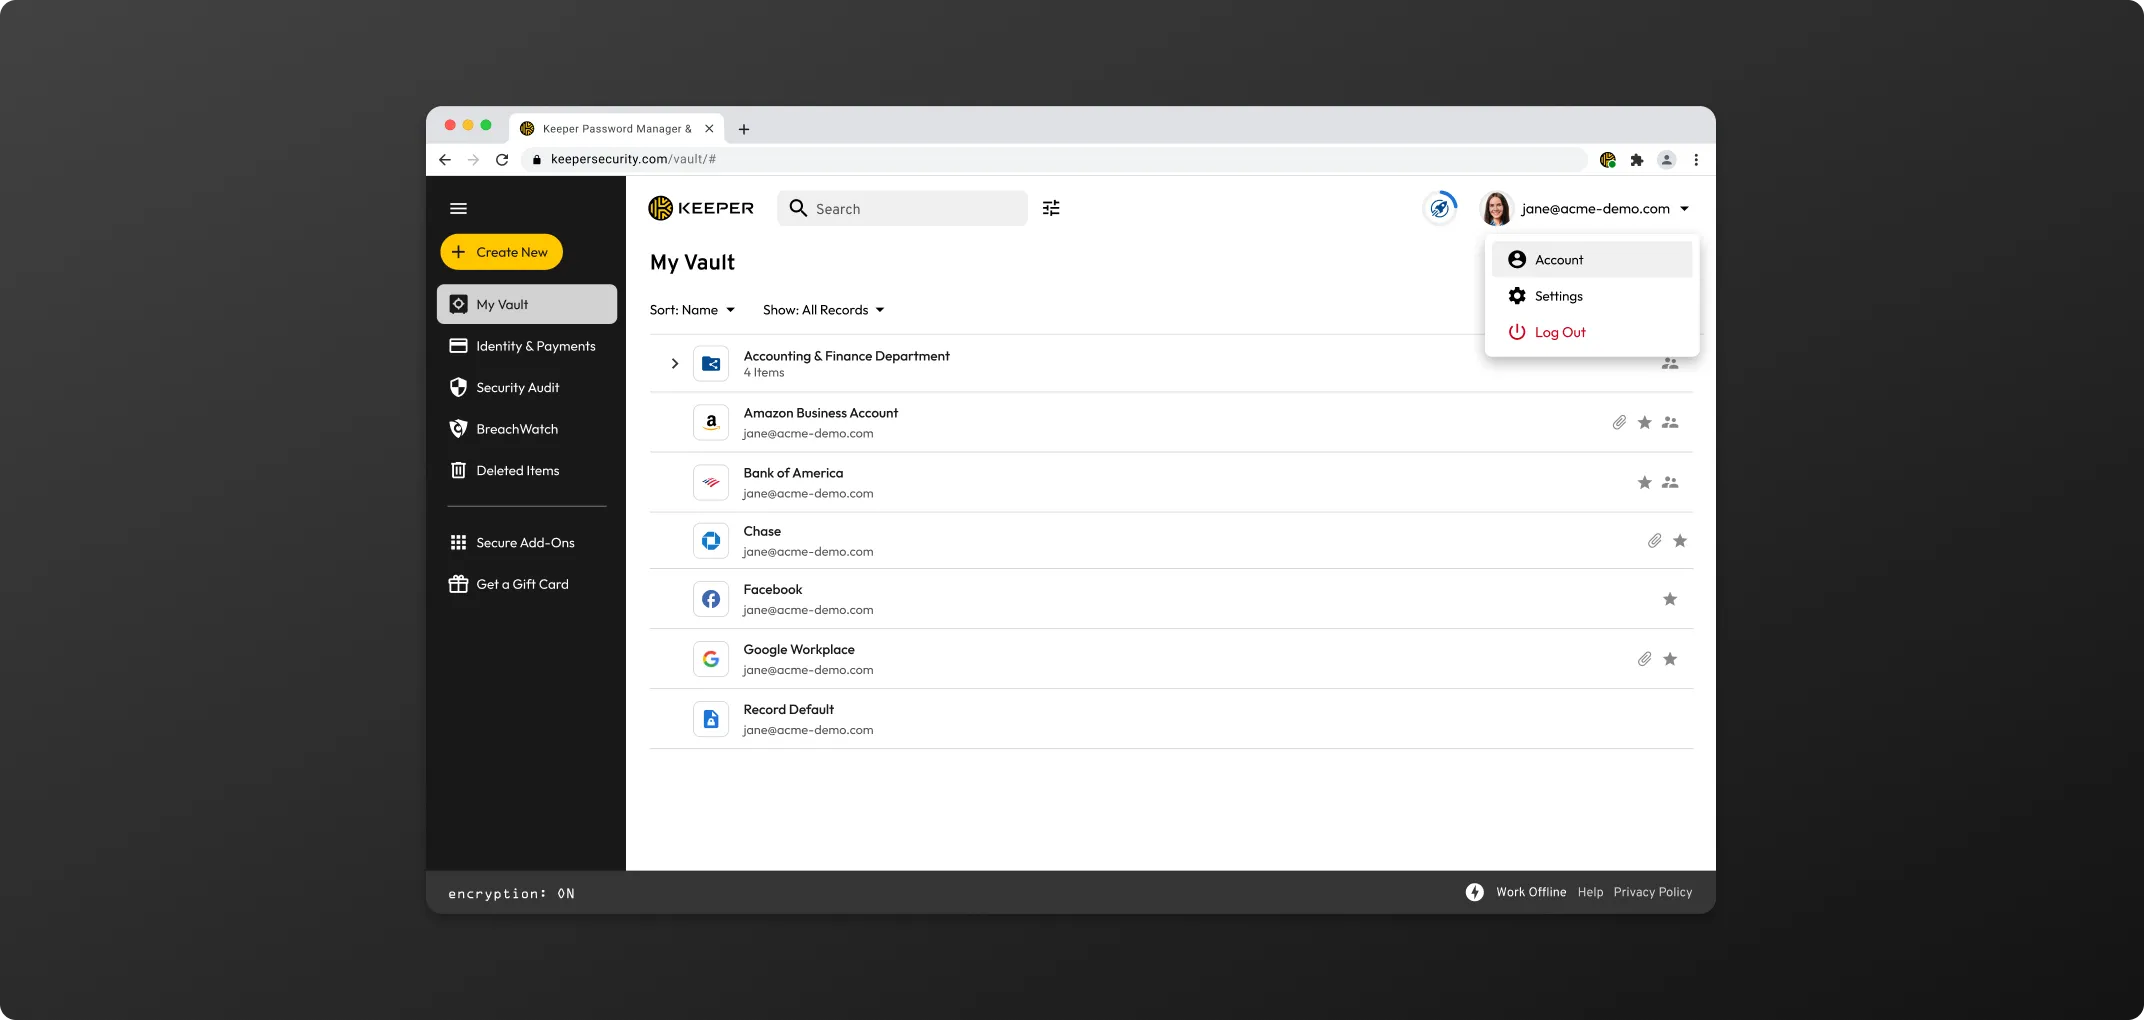
If you would like to change your existing Master Password from the Web Vault & Desktop App, from the account dropdown menu (your email ) select Settings and next to "Master Password" click Reset Now. You will then be prompted to enter your current master password and create and confirm a new master password.
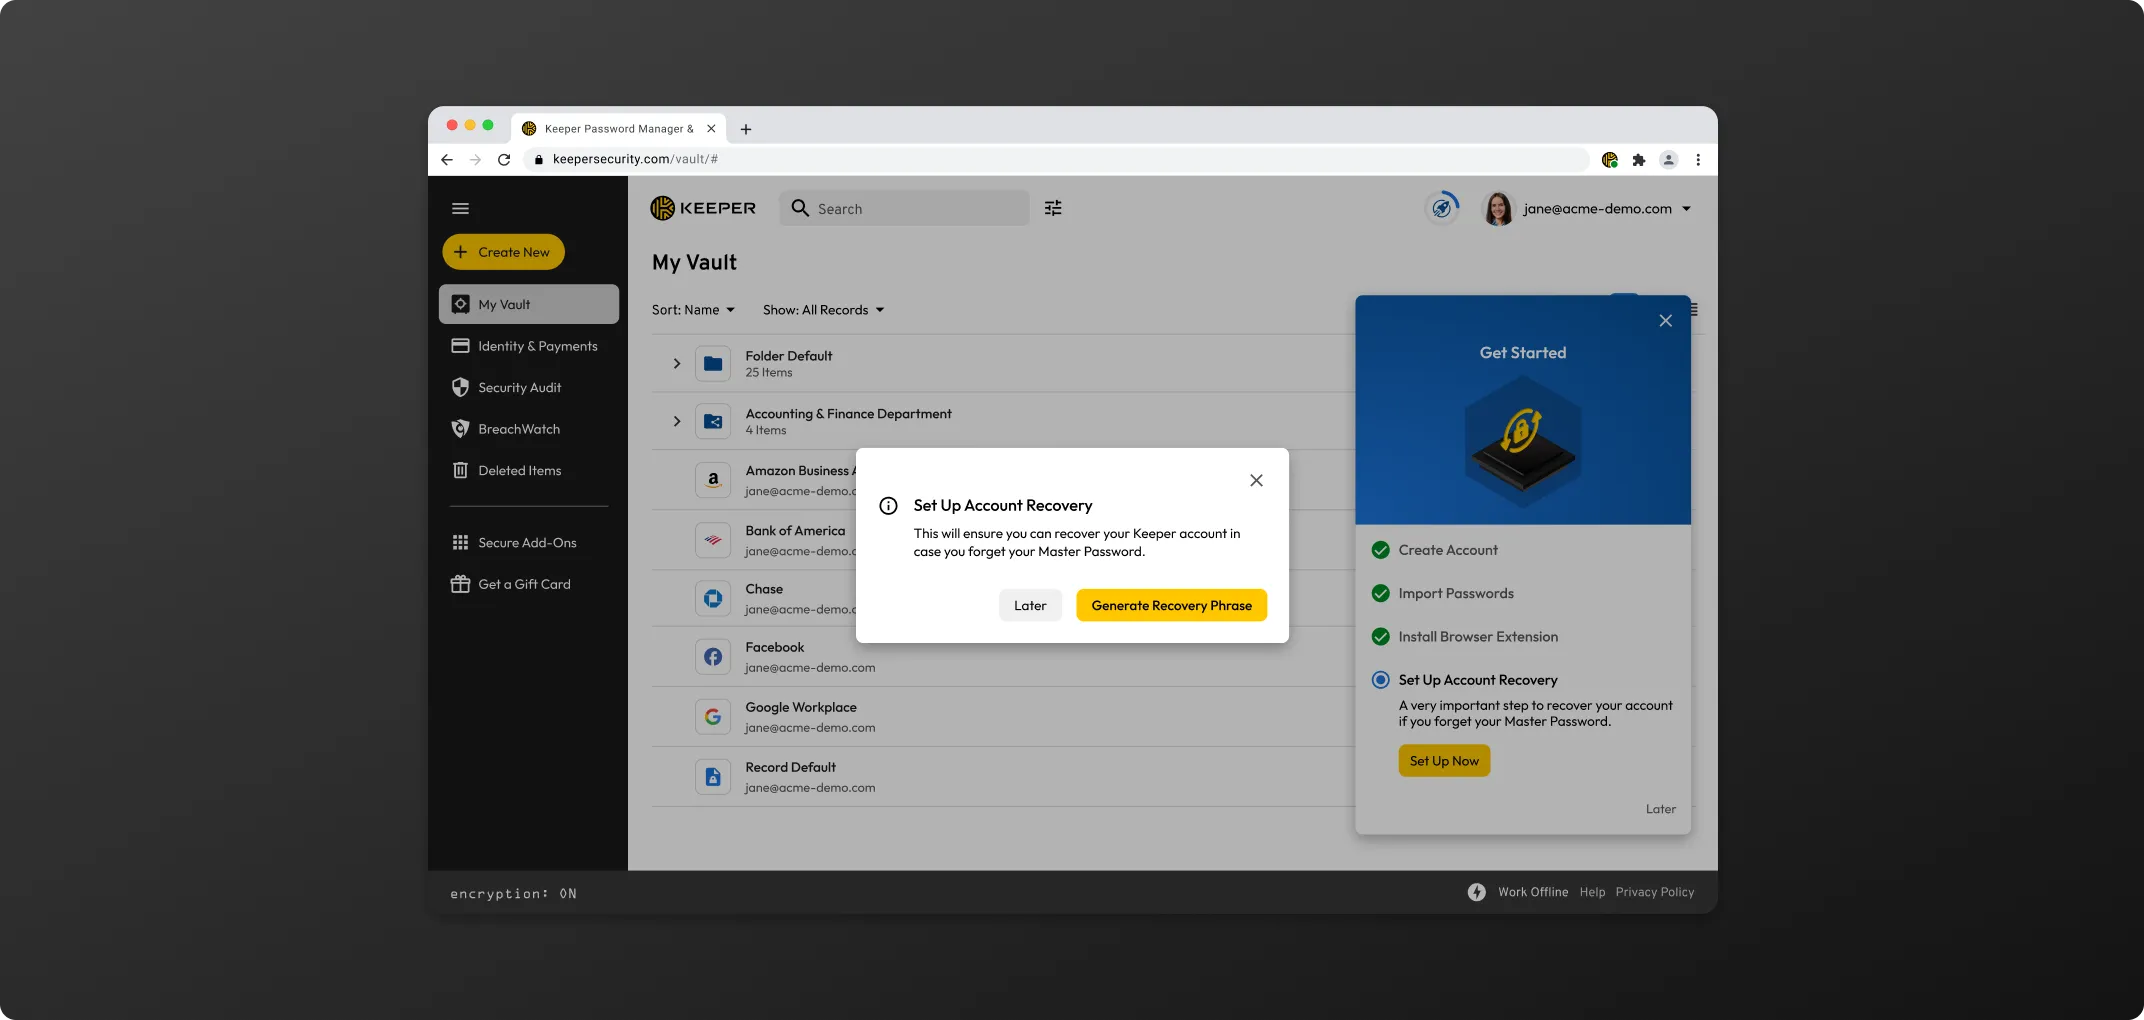
Upon initial vault login, new users will be prompted to set up Account Recovery.
-Click Generate Recovery Phrase to begin.
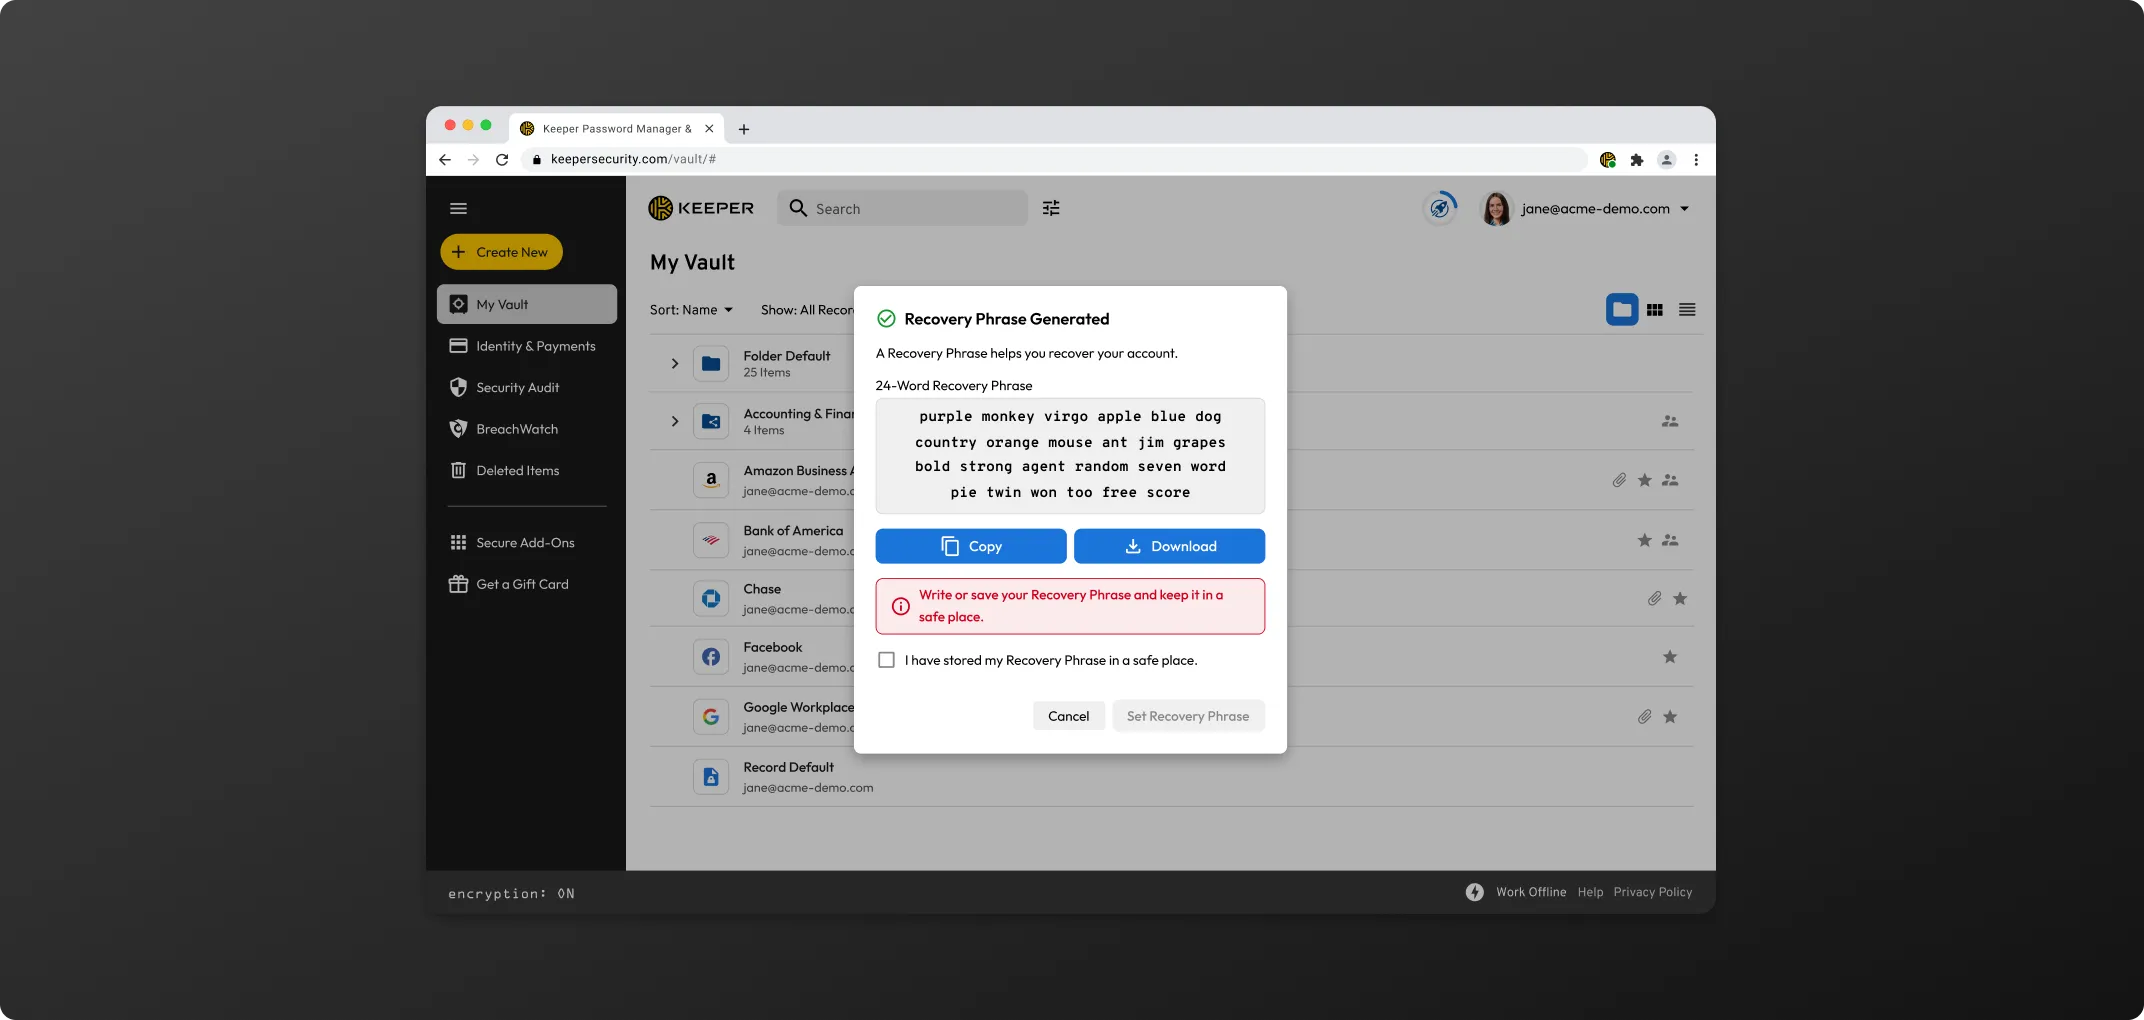
Once your recovery phrase has been generated, be sure to store it in a safe place. For added convenience, you will be given the option to copy or download it. Check the box to acknowledge you have stored it in a safe place and click Set Recovery Phrase to complete the setup.
* Please note that if you forget your master password and lose your recovery phrase, you will not be able to login to your vault and Keeper Support will be unable to help you regain access.
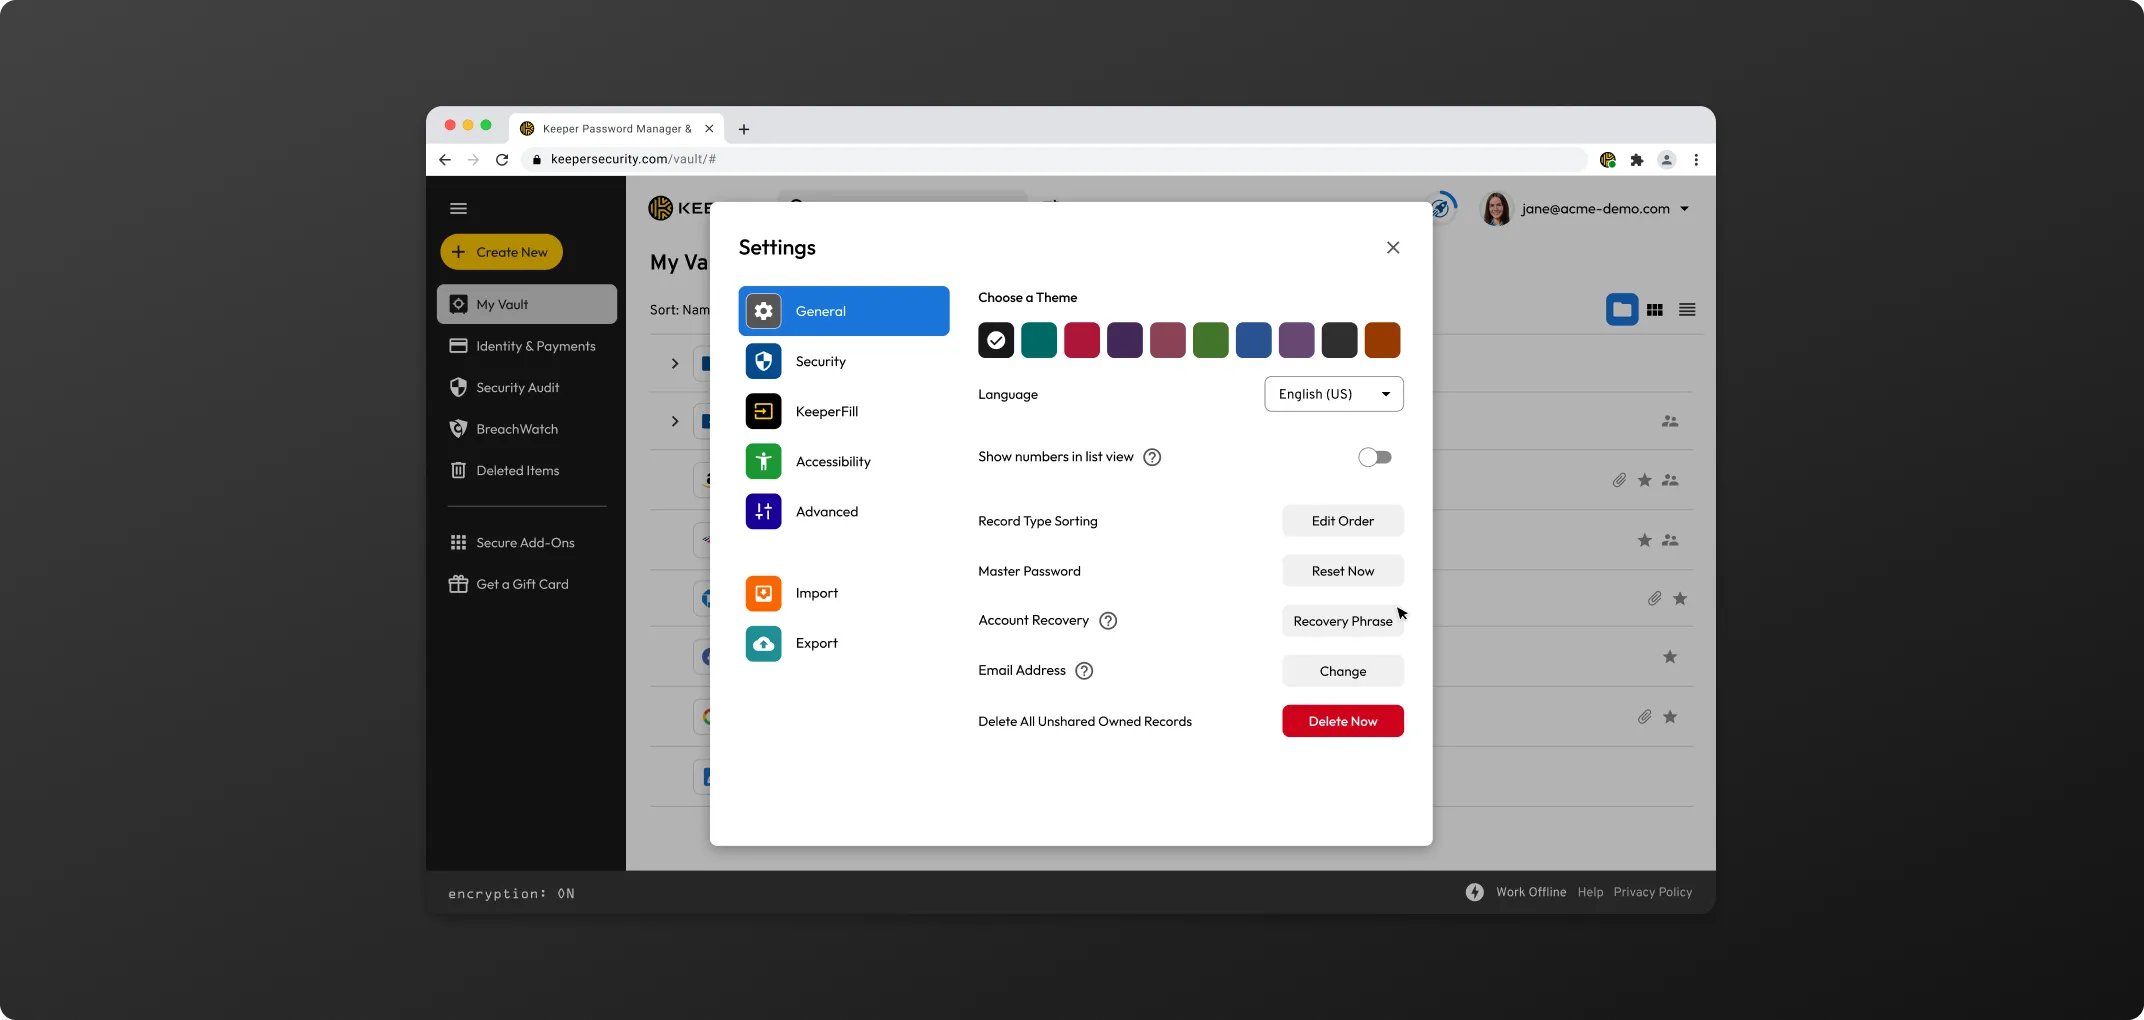
In addition to enabling an account recovery phrase, we recommend turning on Keeper's two-factor authentication feature from your account's "Settings" menu.
* If you know your Master Password and would simply like to setup Account Recovery, from the account dropdown menu (your email) select Settings > Recovery Phrase.
All Keeper Enterprise users can create a free, Keeper Family Plan for up to 5 family members with unlimited devices.
* This vault is intended for personal use only. All business-related credentials must be stored within your company issued vault.
To create your personal vault:
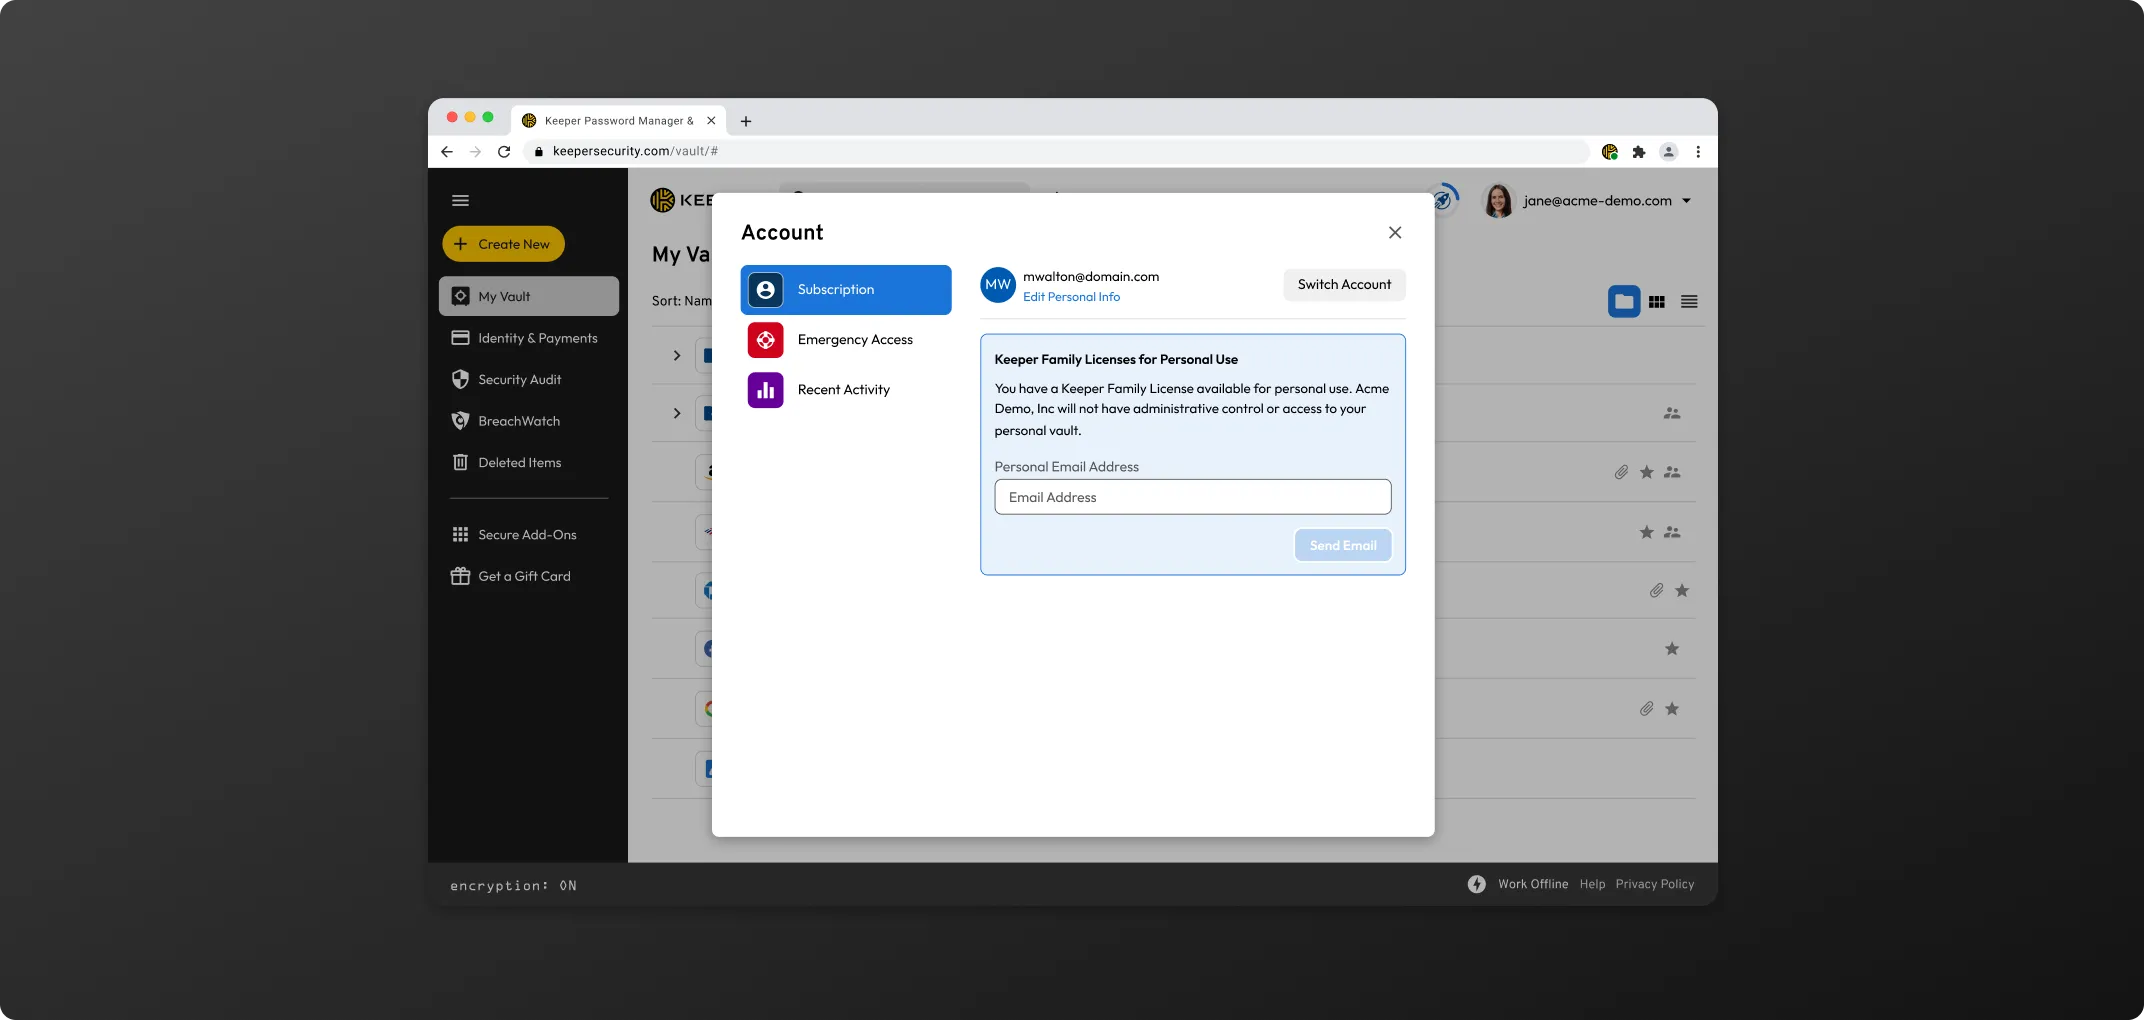
Important Notes Regarding Your Linked Personal Account
Visit the Download Keeper for Desktop page to download Keeper for Windows, Mac or Linux.
The KeeperFill browser extension can be installed directly by the user or pushed to users by the Keeper administrator.
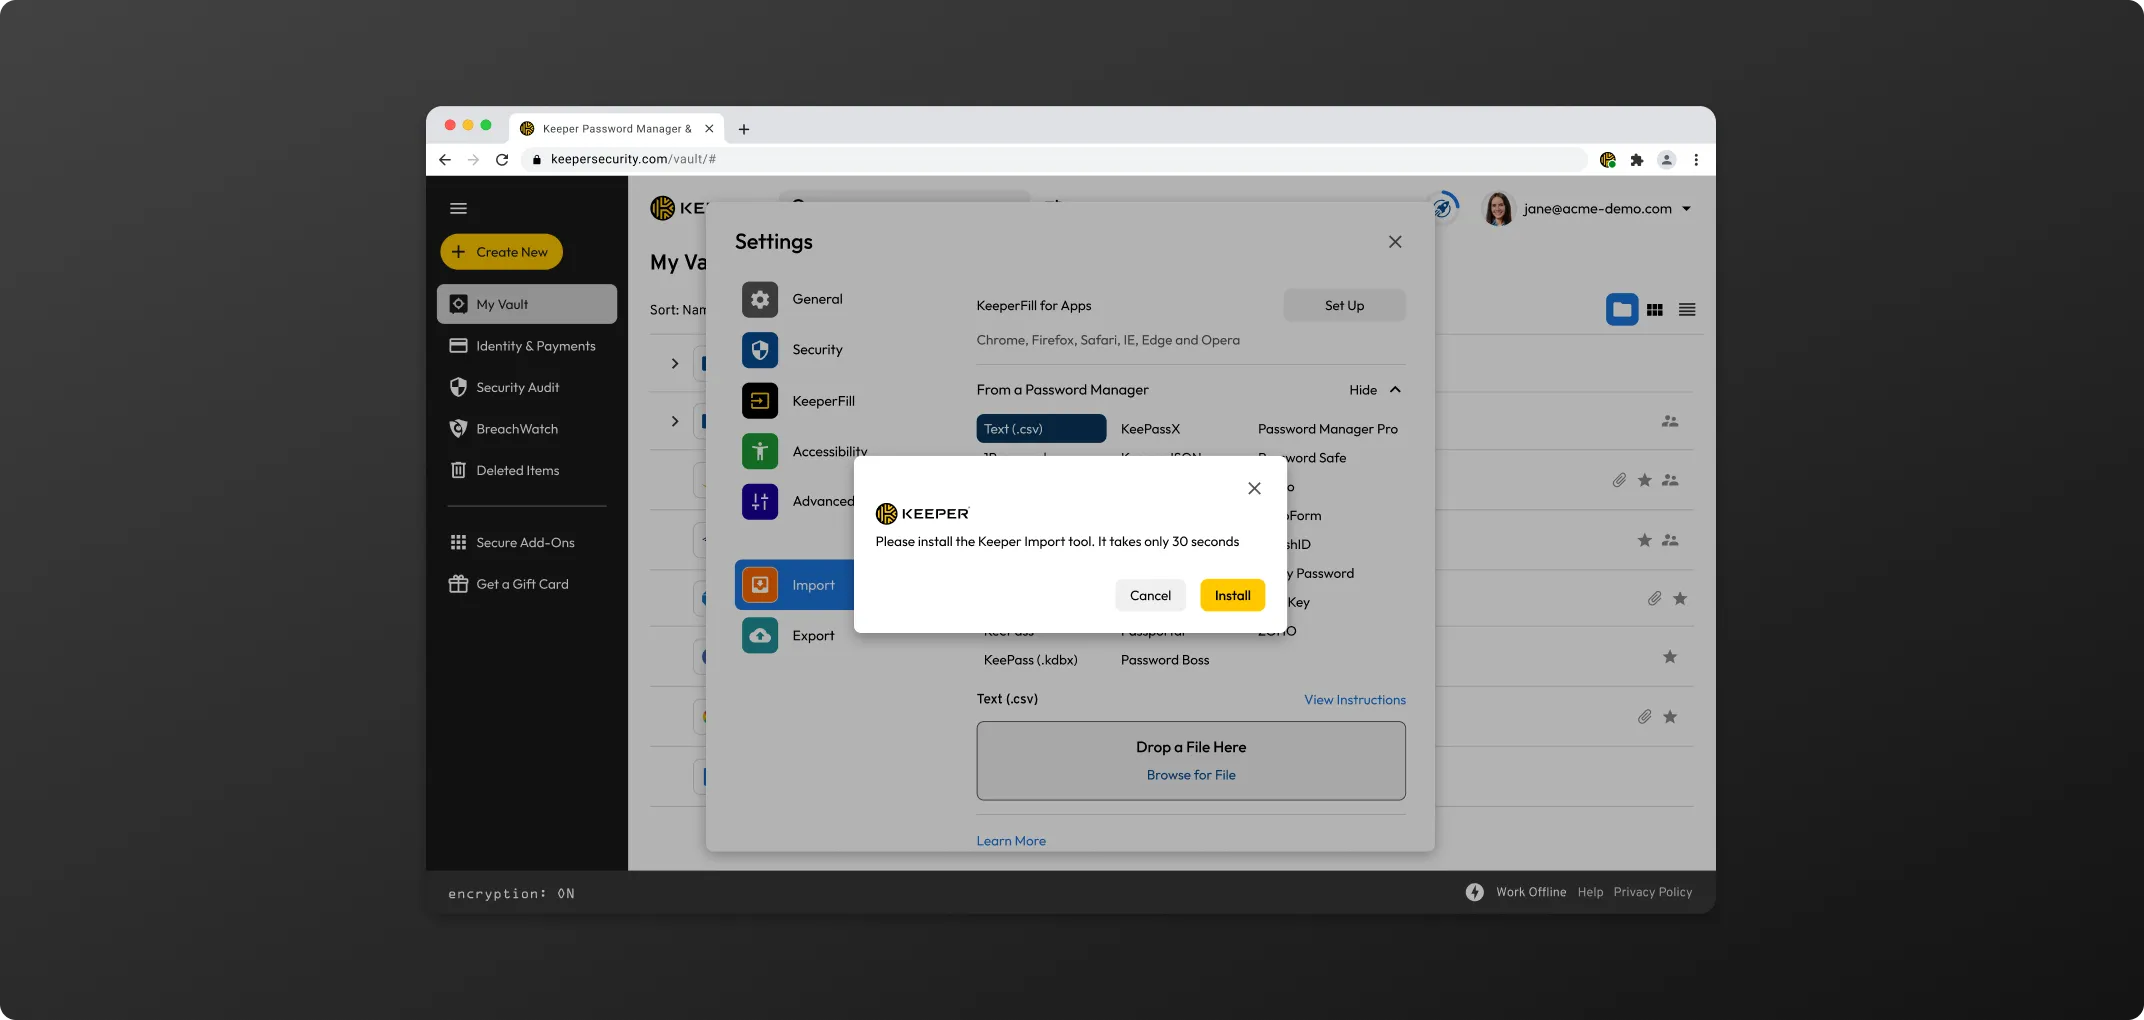
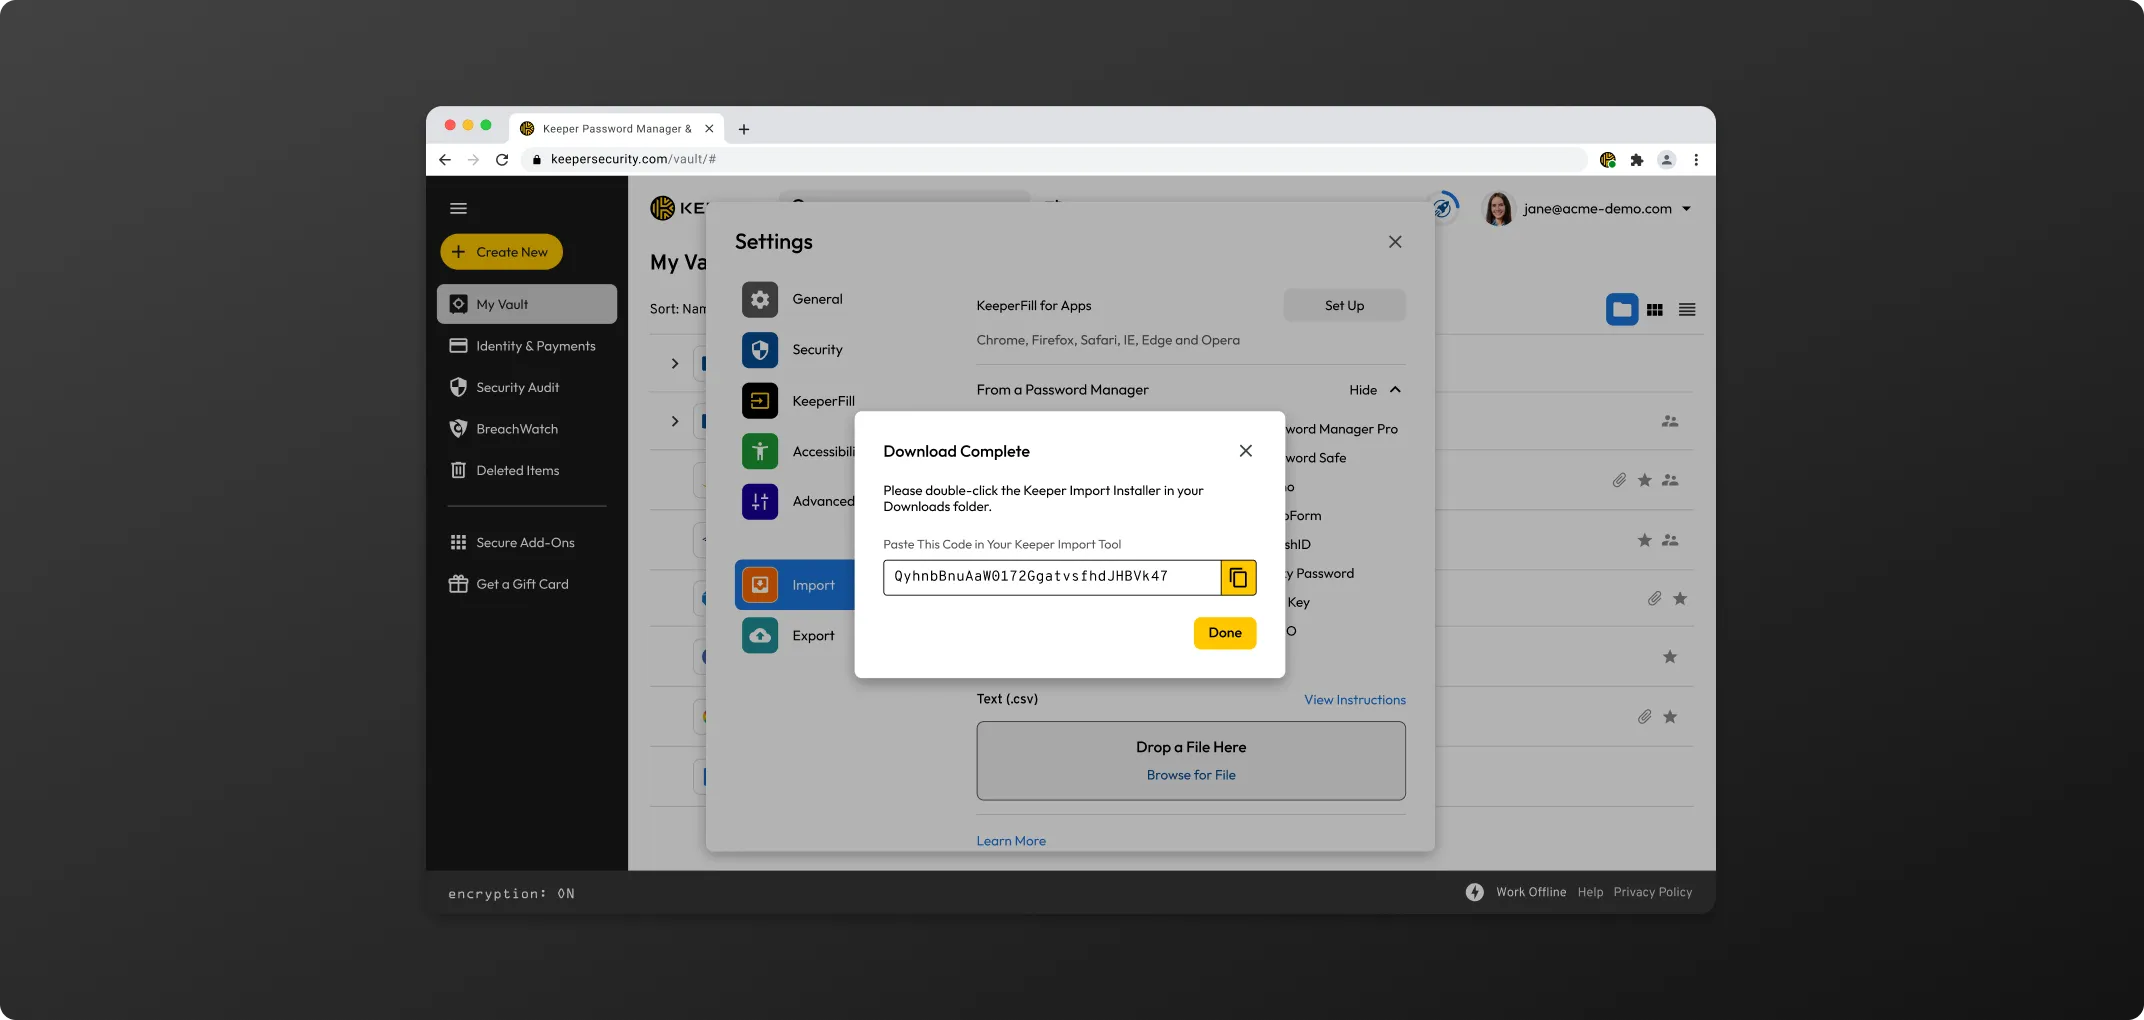
Click + Create New > Record.
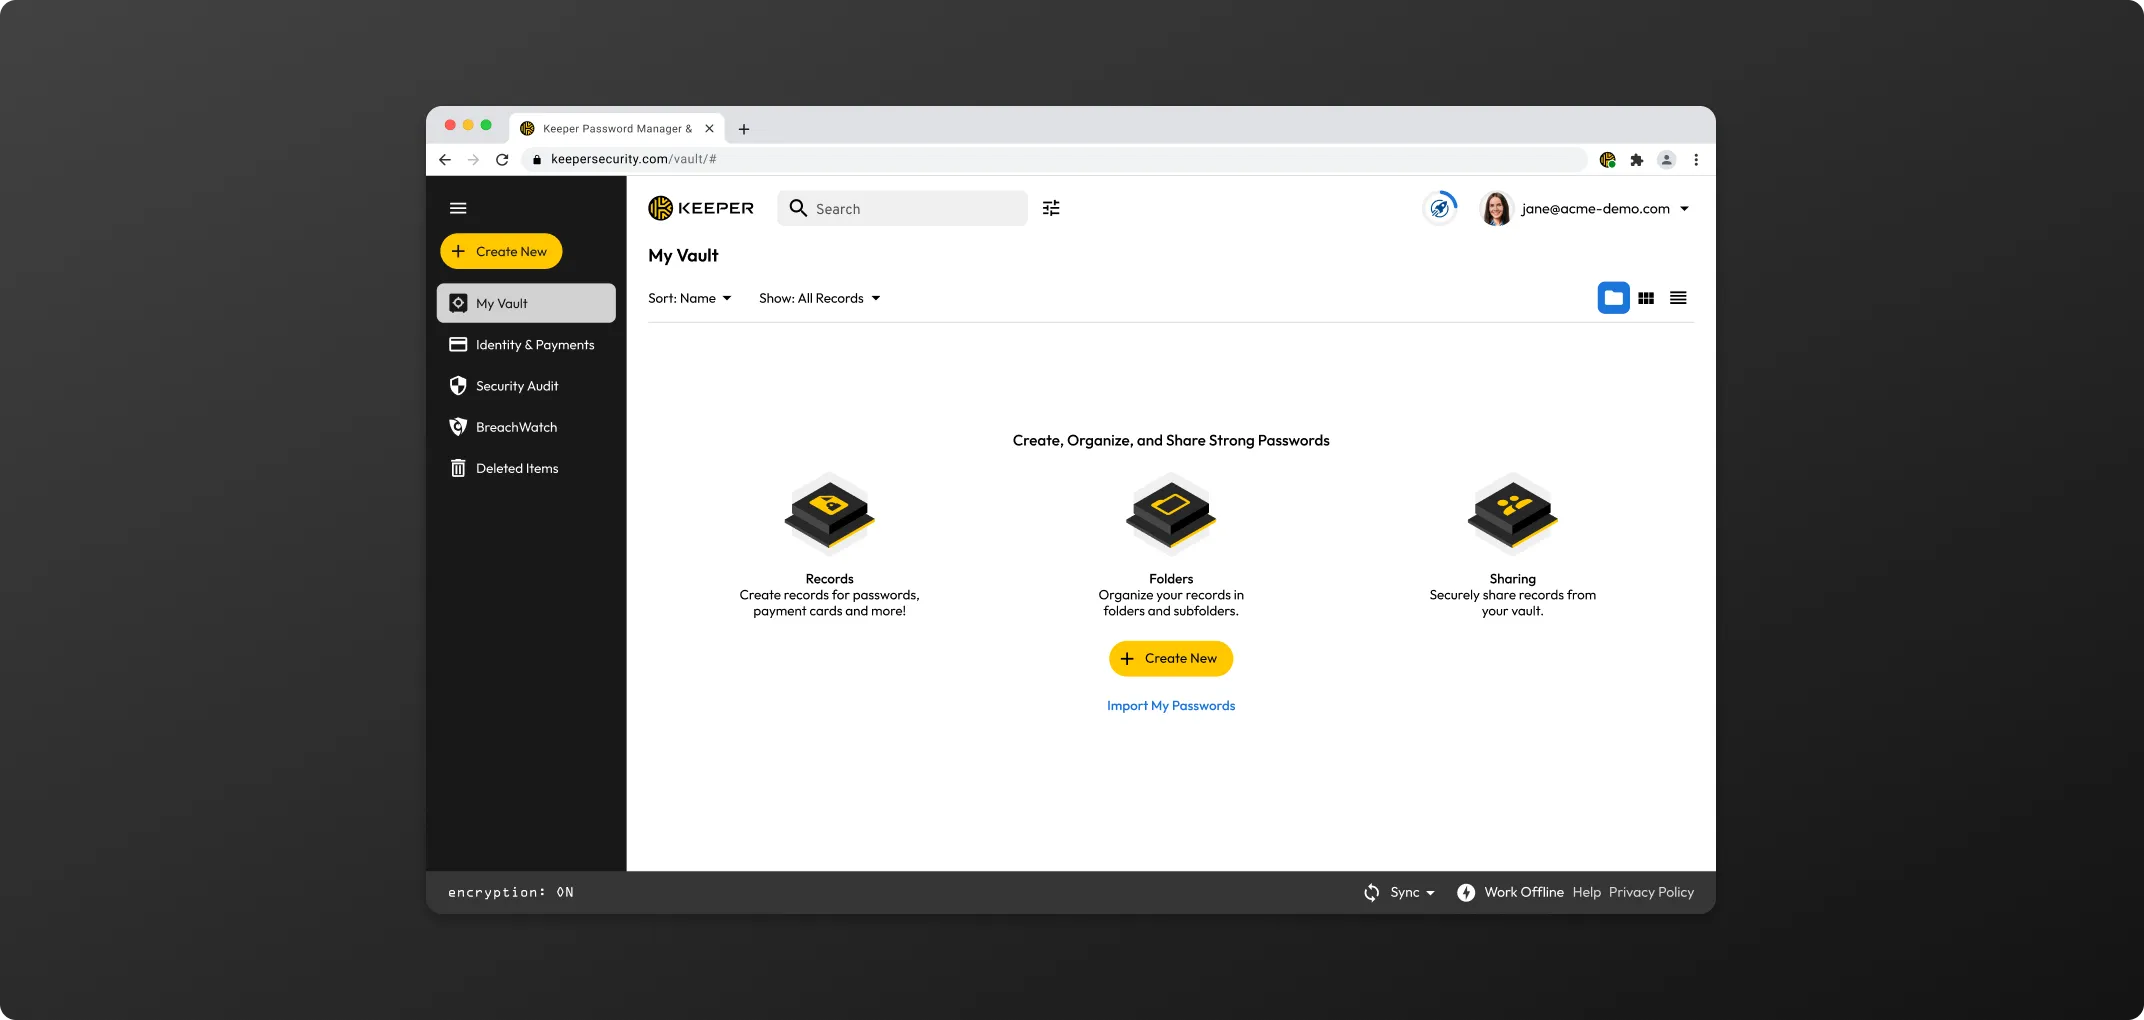
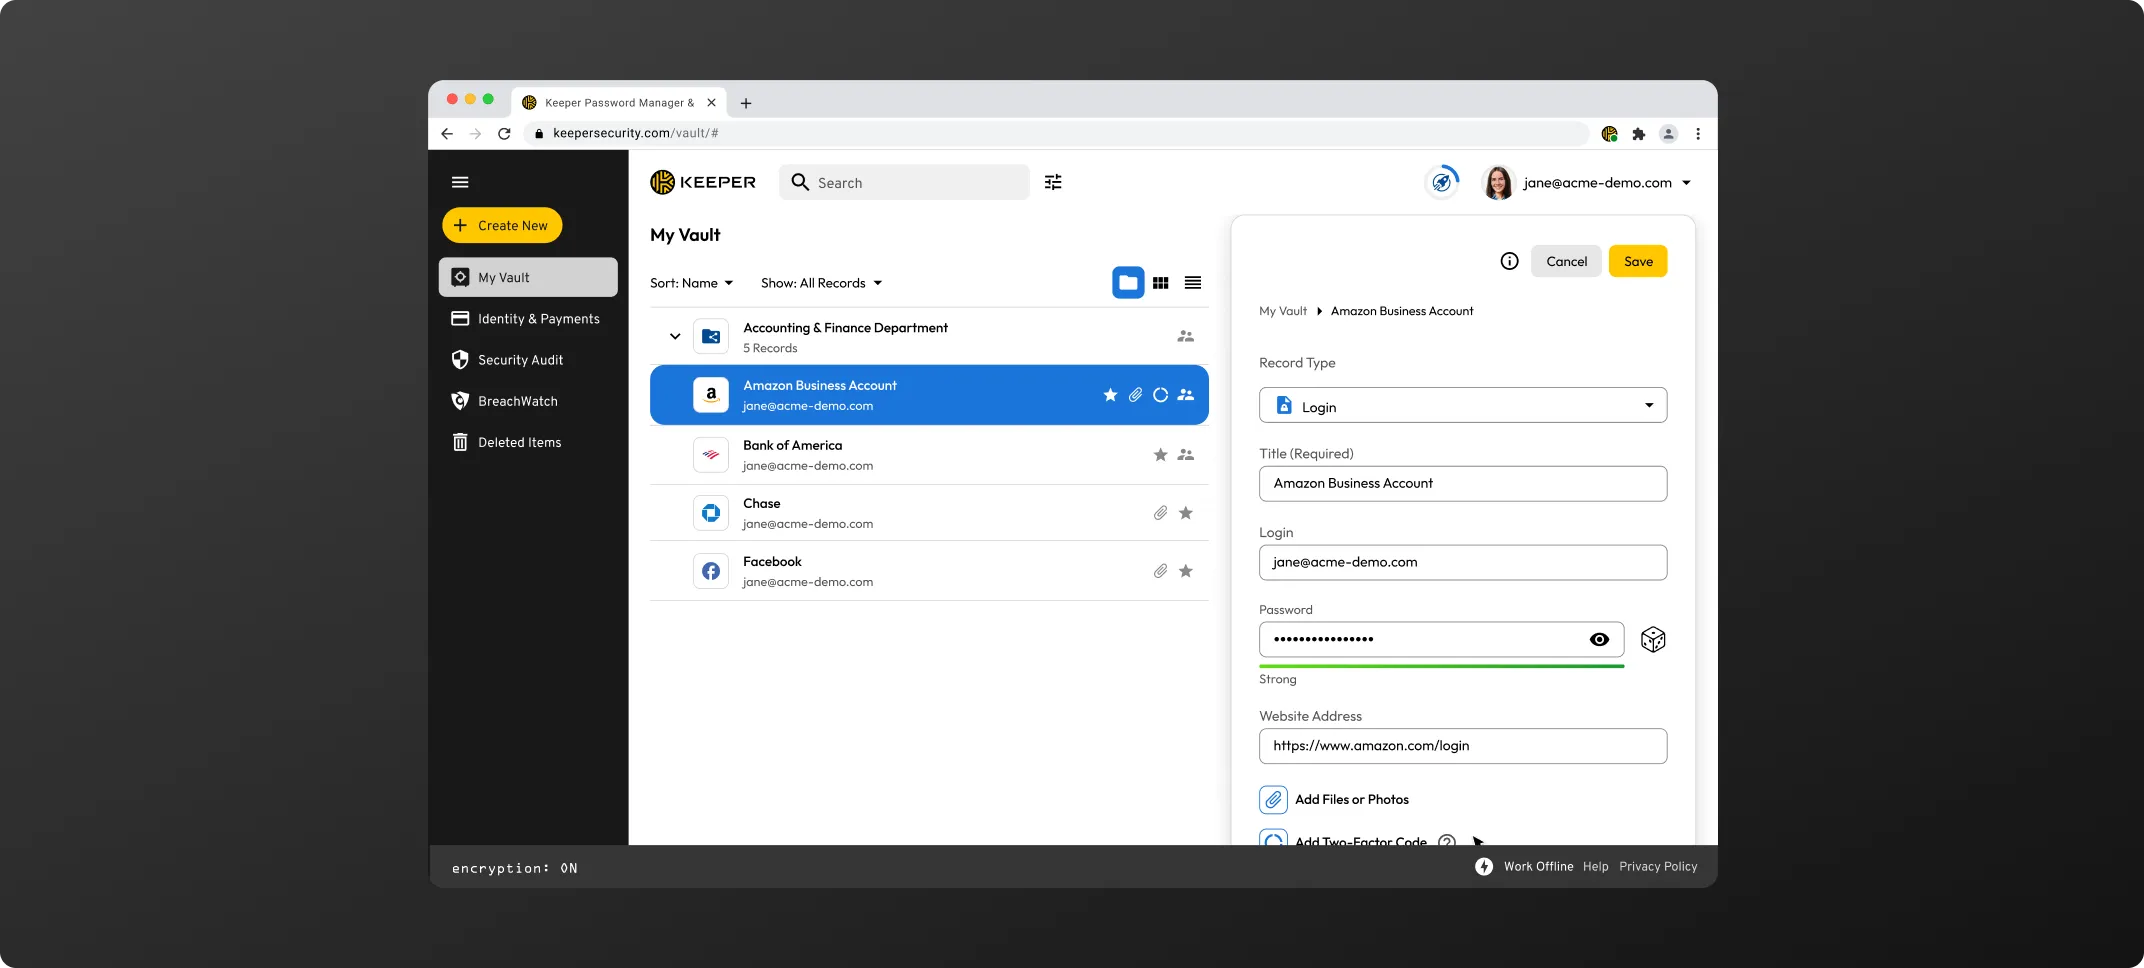
While creating or editing a record, click the dice icon to generate a unique password. If needed adjust the character length and special character, and click Save to finish.
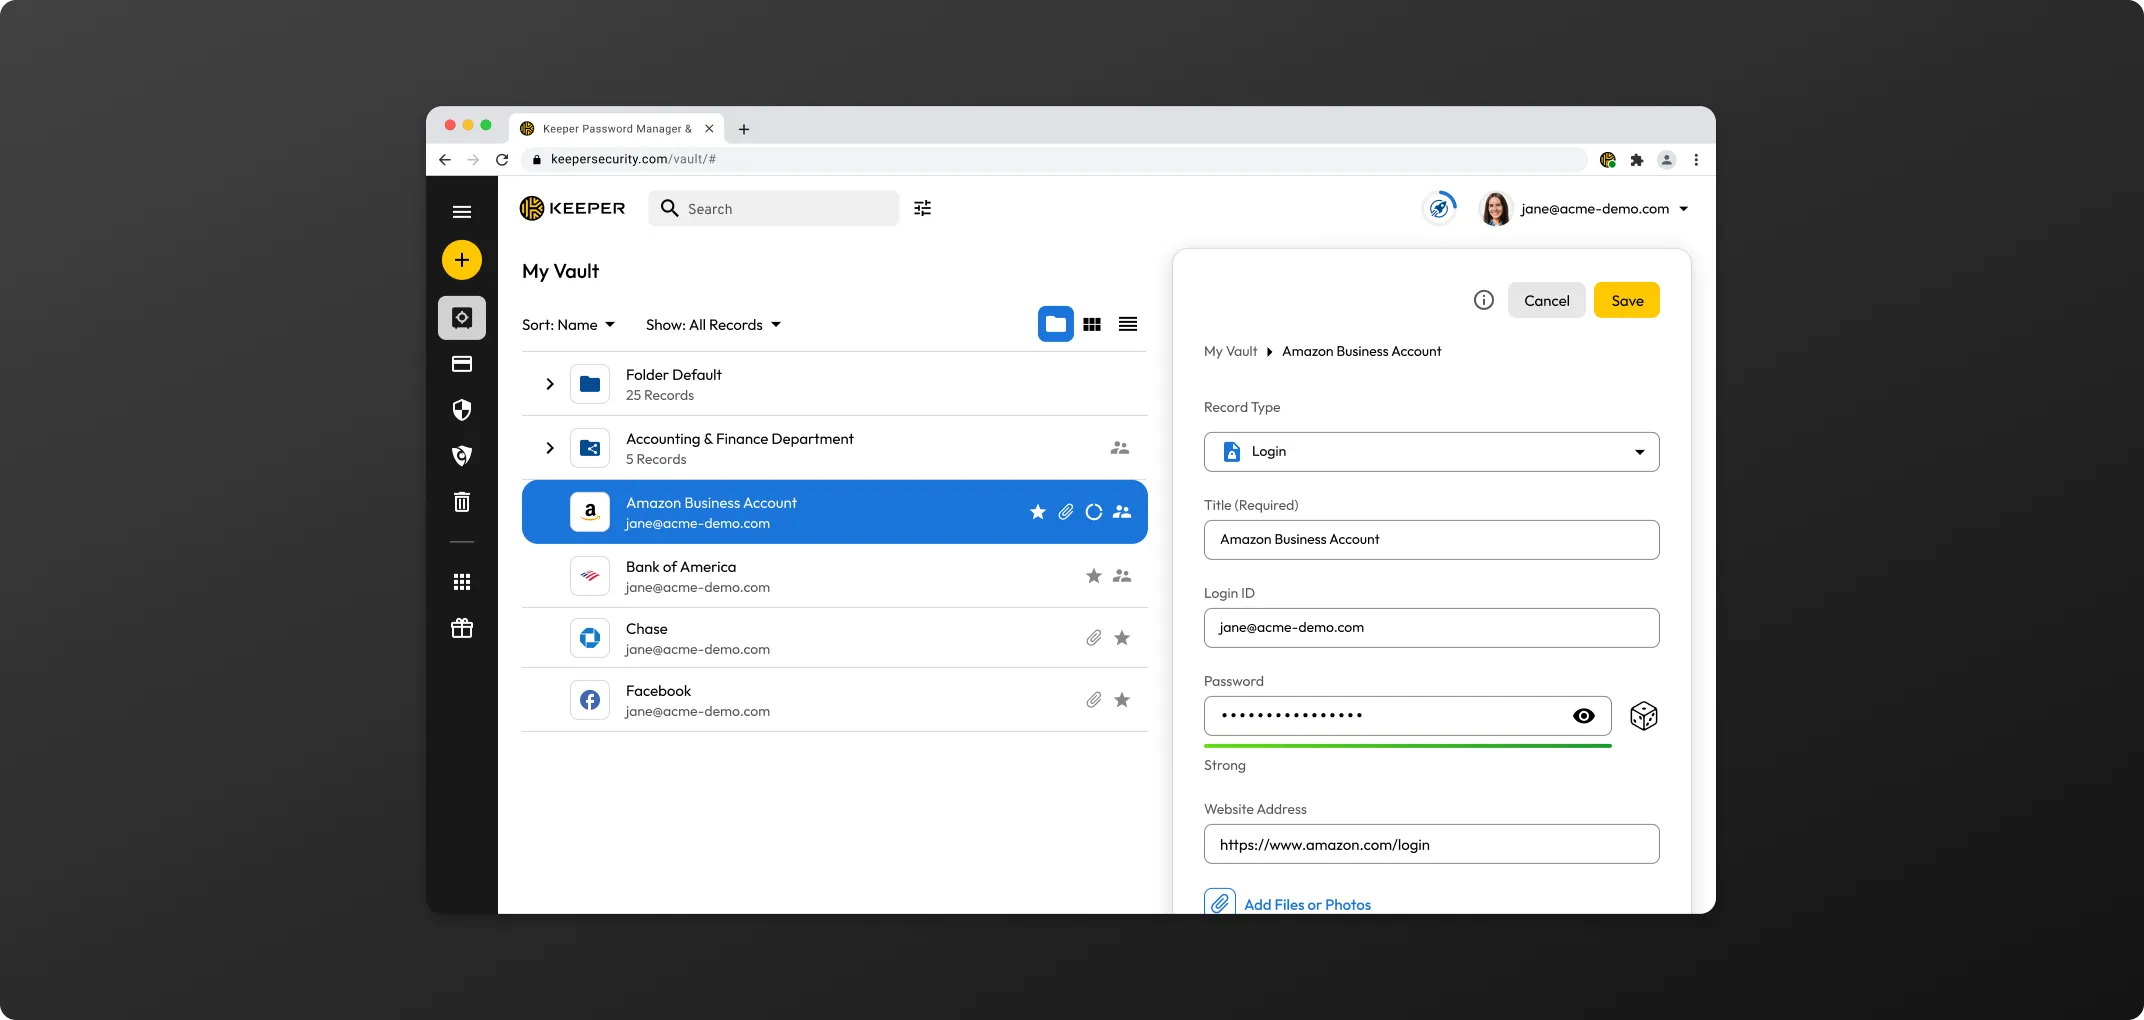
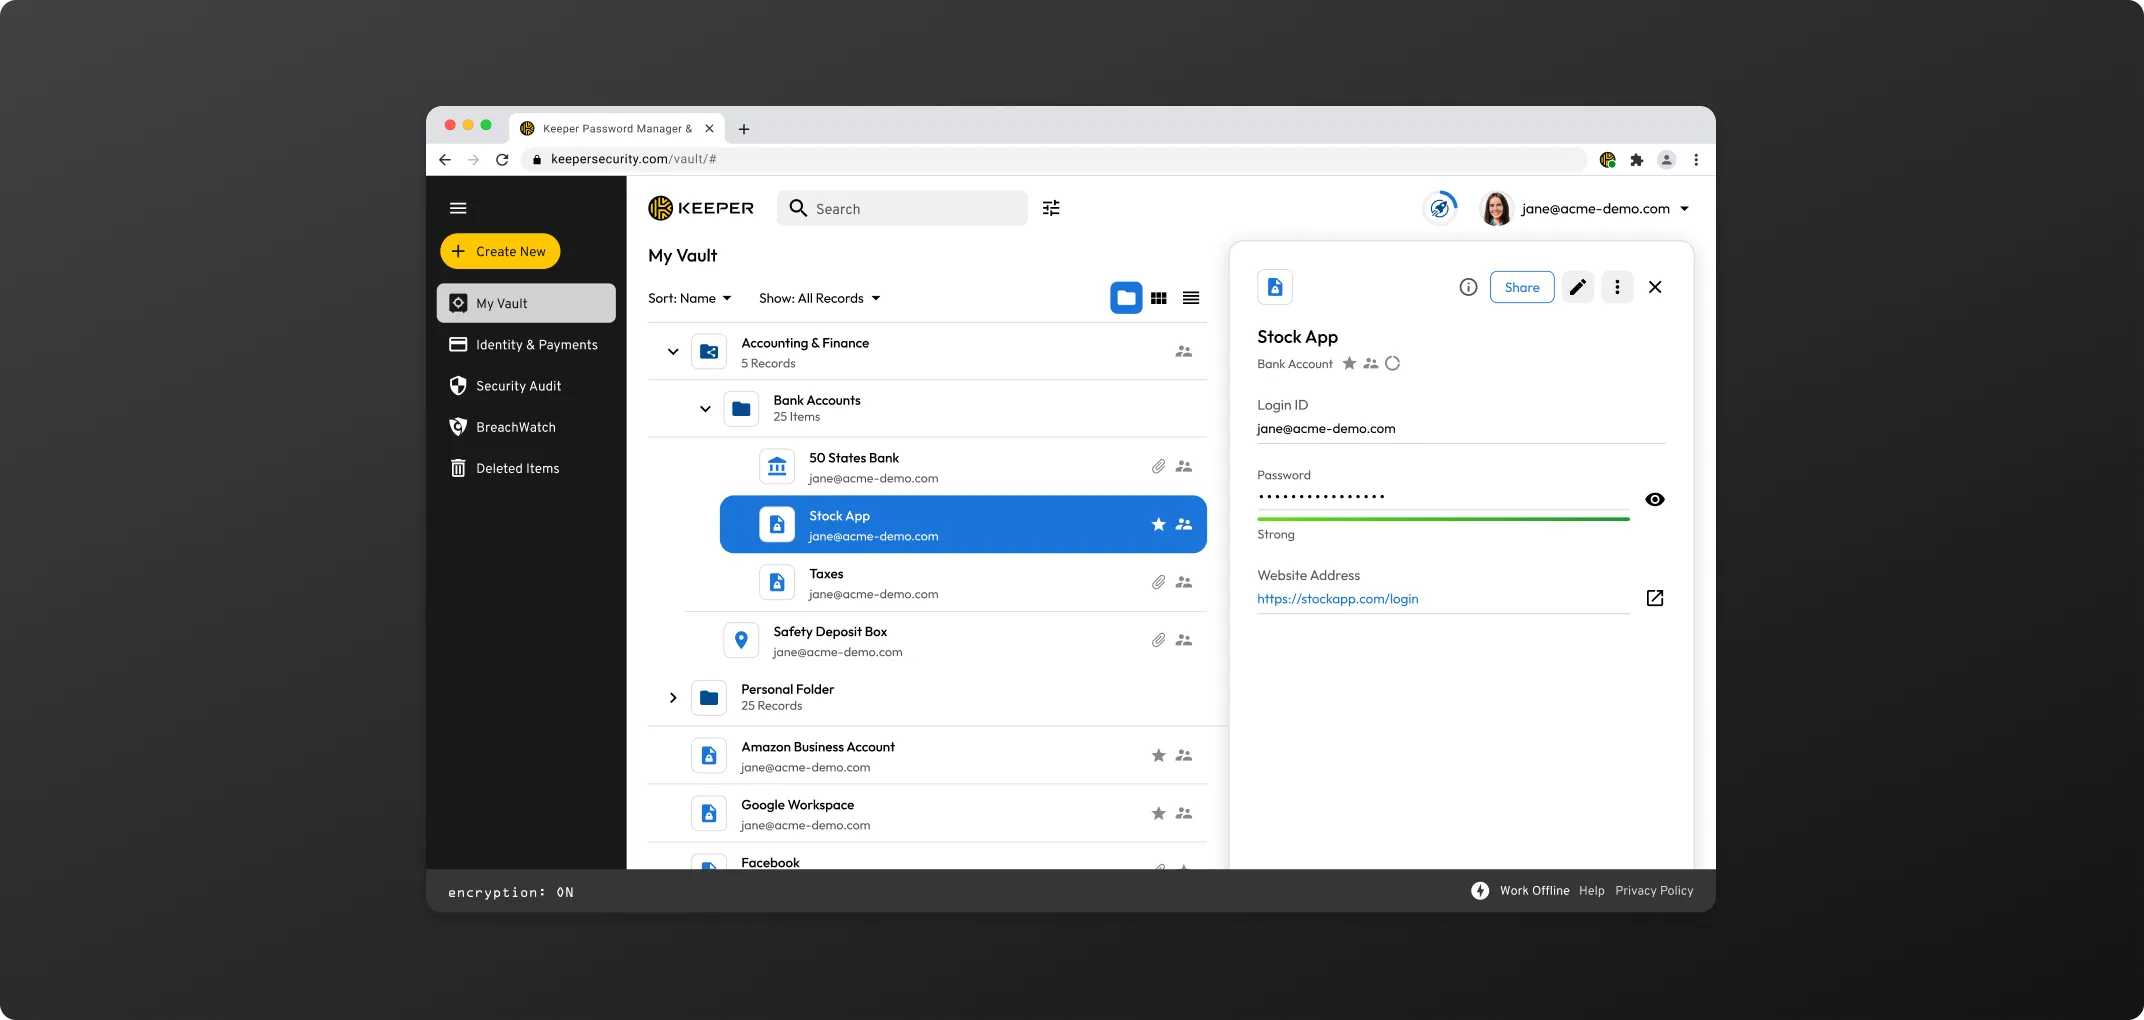
While viewing a record click Share.
Enter the email(s) of the user(s) you would like to share the record with, then select their permission type from the dropdown menu (if they are not already a Keeper user, they will be invited to create an account via email).
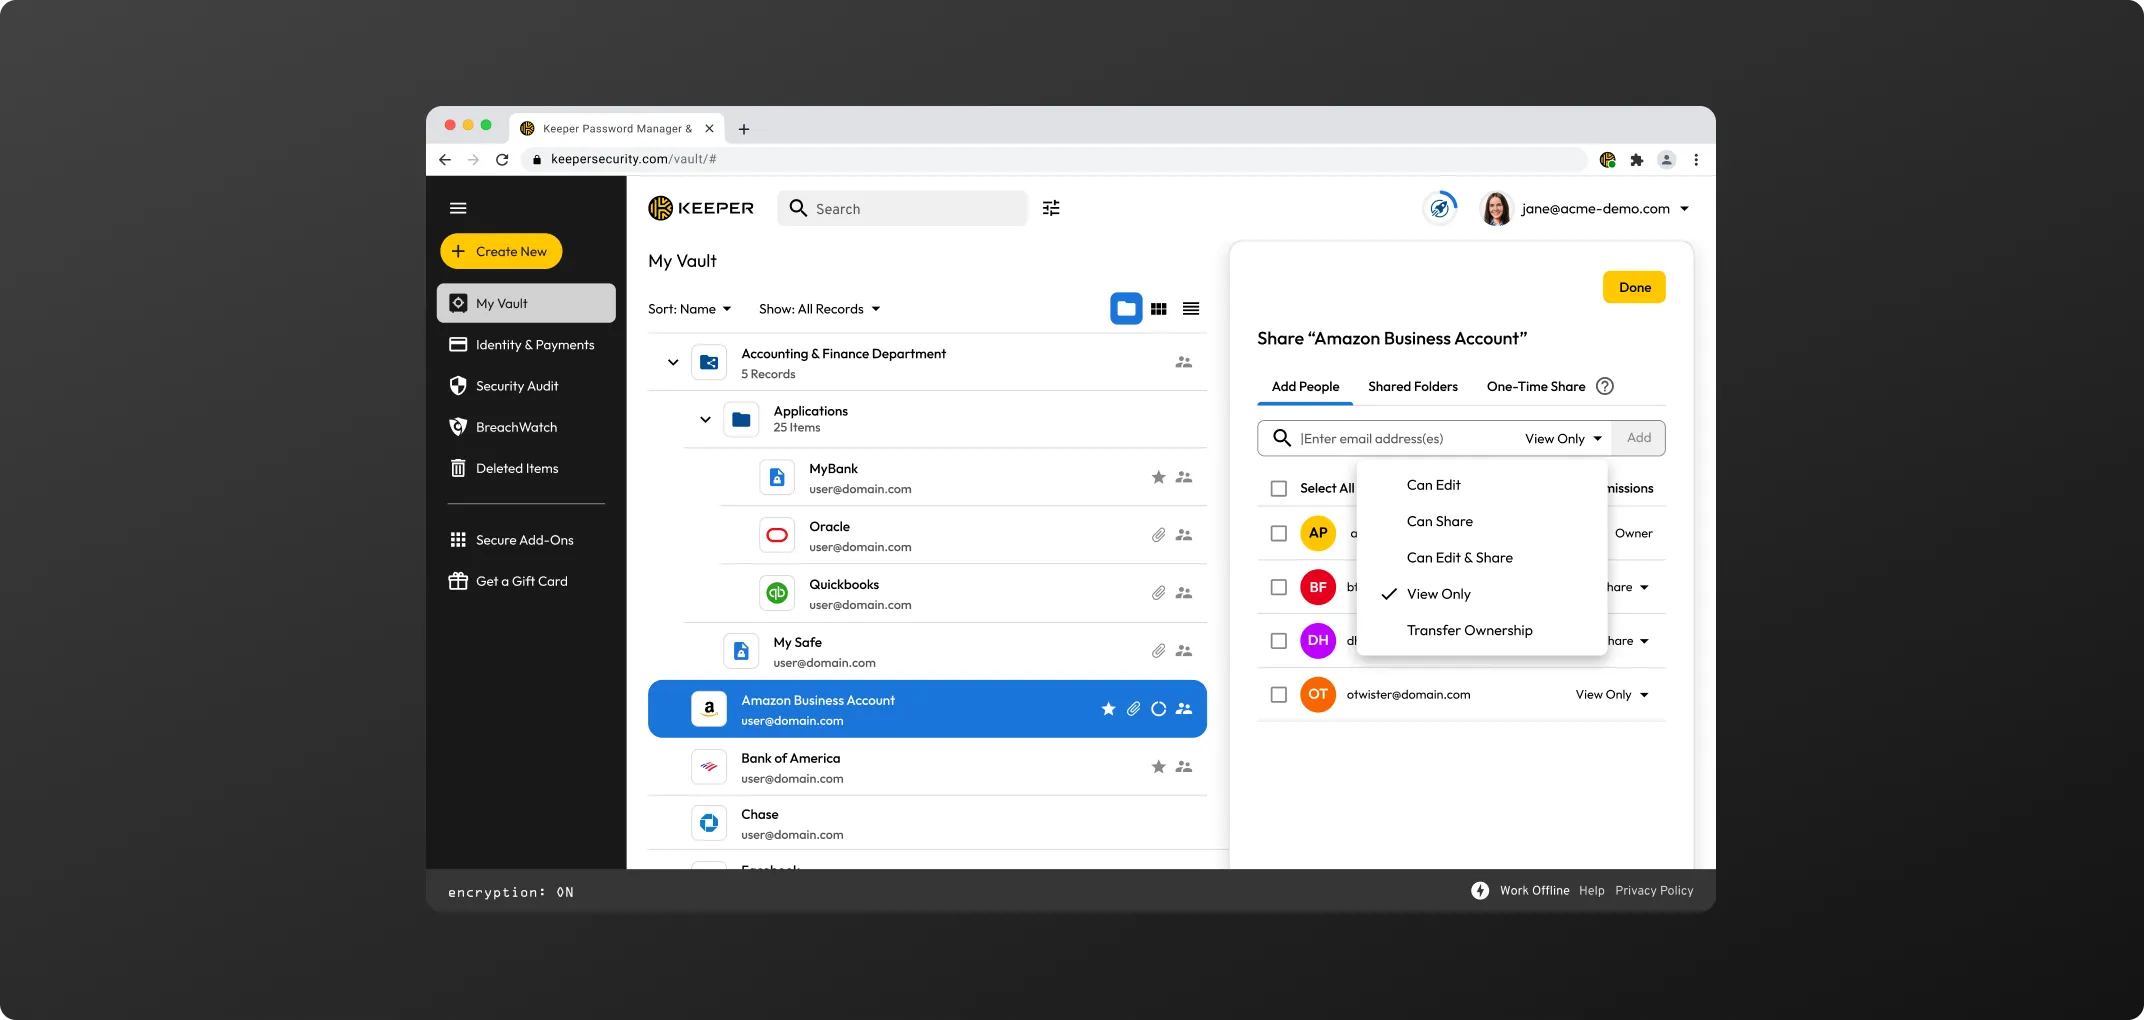
| Permission Name | Permission Level |
|---|---|
| Can Edit | Users in the folder can edit this record |
| Can Share | Users in the folder can share this record |
| Can Edit & Share | Users in the folder can edit and share this record |
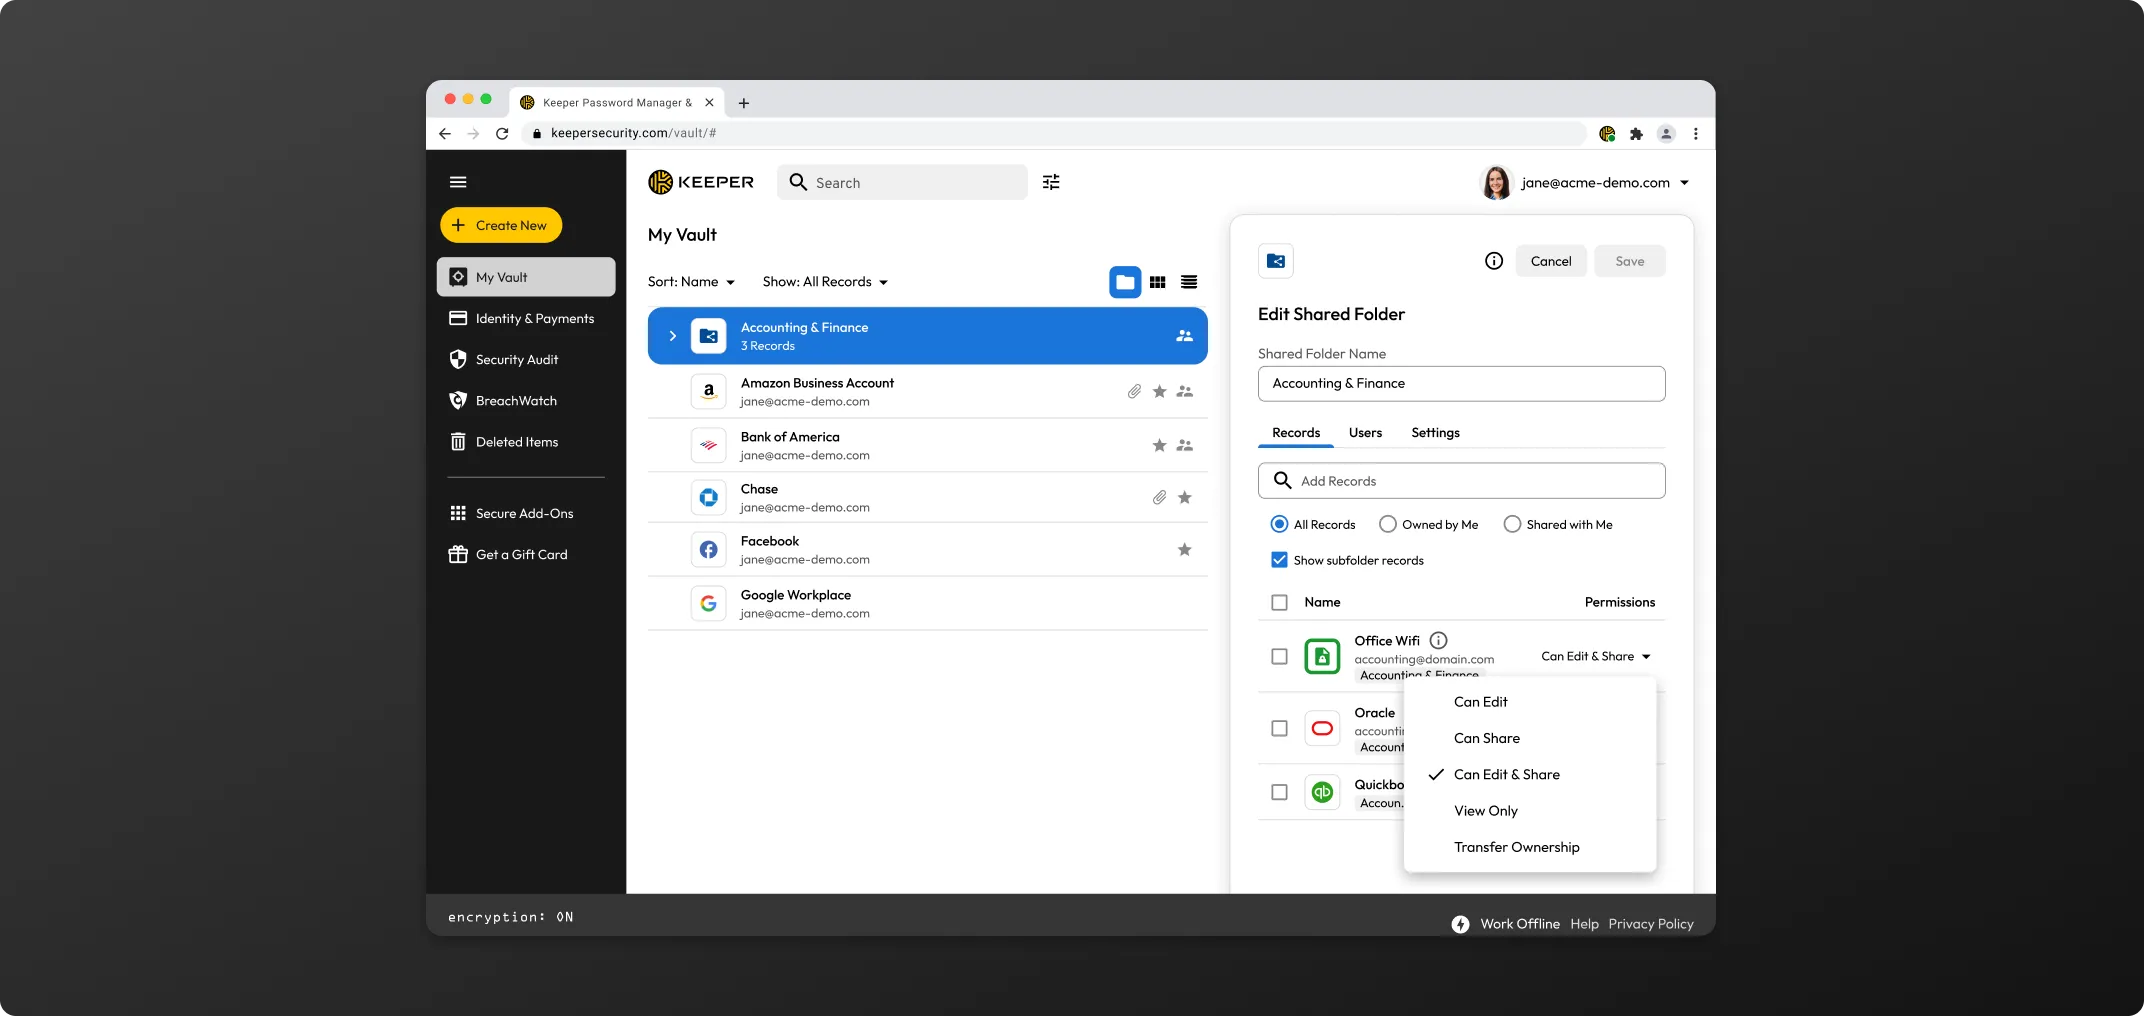
| View Only | User can only view the record |
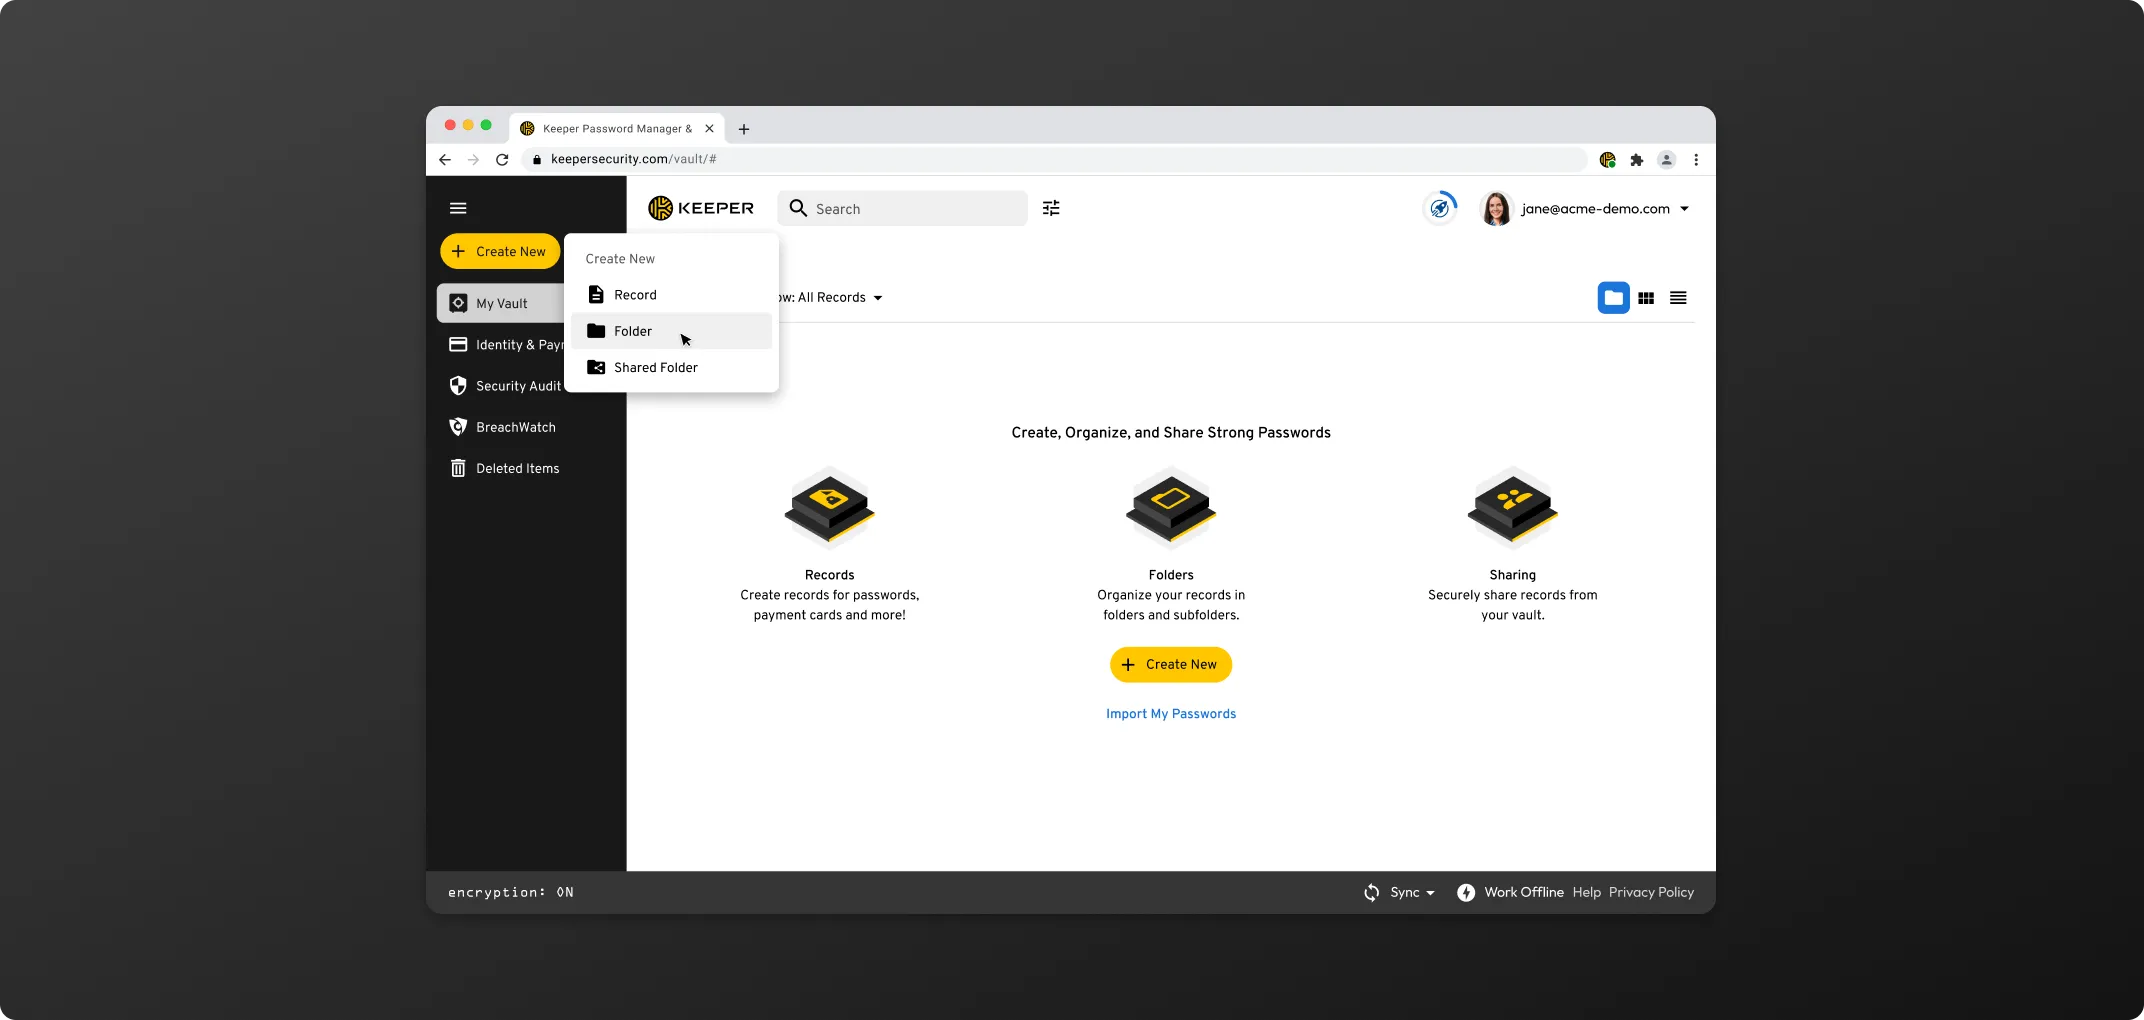
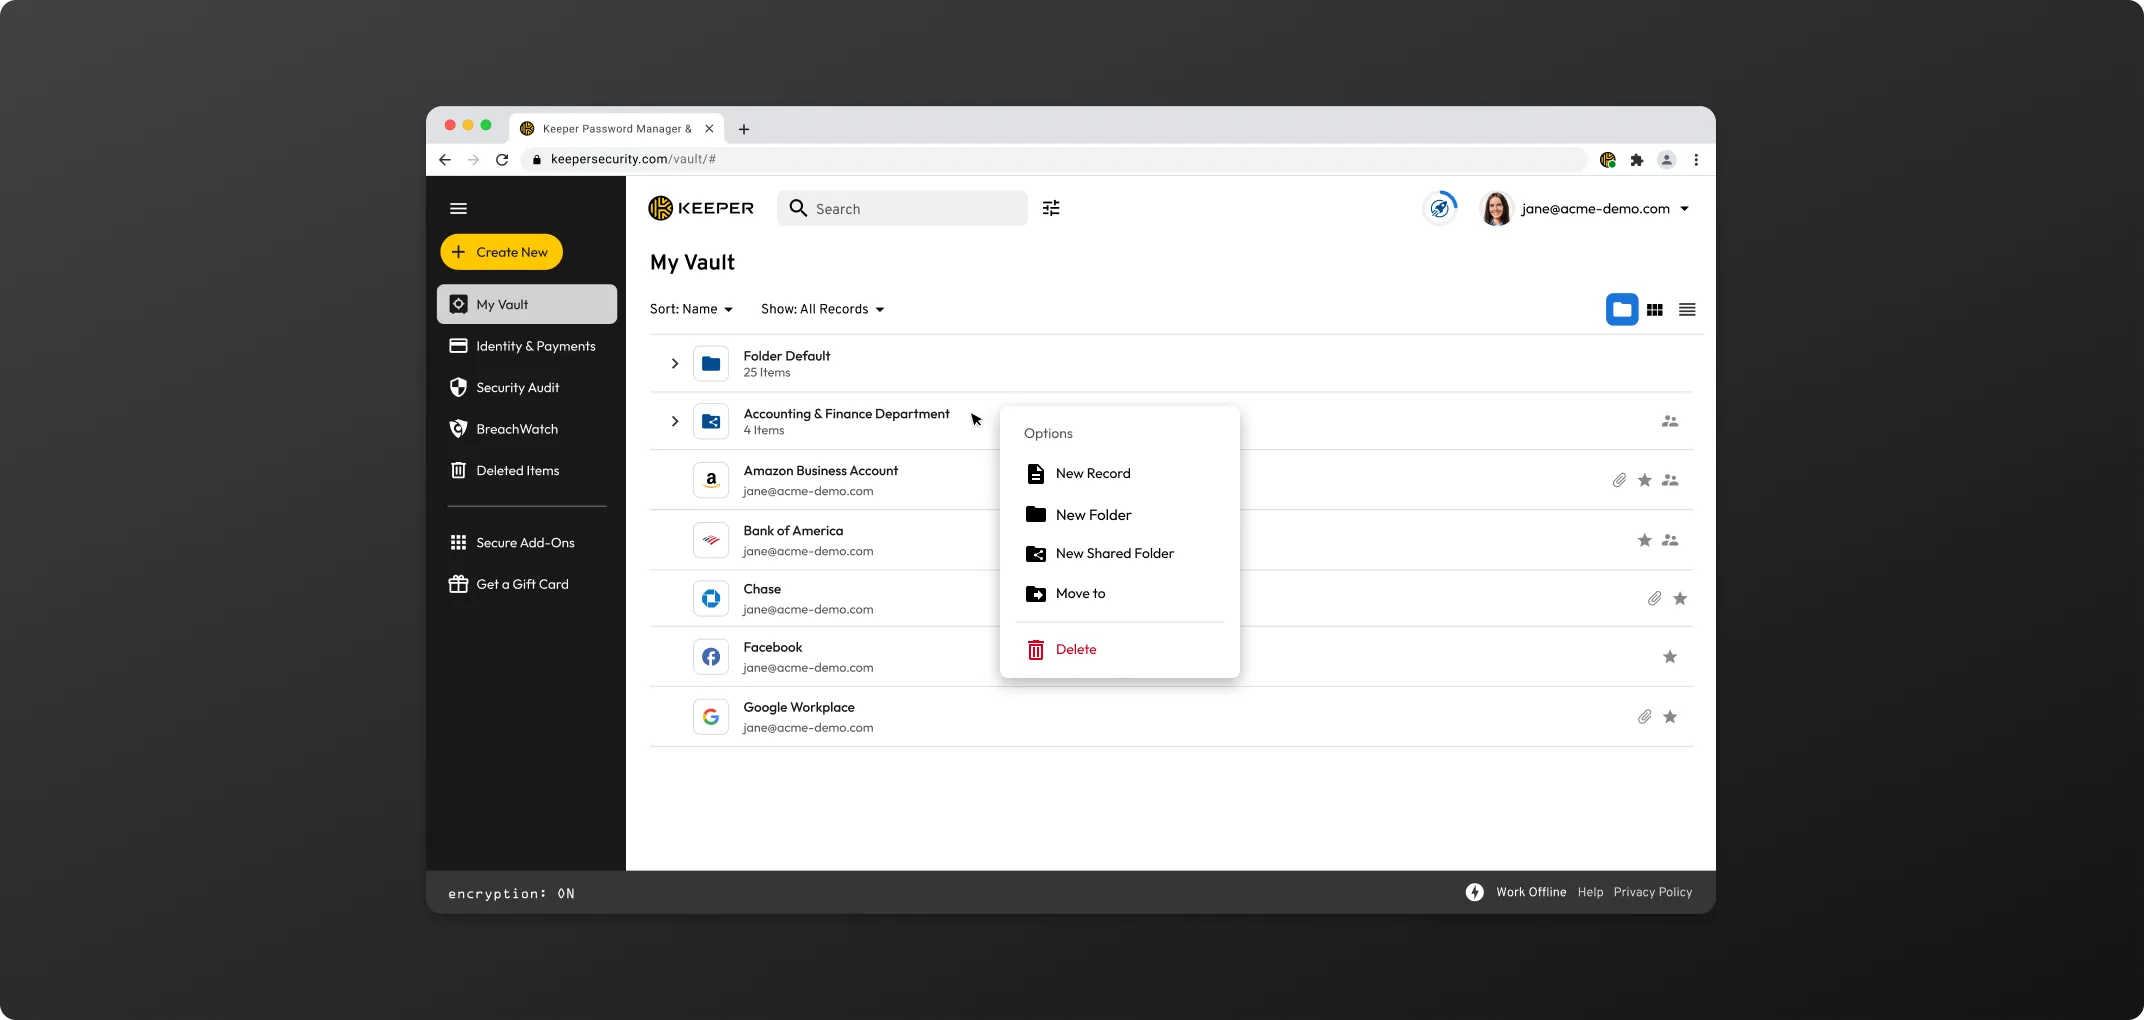
A private folder is only visible to the user who created the folder and can be made up of subfolders and records. A folder can also contain other shared folders and shared records. To create a private folder, click Create New > Folder. Choose where you would like to nest the folder using the dropdown menu. You can select the parent folder or select My Vault to add the folder at the root level.
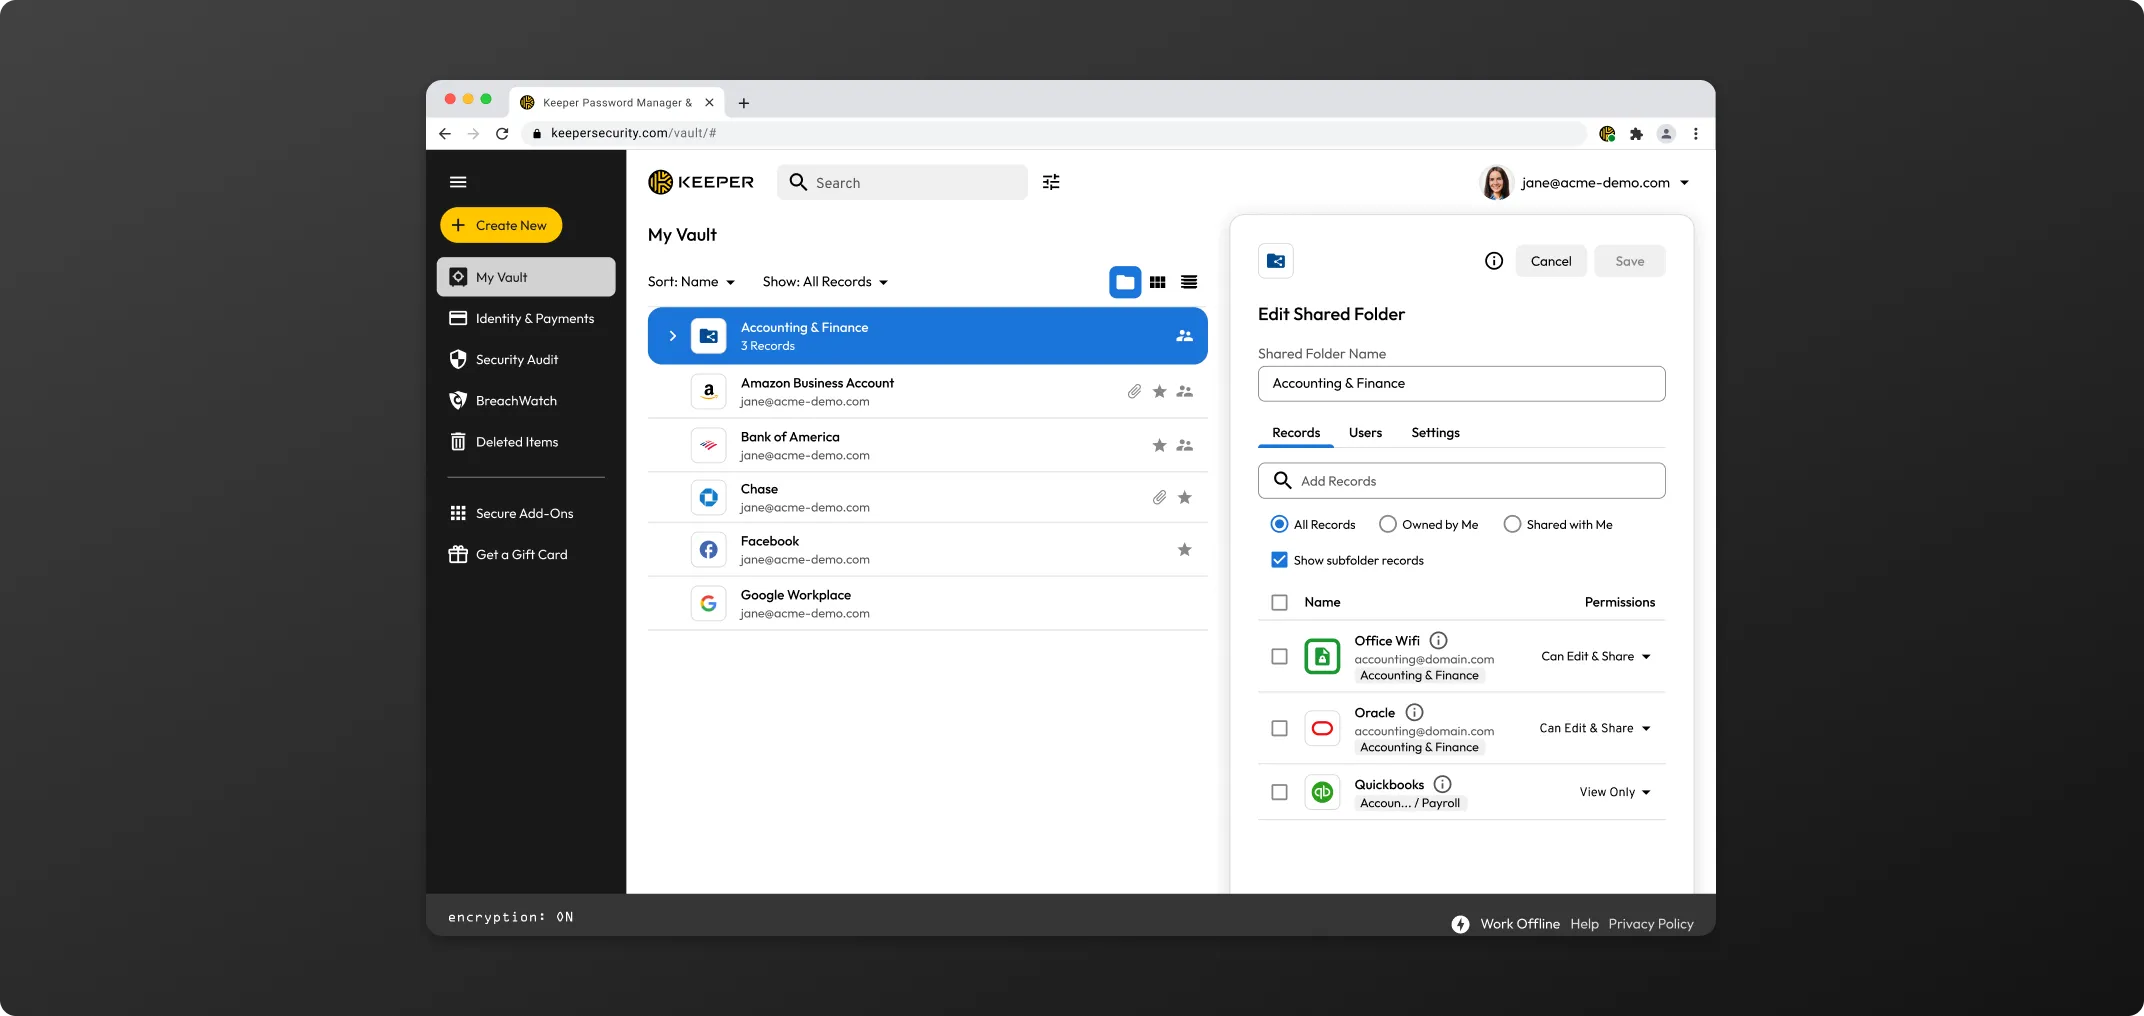
While viewing the records within a Shared Folder, click Edit and check the box next to "Show subfolder records" located in the Records tab to include those records in view or leave it unchecked to collapse them from view.
Both private and shared folders can be nested and contain an unlimited number of records or subfolders. Each subfolder inherits the same permissions structure as the parent folder.
If the parent folder is a shared folder and you move a private folder into it, the private folder will now inherit the permissions set from the shared folder, including the users that have permission to view and edit that folder and its records.
Shared folders allow you to share multiple records at once and new records can be added to the folder as needed.
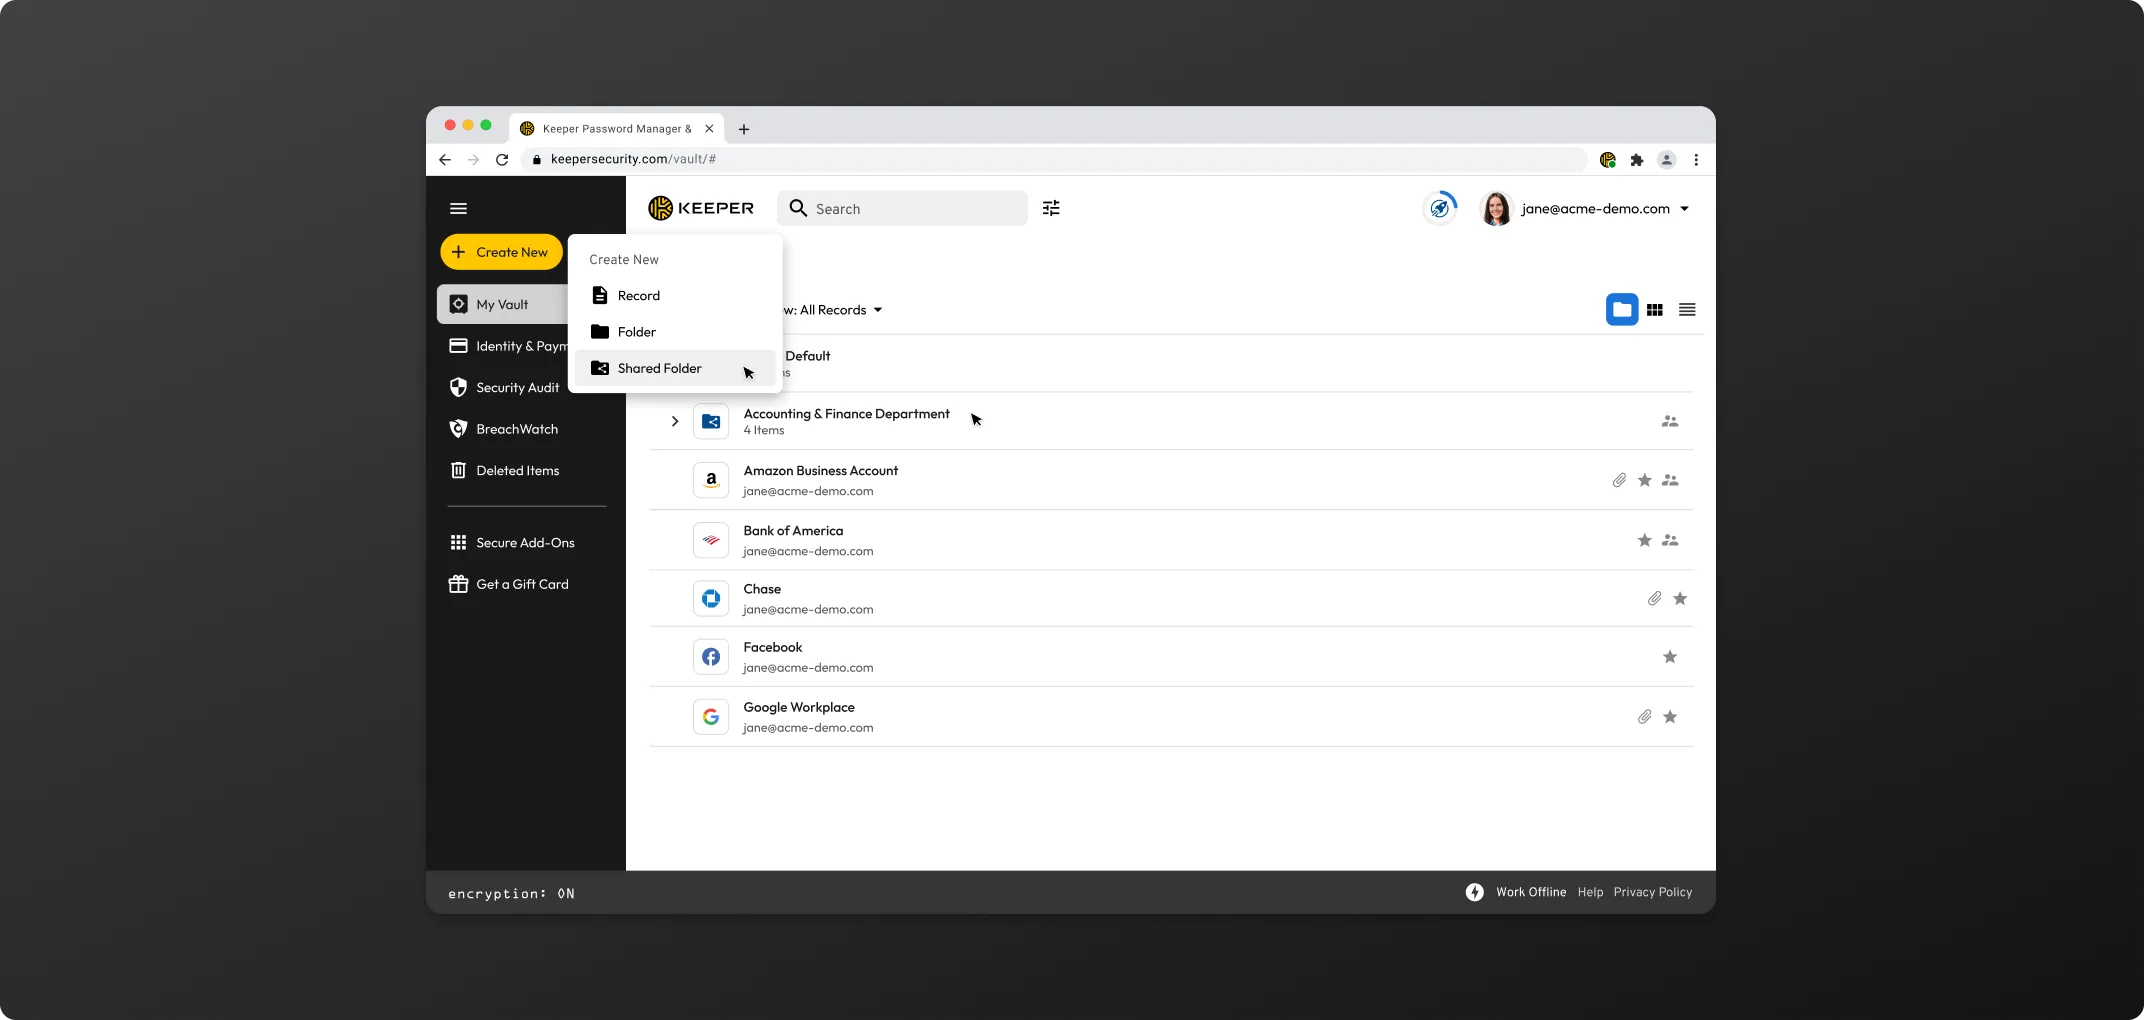
To create a Shared Folder, click Create New > Shared Folder.
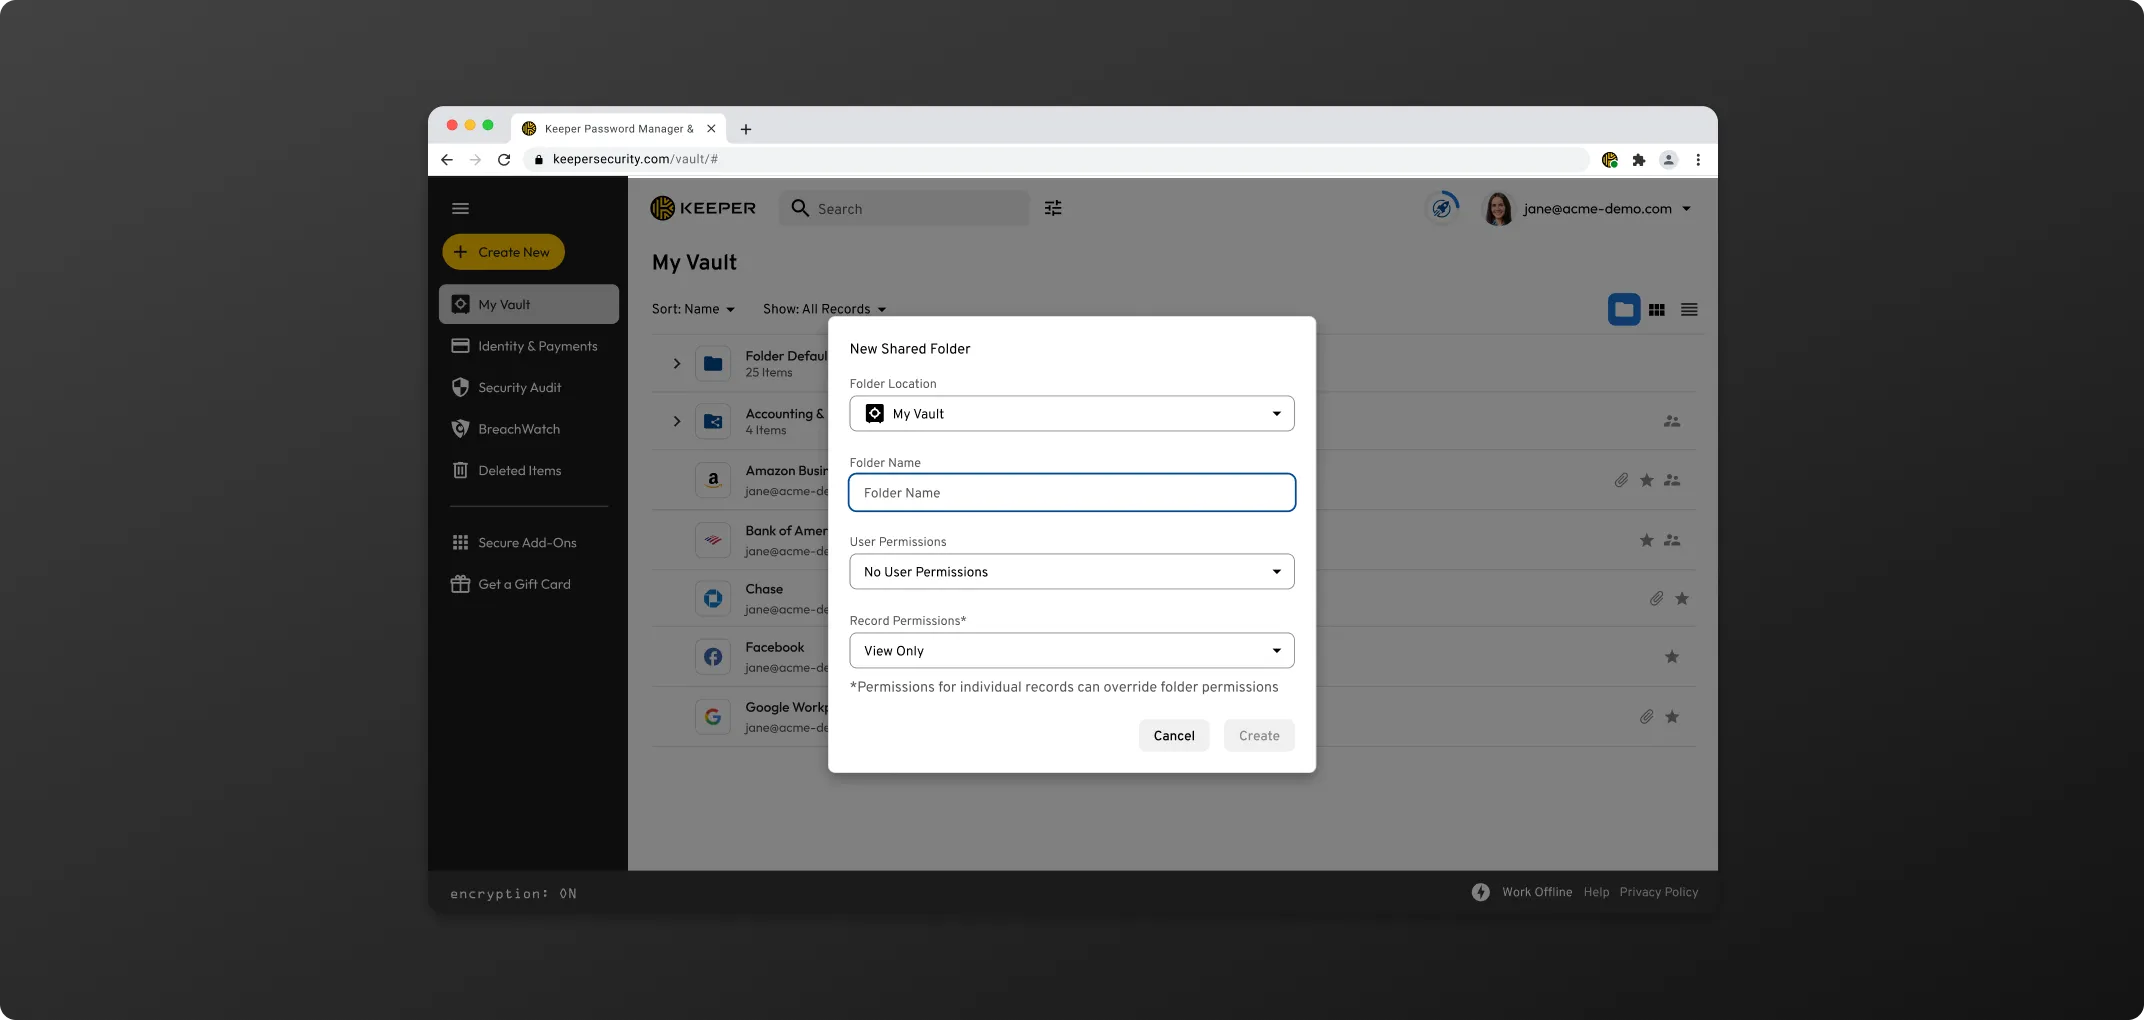
Choose where you would like to nest the folder using the dropdown menu and enter a name for the folder. Set the User and Folder Permissions and click Create.
You can add records to the folder by a simple drag-and-drop or you can click Edit and add the records using the record Search bar.
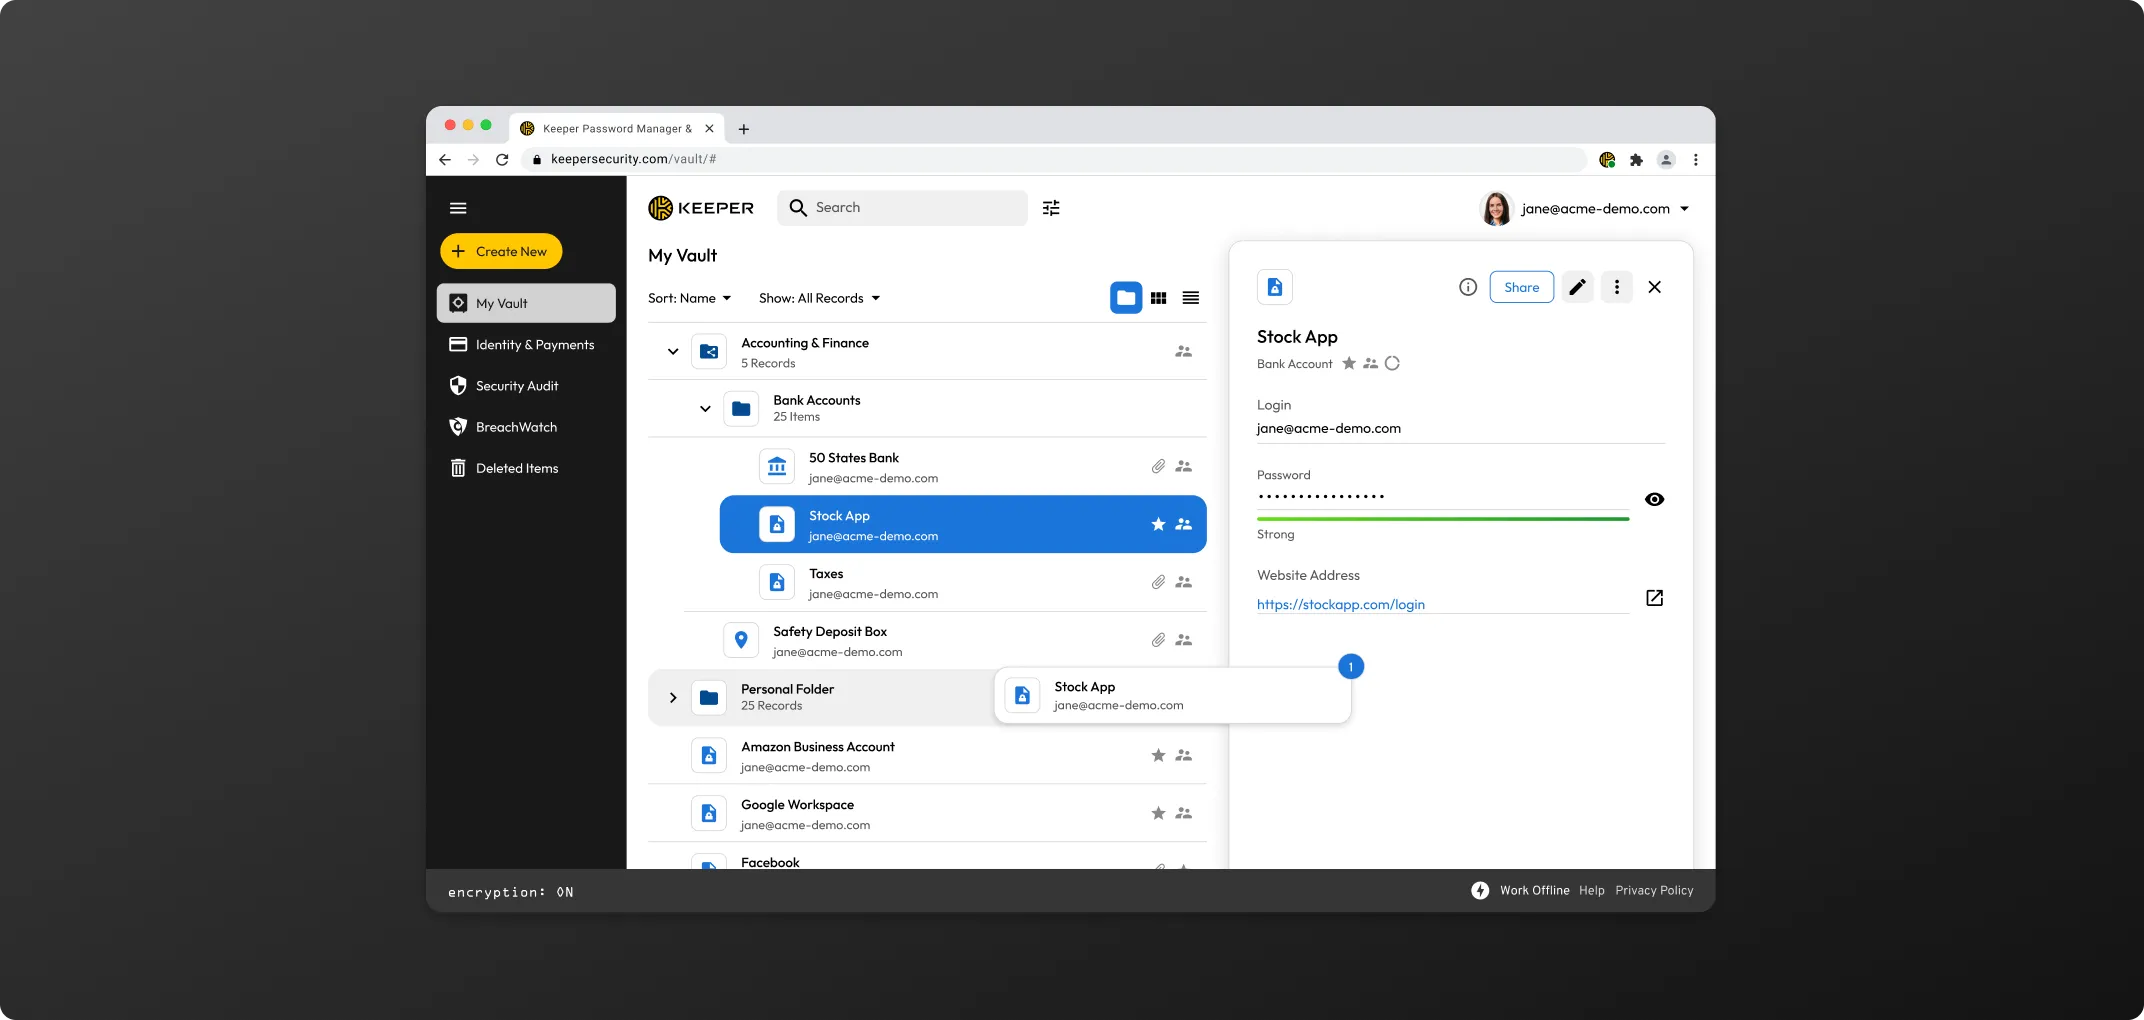
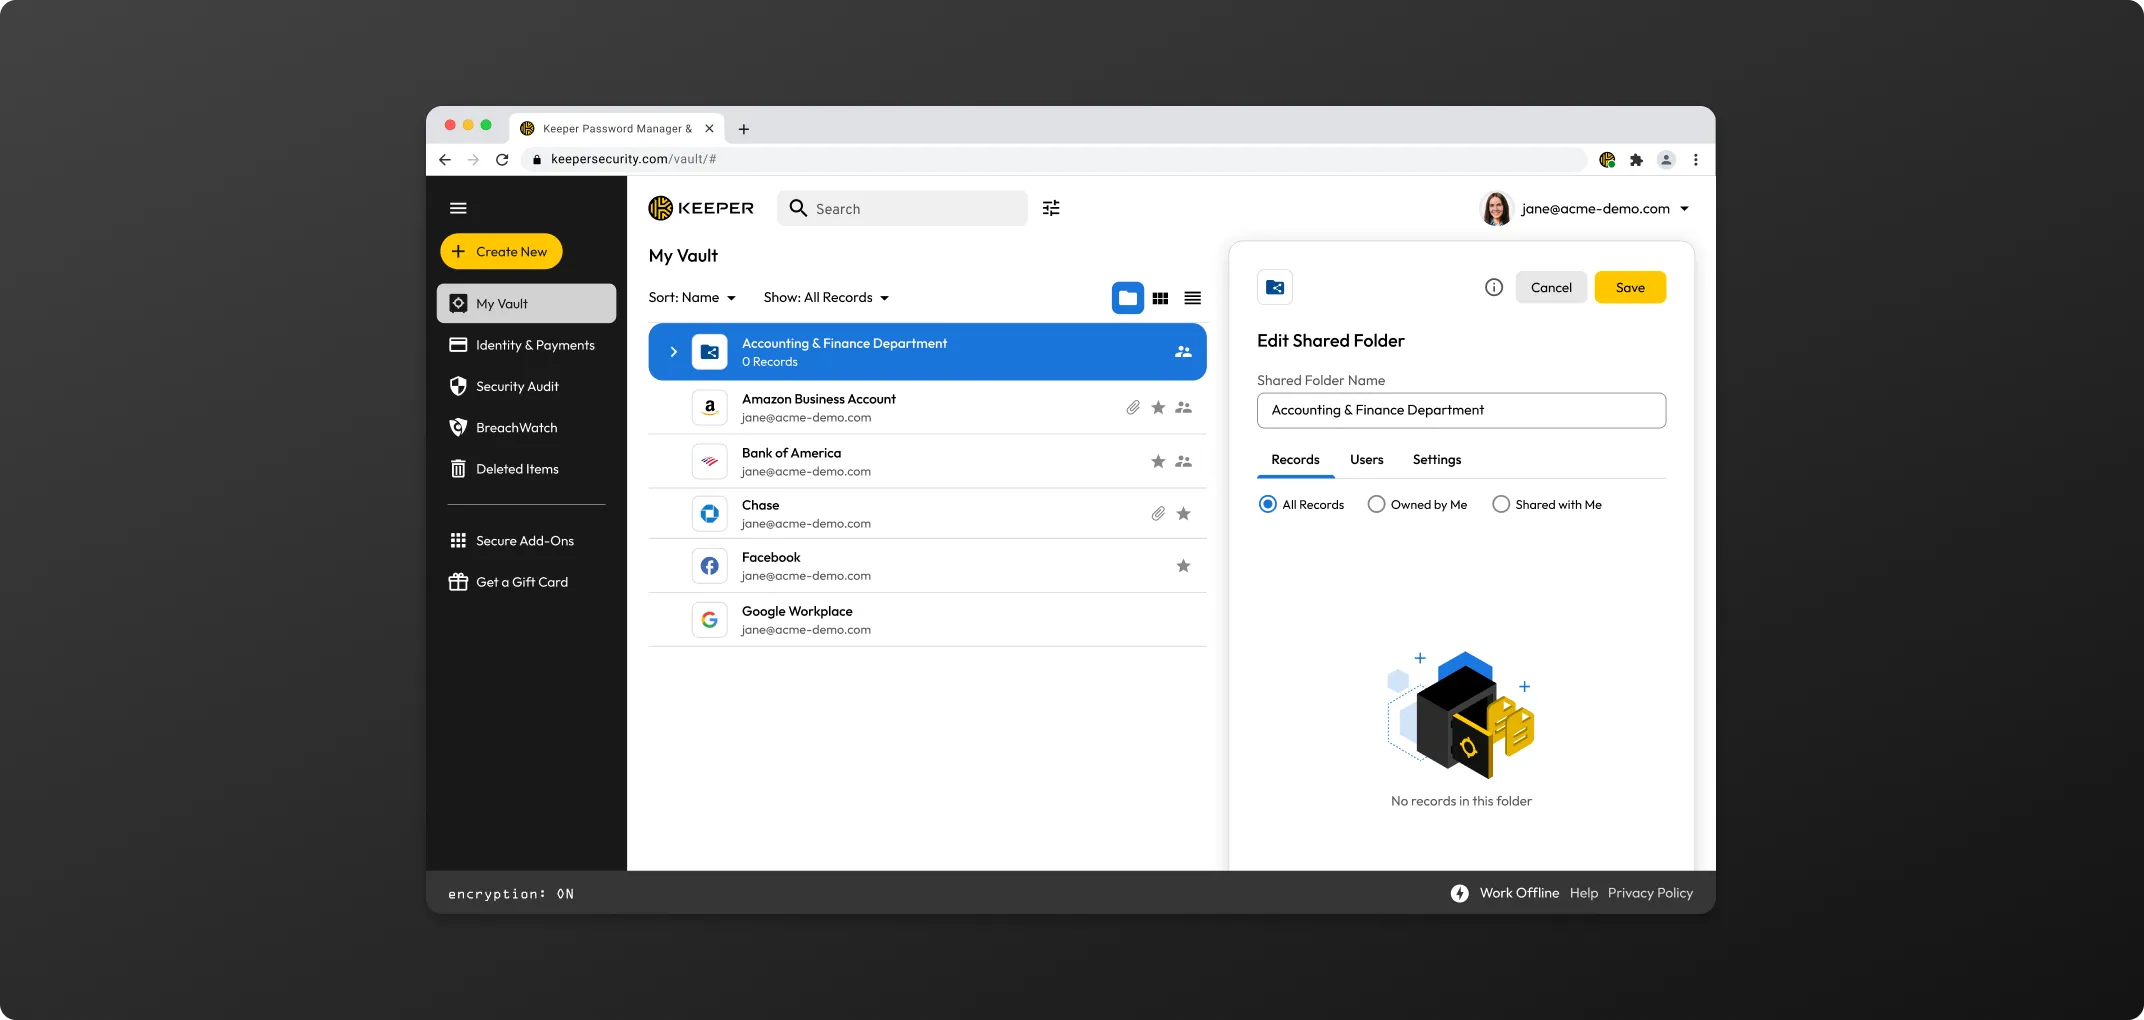
Record Permissions are used to govern folder members' (users) interactions with each individual record in the folder. You can access these permissions from the Records Tab by clicking Edit and then the dropdown icon next to each record name.
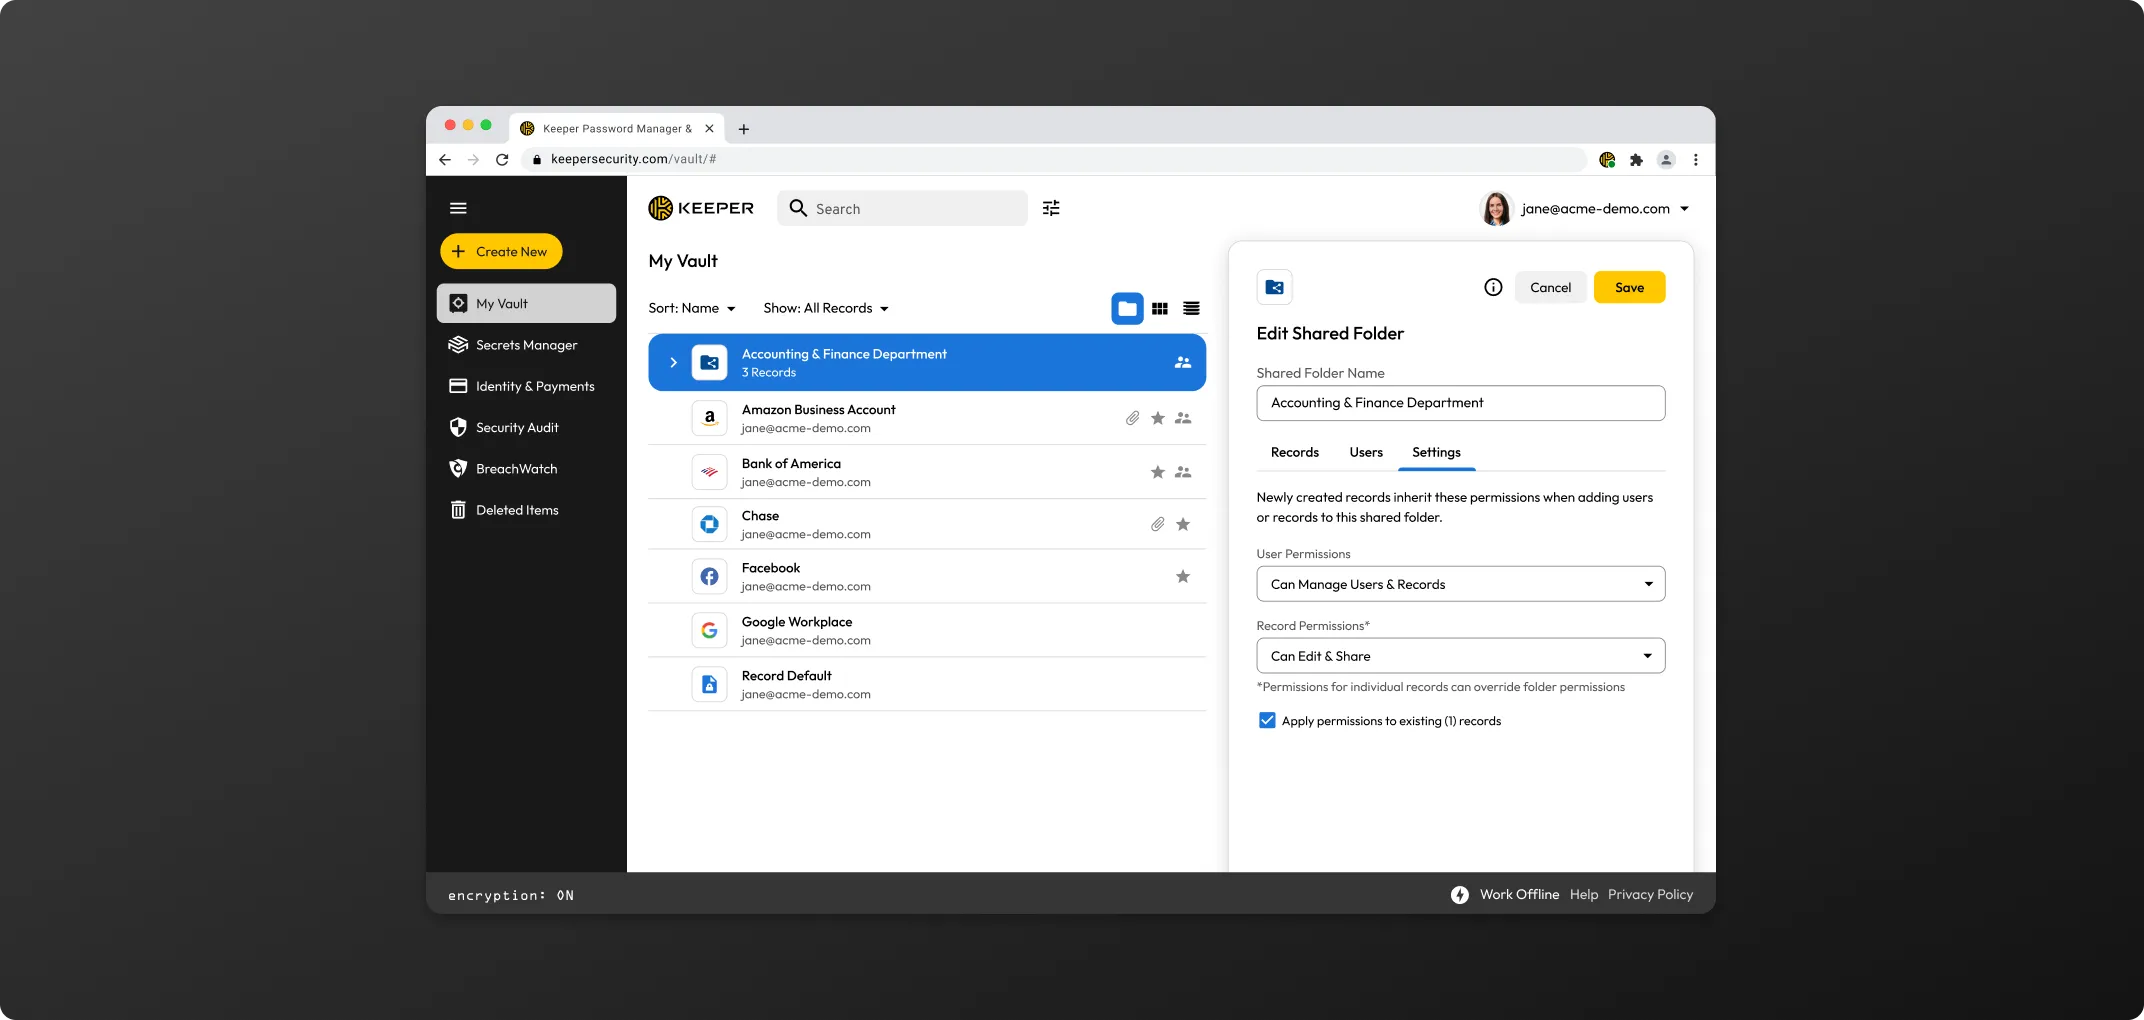
Shared Folder Settings are configured in order to easily set folder permissions for all users within the folder. These are selected upon the initial creation of the Shared Folder but you can change them at any time by clicking Edit > Settings. Click the dropdown arrows to set the Record and User Permissions for the folder.
Please note, newly created records inherit these permissions when adding users or records to the shared folder.
In order for the "subfolders" checkbox to appear, you must first click the "Show subfolder records" checkbox located in the Records tab.
* If the Default Folder Settings are not set properly, users who add records to the Shared Folder will find that the records are "View Only" by other members of the Shared Folder, even if those users have "Can Manage Records" permission. If you would like all folder members to have edit rights over all records that are added to the folder, set the Default Folder Settings to Can Edit Records. The Can Manage Records setting only allows users the ability to add or remove records, it does NOT give them record permissions.
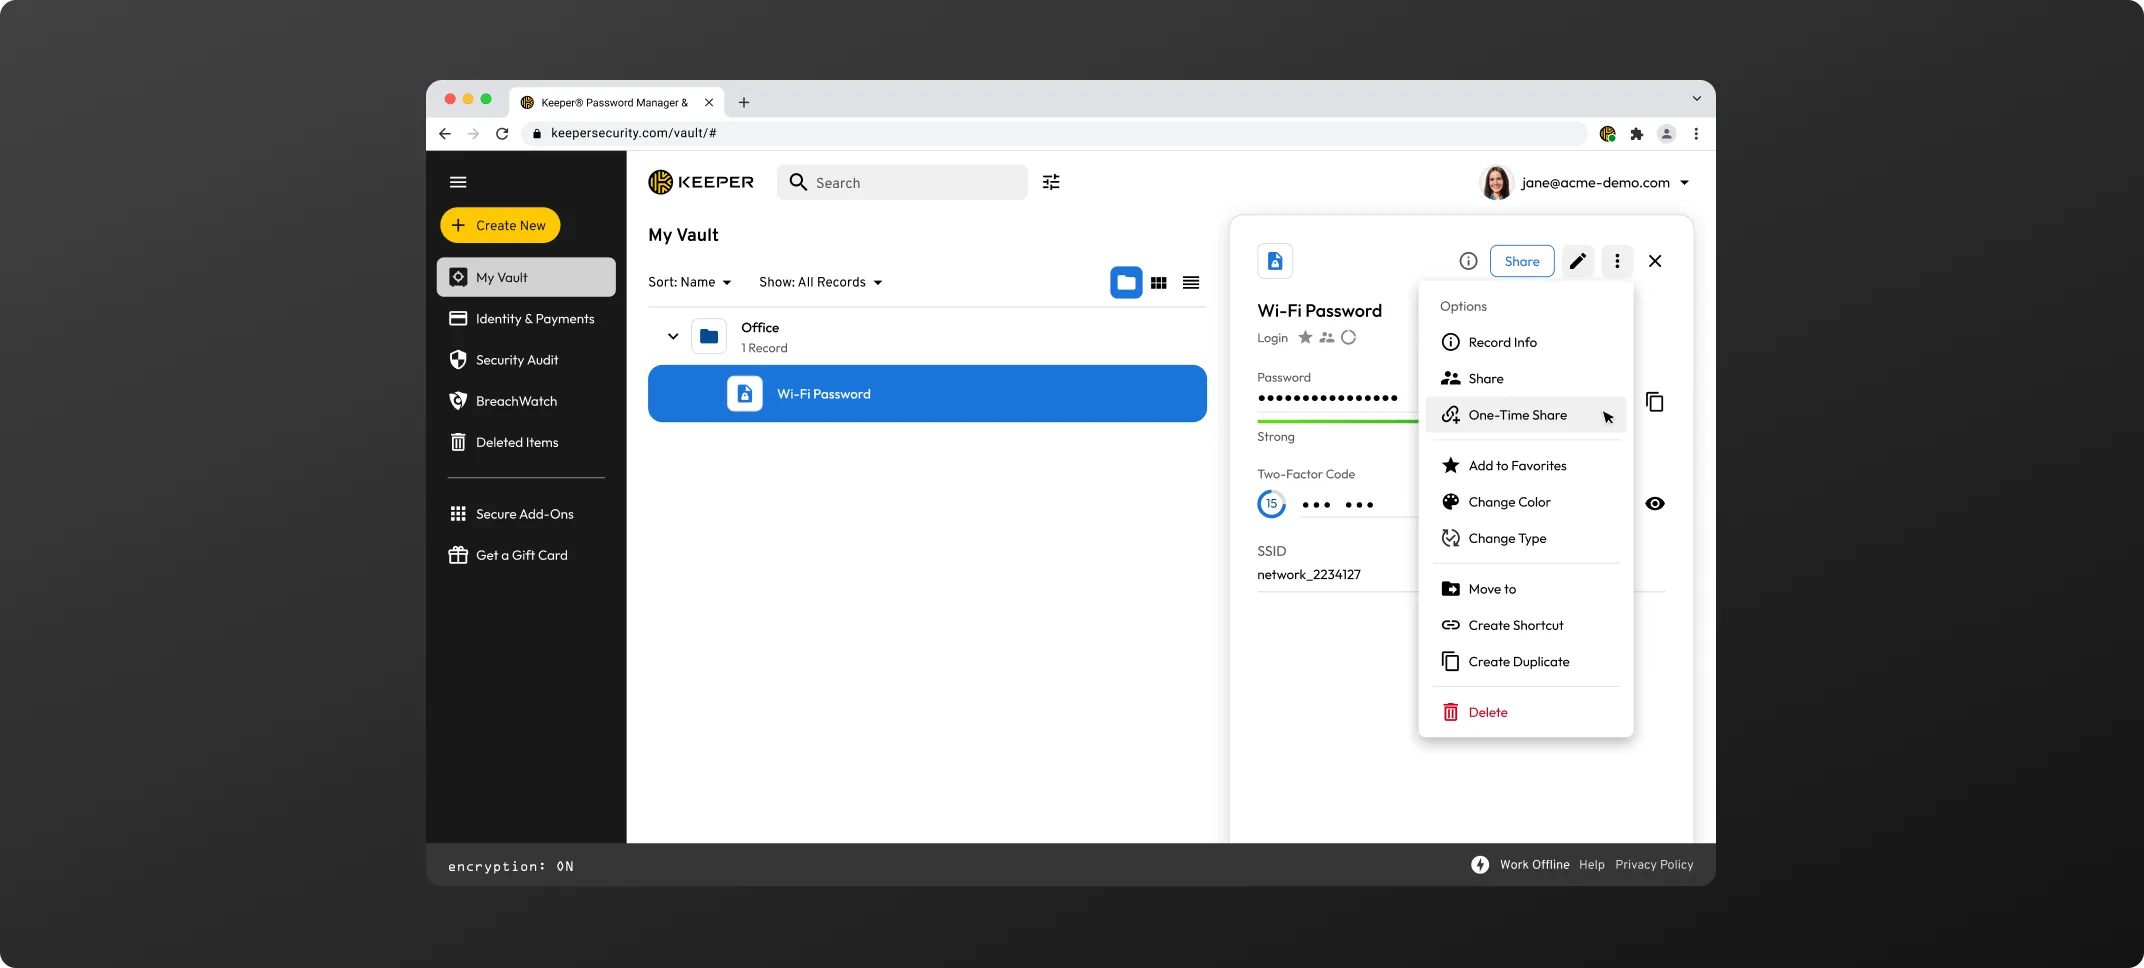
To create a One-Time Share, click the menu icon within the record that you own or have the permission to re-share. Then select "Create a One-Time Share" to generate a link.
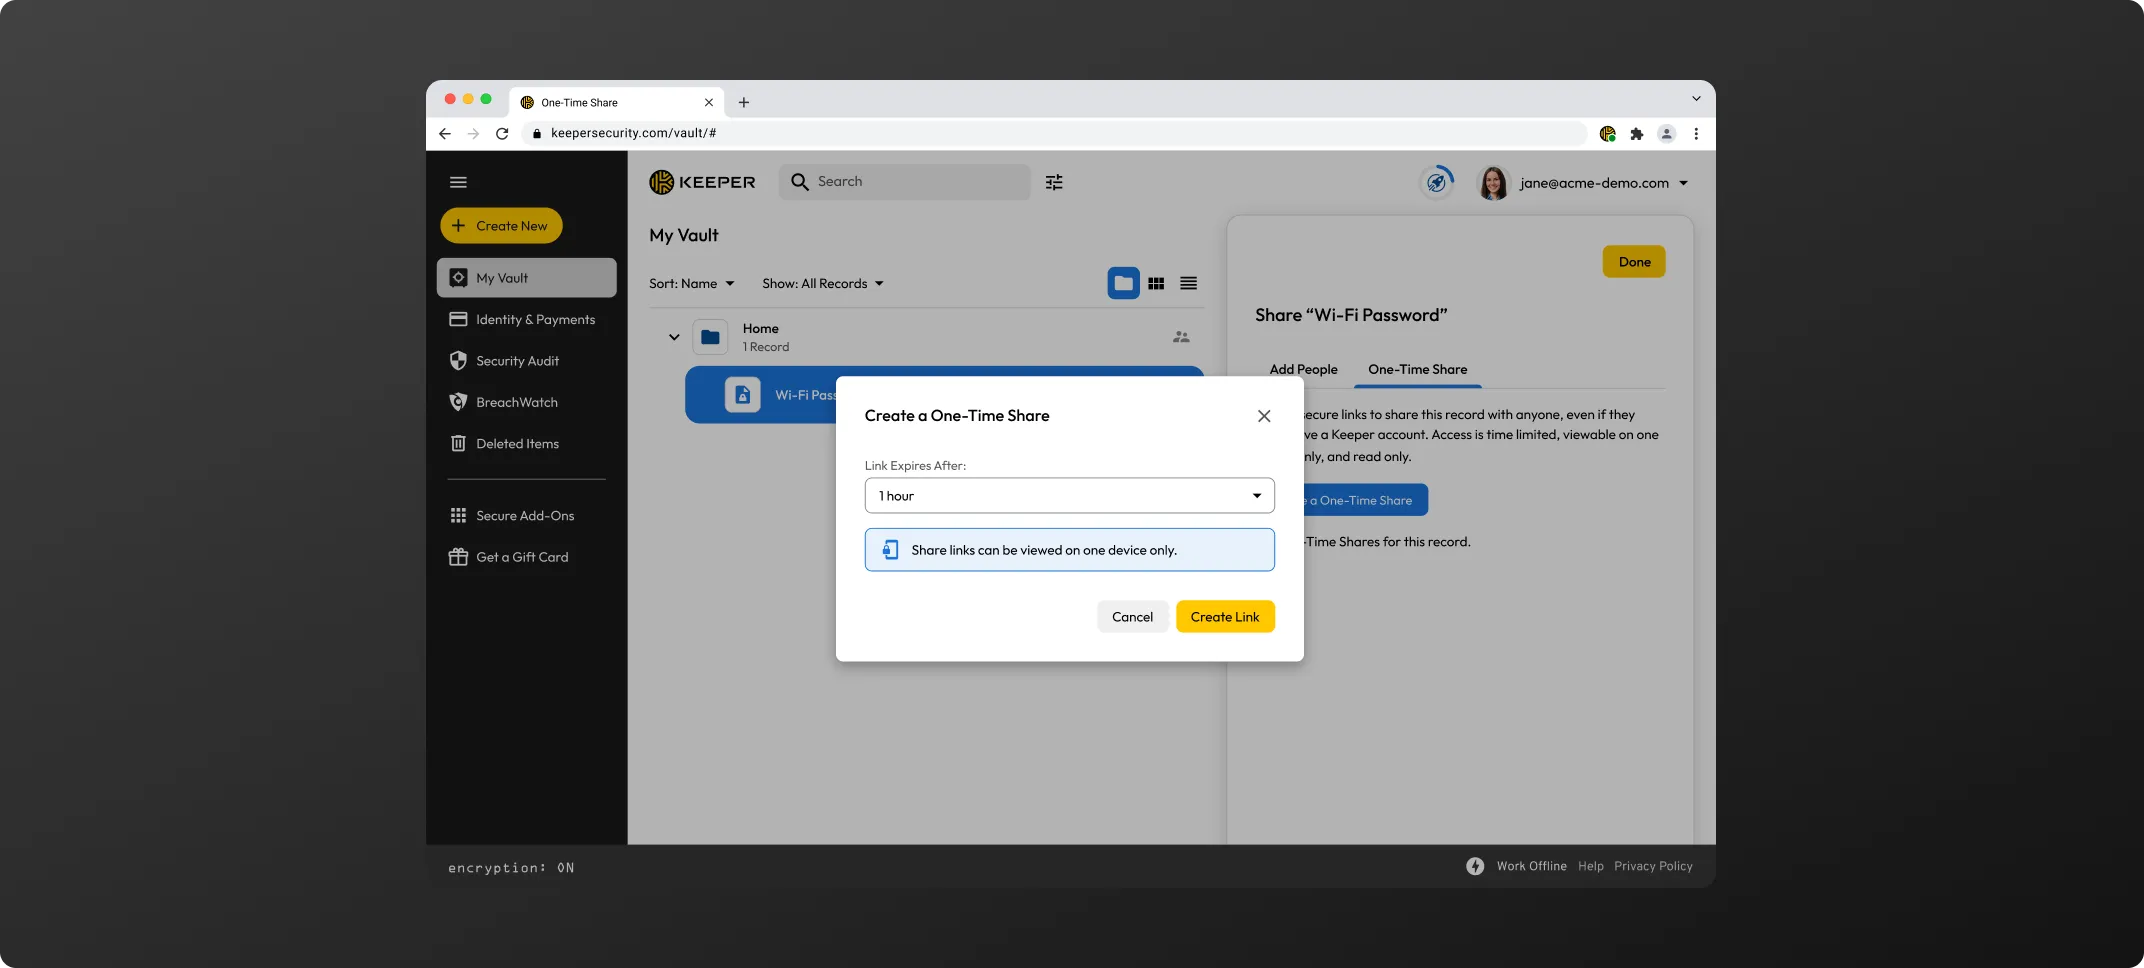
Next, select the record access expiration from the dropdown menu and click Generate.
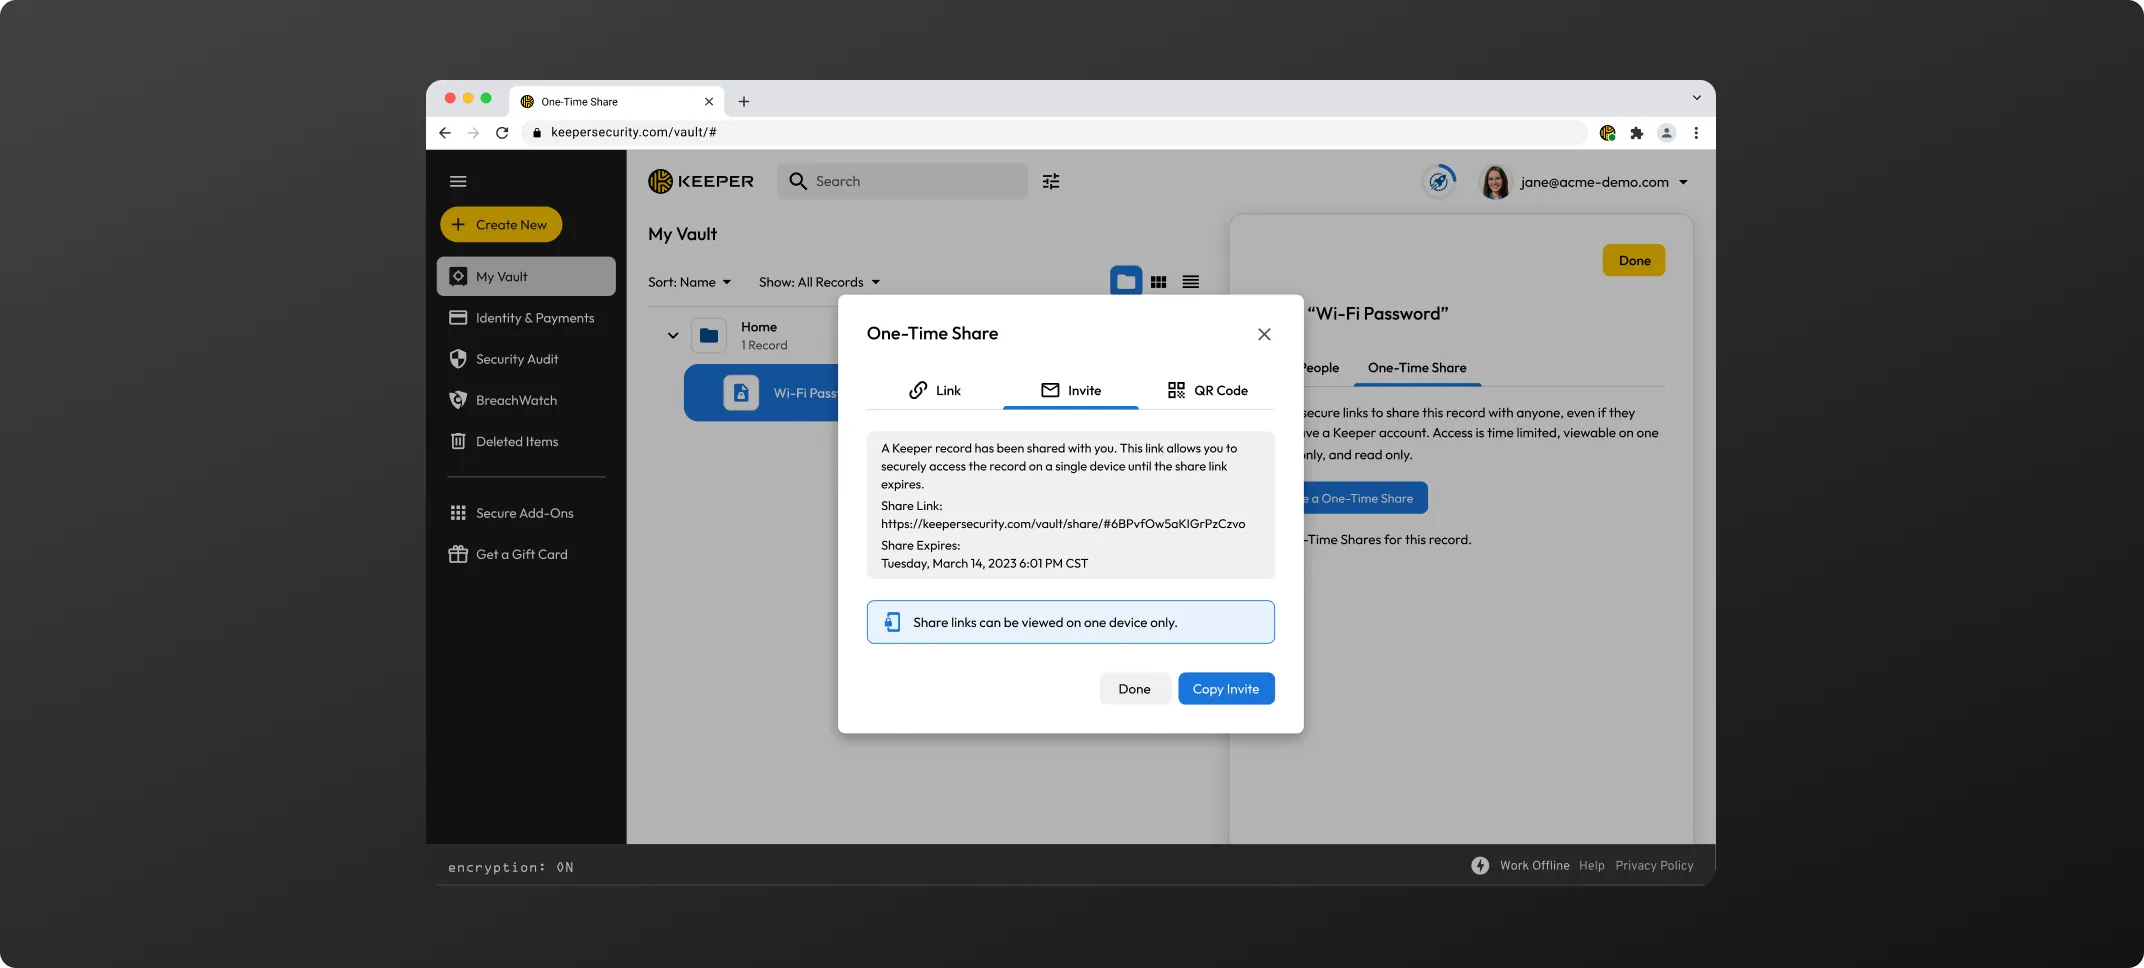
You can copy the URL of the link, or copy the entire invitation body (for sending additional contextual information to the recipient). If you scroll down the dialog, you will also see a QR code that can be sent to the recipient.
When the recipient of the share link opens the record, it will open in their web browser and it will be bound to their device. The record access will automatically expire after the set amount of time.
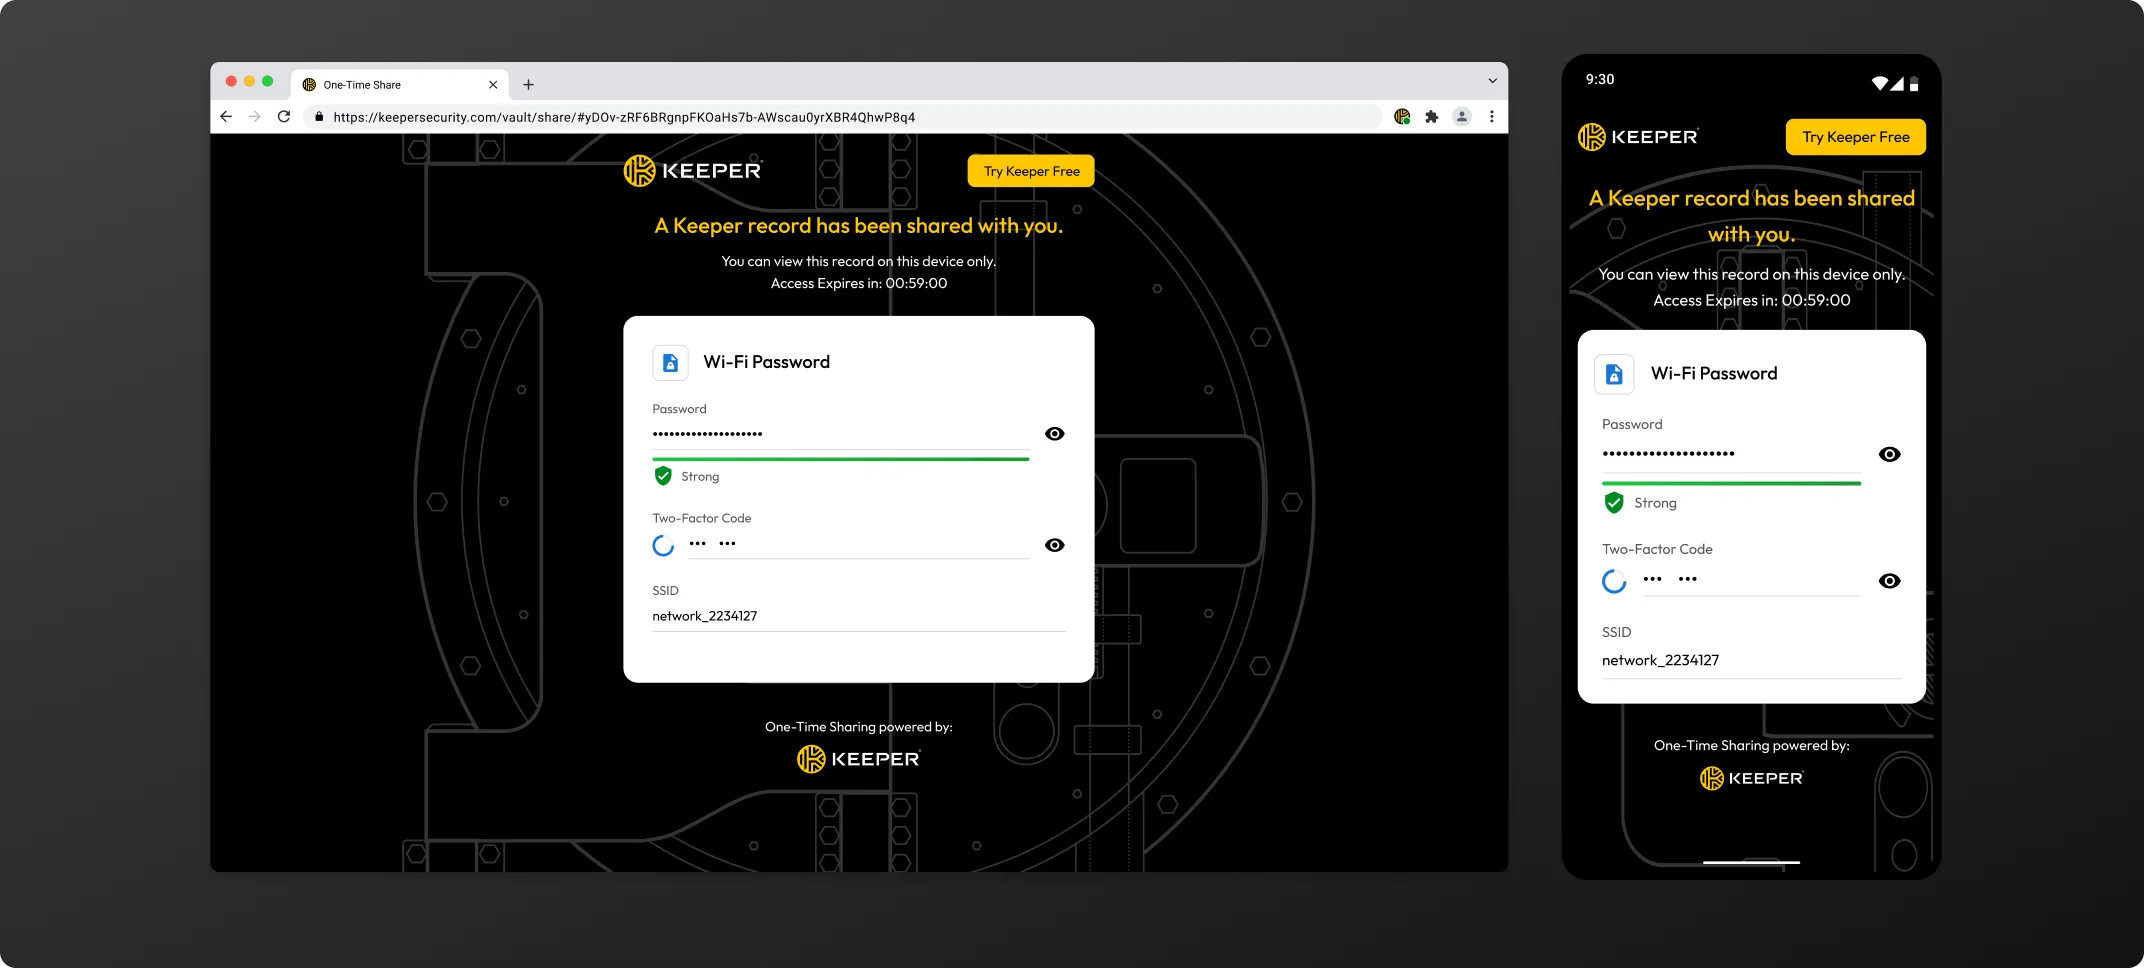
After the record has expired, the link will no longer be valid, and existing devices will no longer load the information.
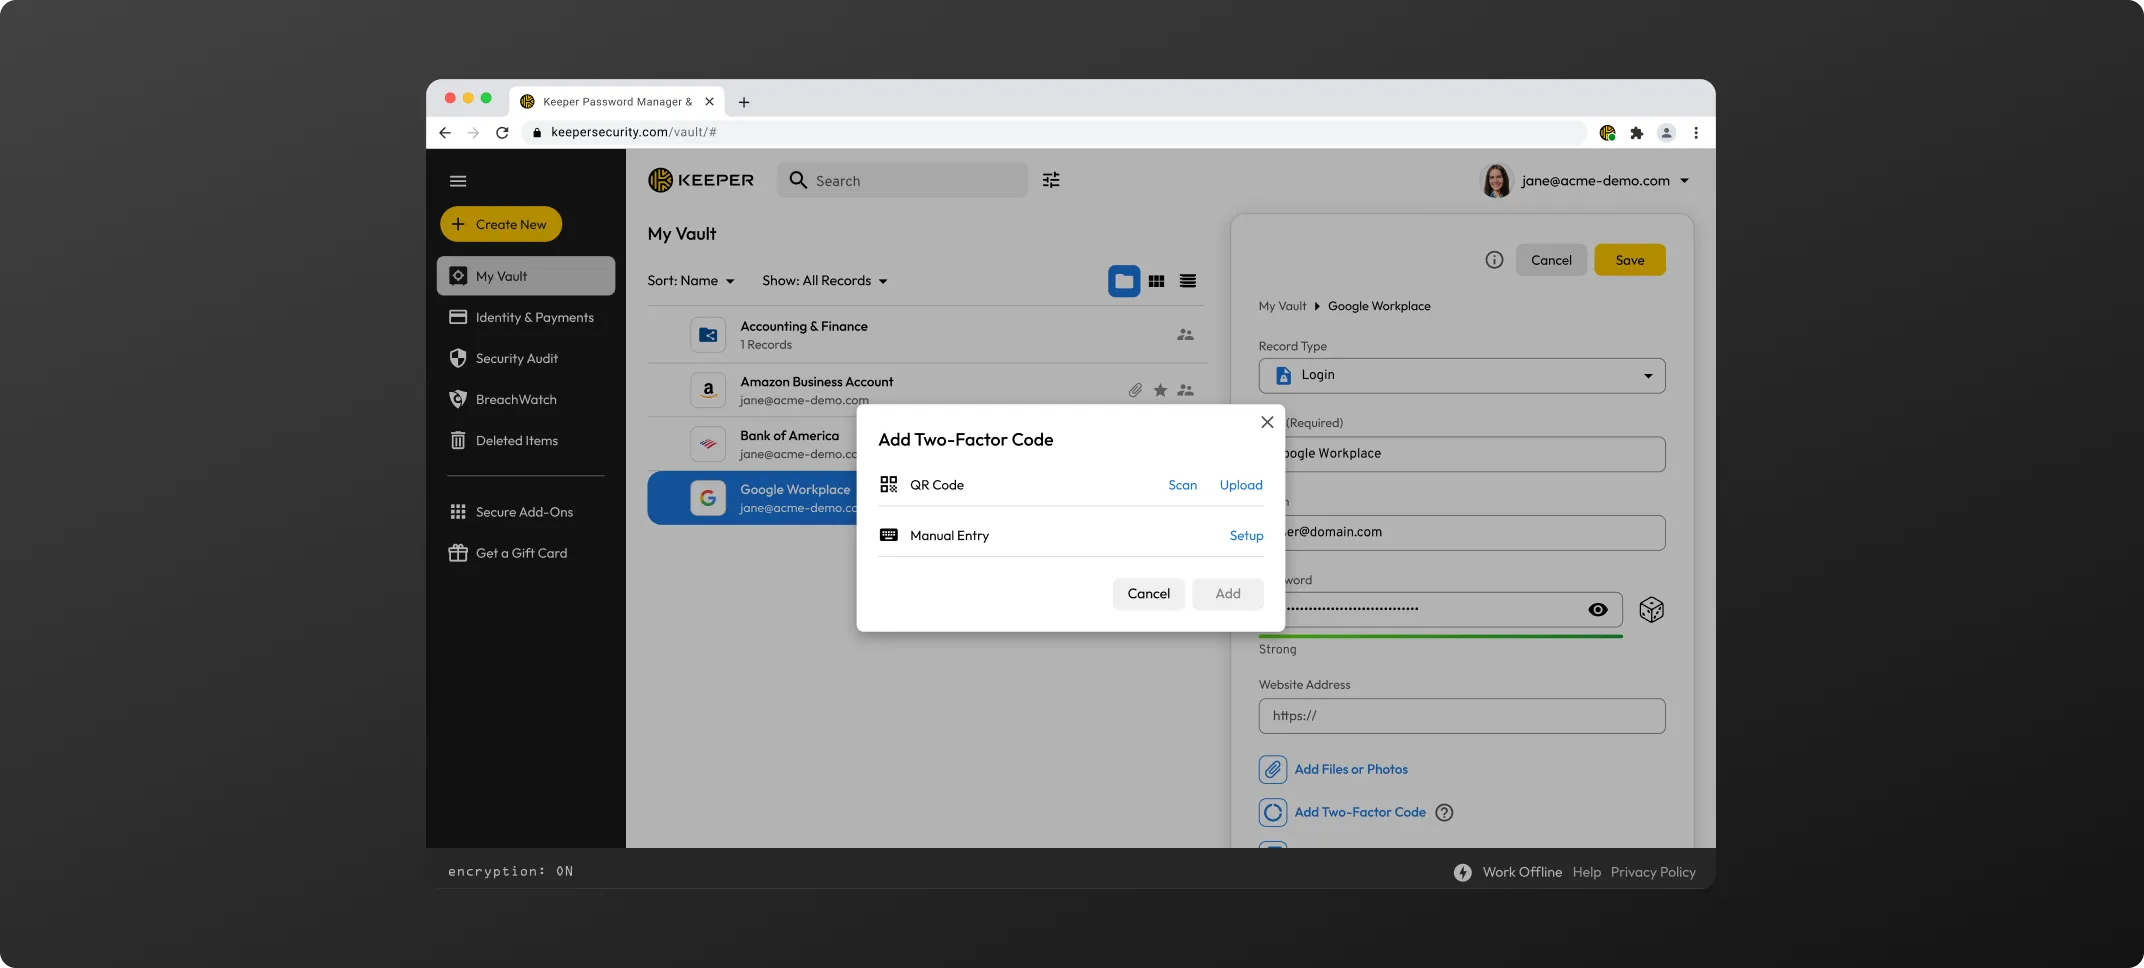
To add a Two-Factor Code, you can use the Web Vault, Desktop App or mobile apps.
From the Desktop App, click on "Add Two-Factor Code". There are 3 ways to input the code:
The "Scan" feature on the Keeper Desktop application lets you drag a small scanner window on top of the target QR code. This is useful when setting up applications on the desktop computer.
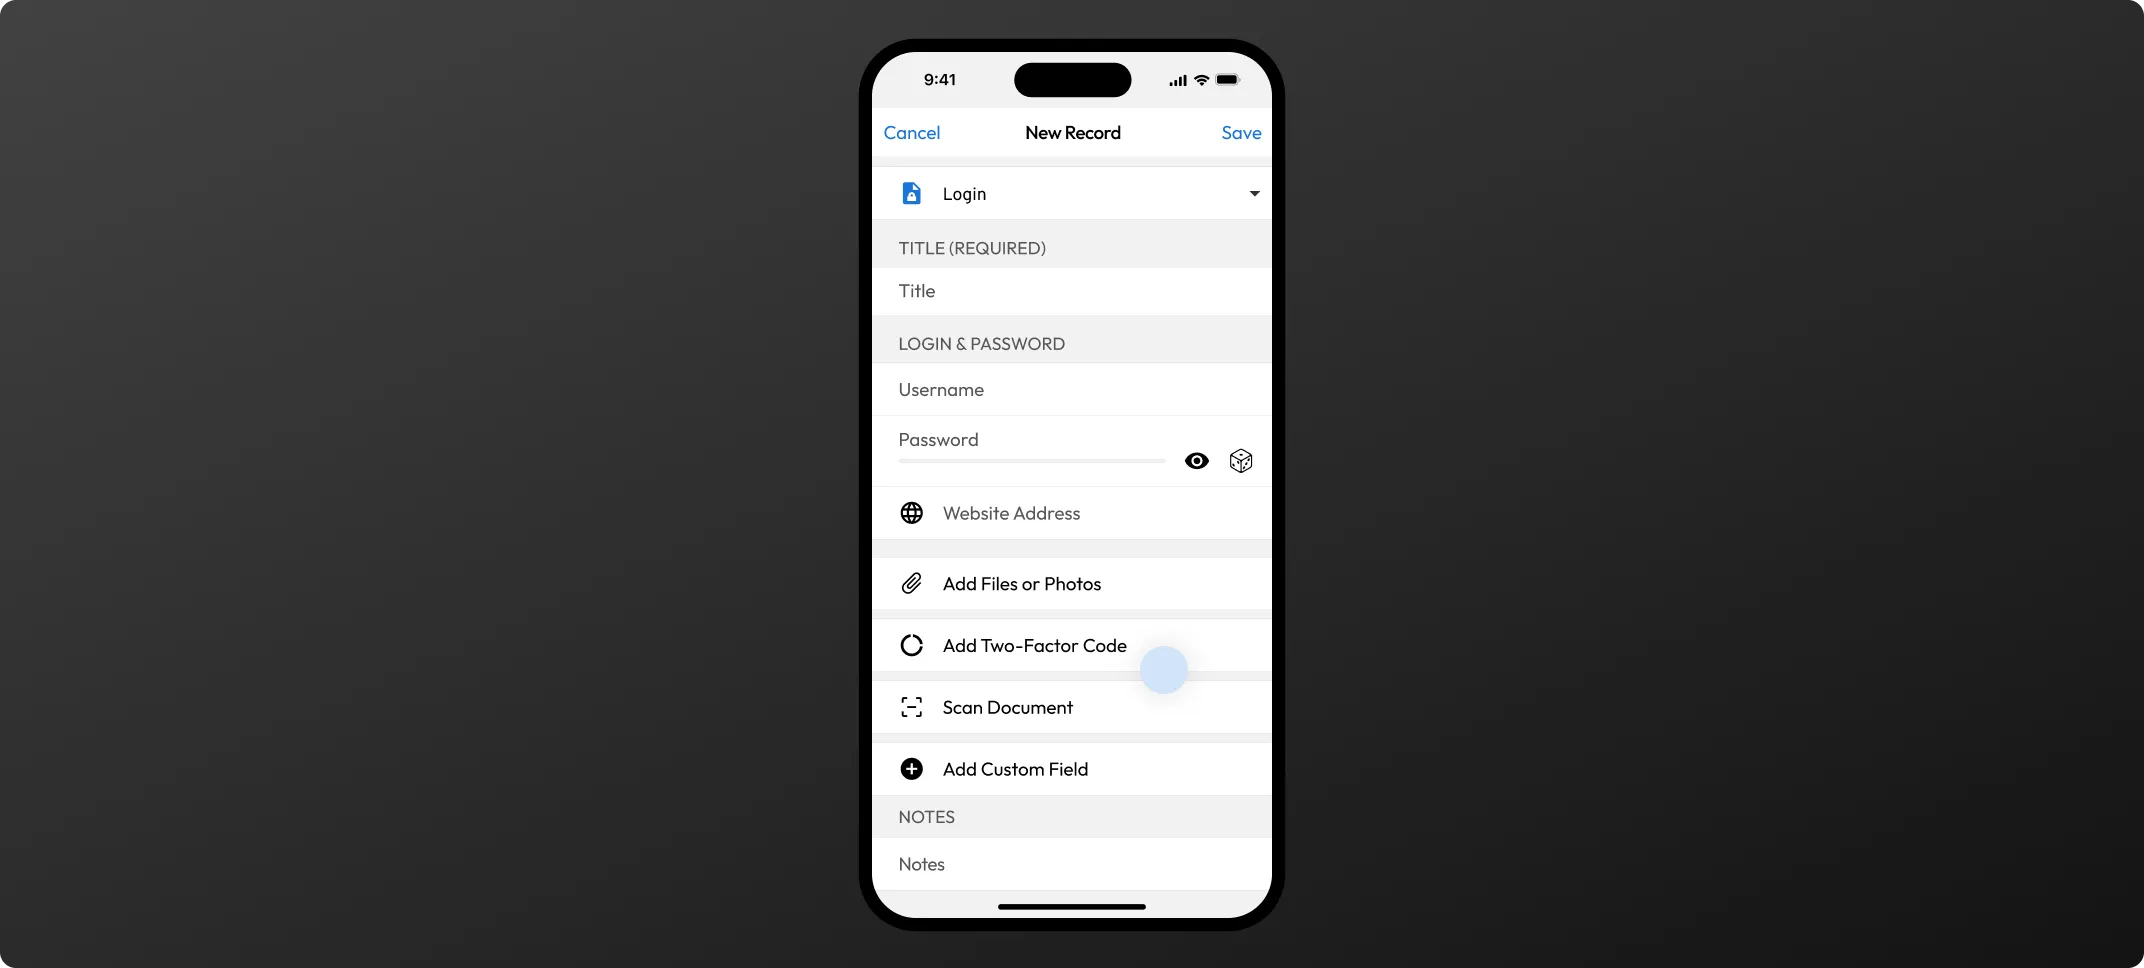
It's also very easy and straightforward to use the Keeper mobile app on iOS or Android to add a Two-Factor code. Tap on "Add Two-Factor Code" from the record edit screen and use the device camera.
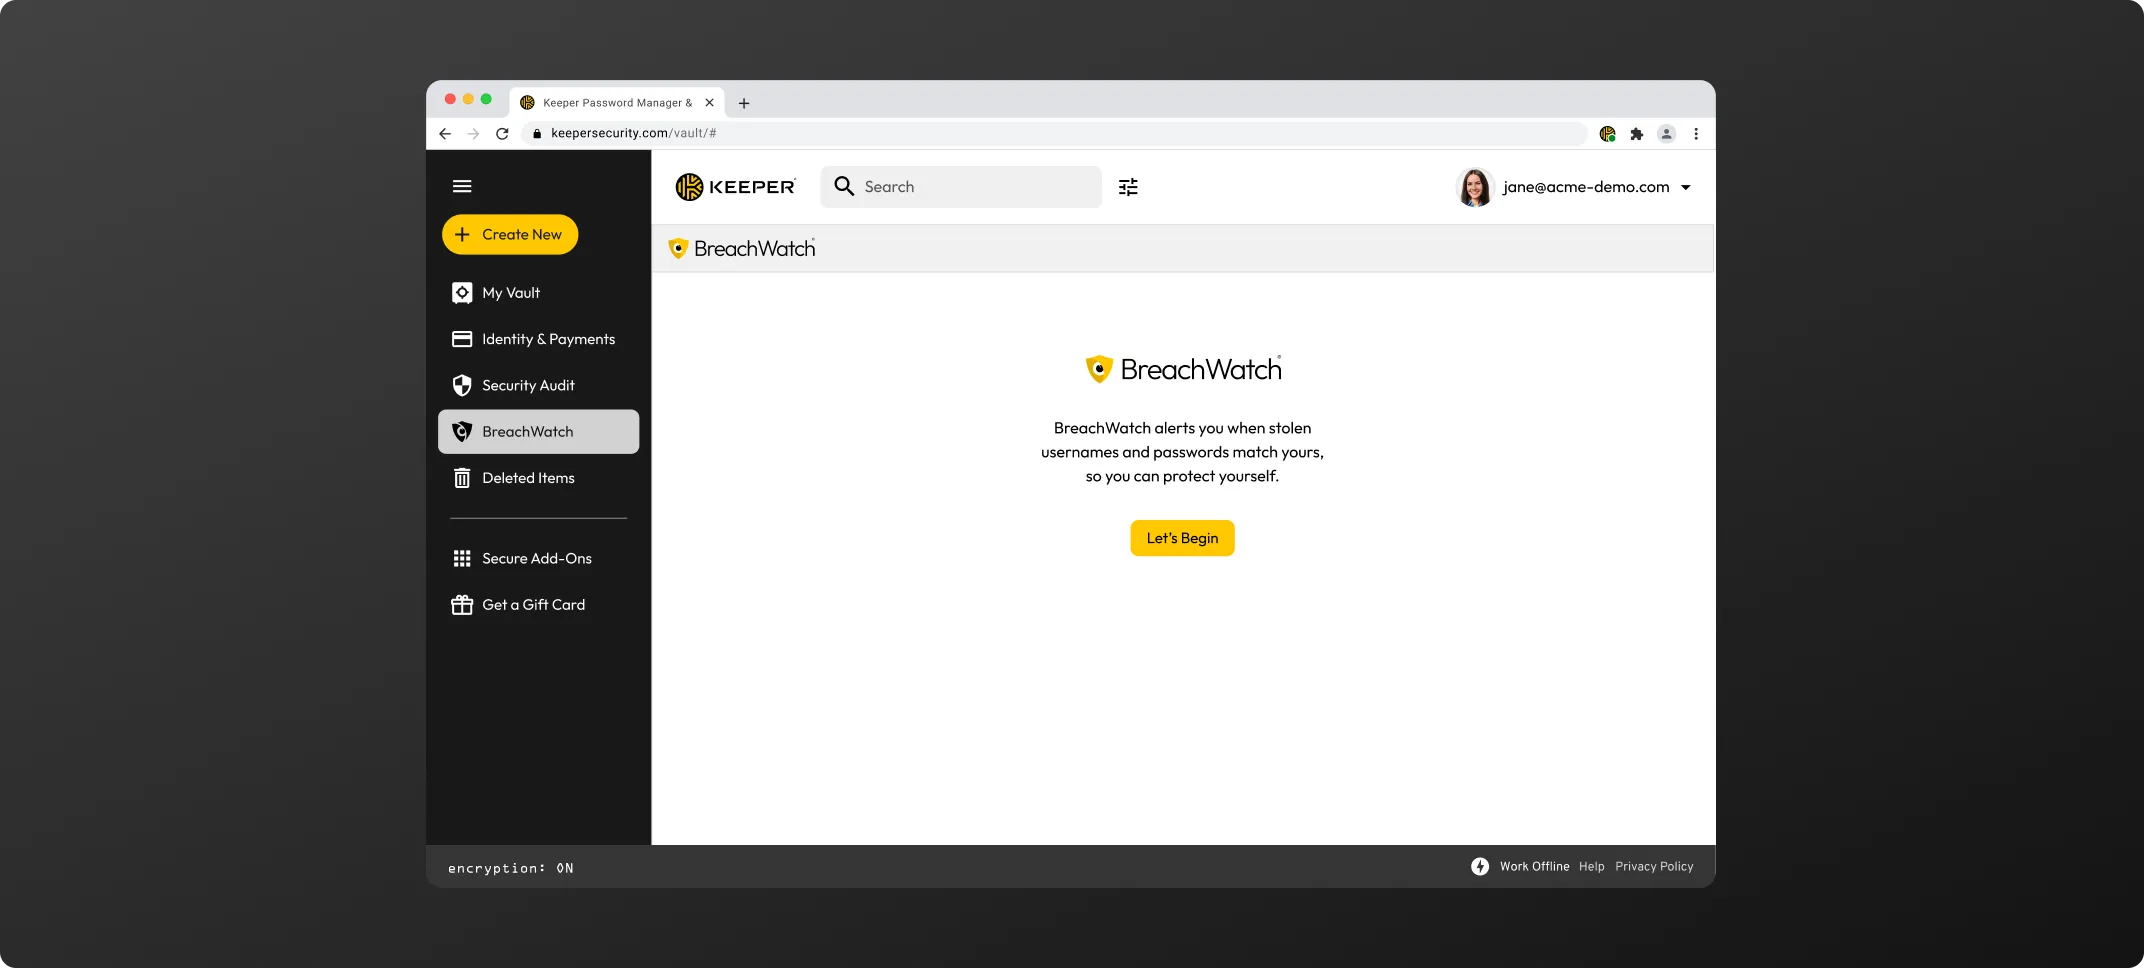
To start your BreachWatch scan, click BreachWatch in the left navigation menu within the Admin Console, then click Let's Begin > Scan.
To create and save a passkey for a site, typically you'll need to visit the "Security" or "Account Settings" screen of the website. In the below example, we'll be showing Best Buy.
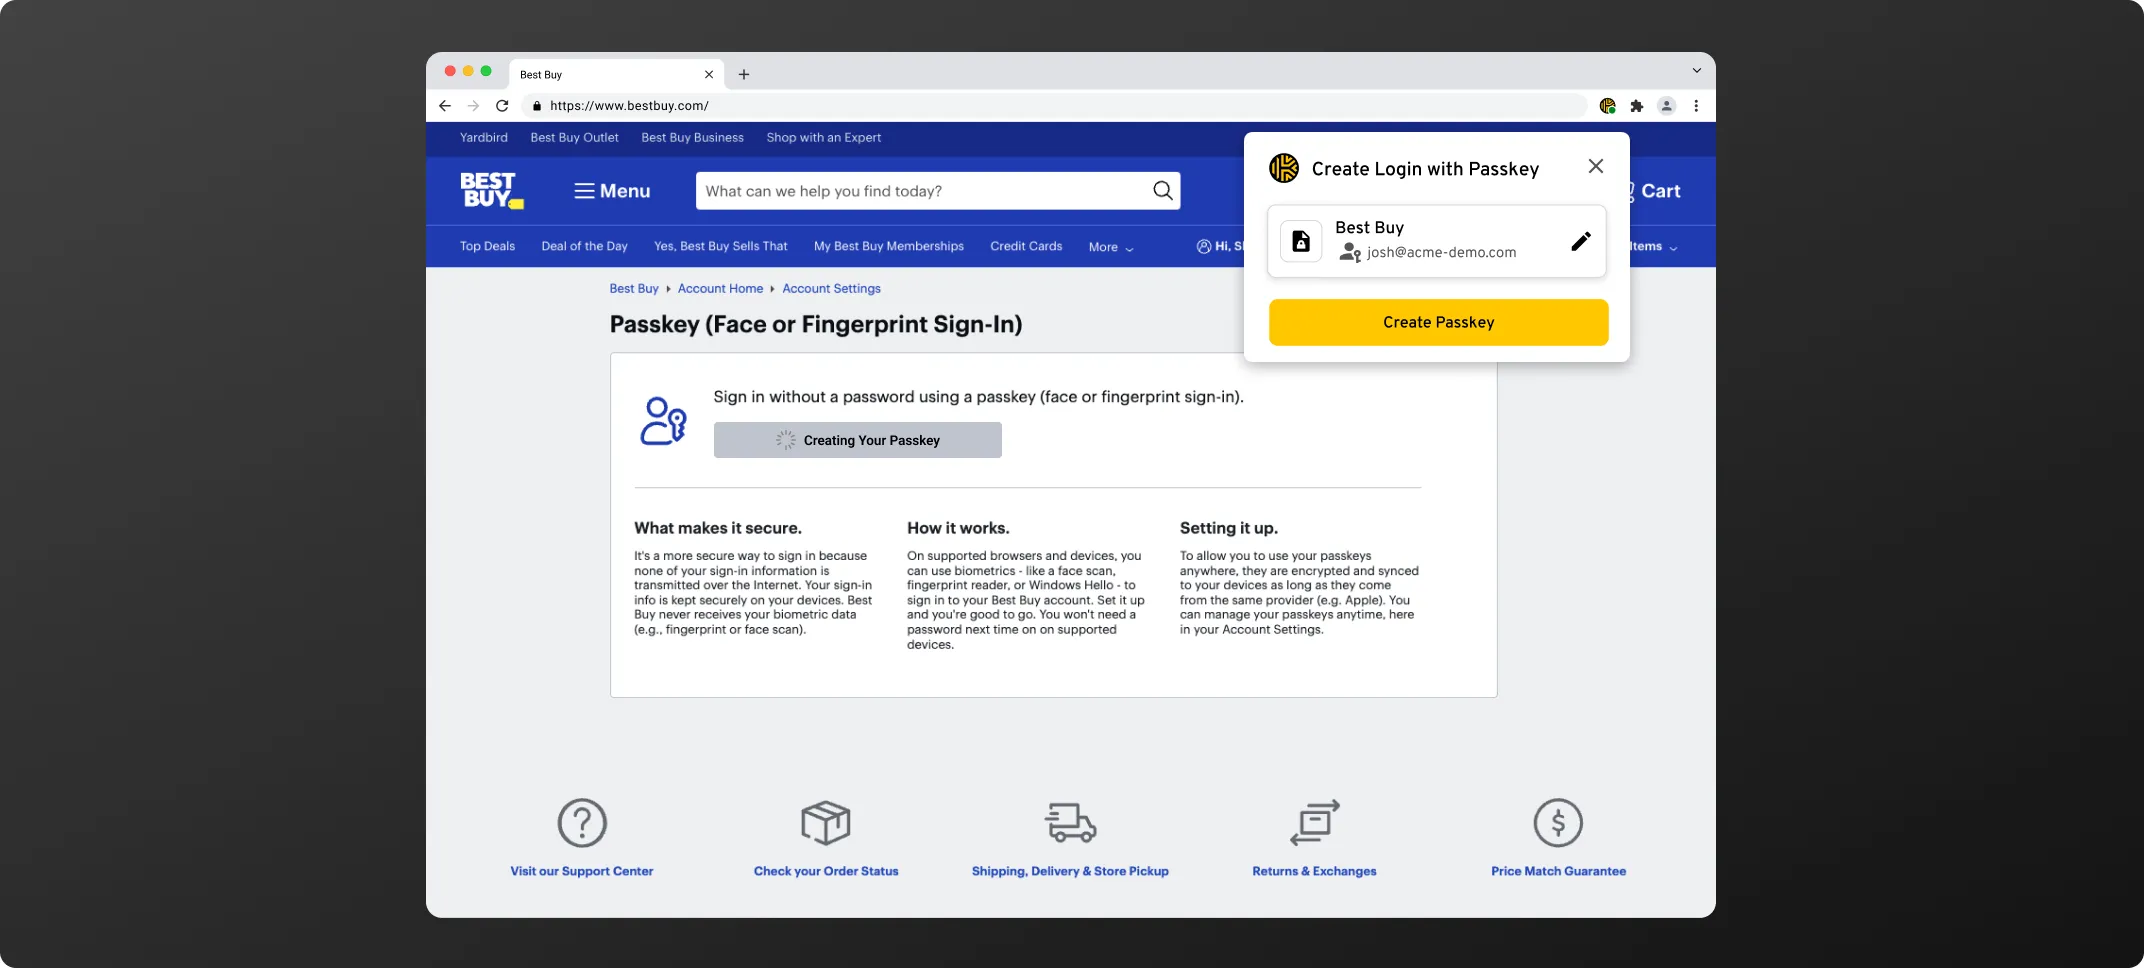
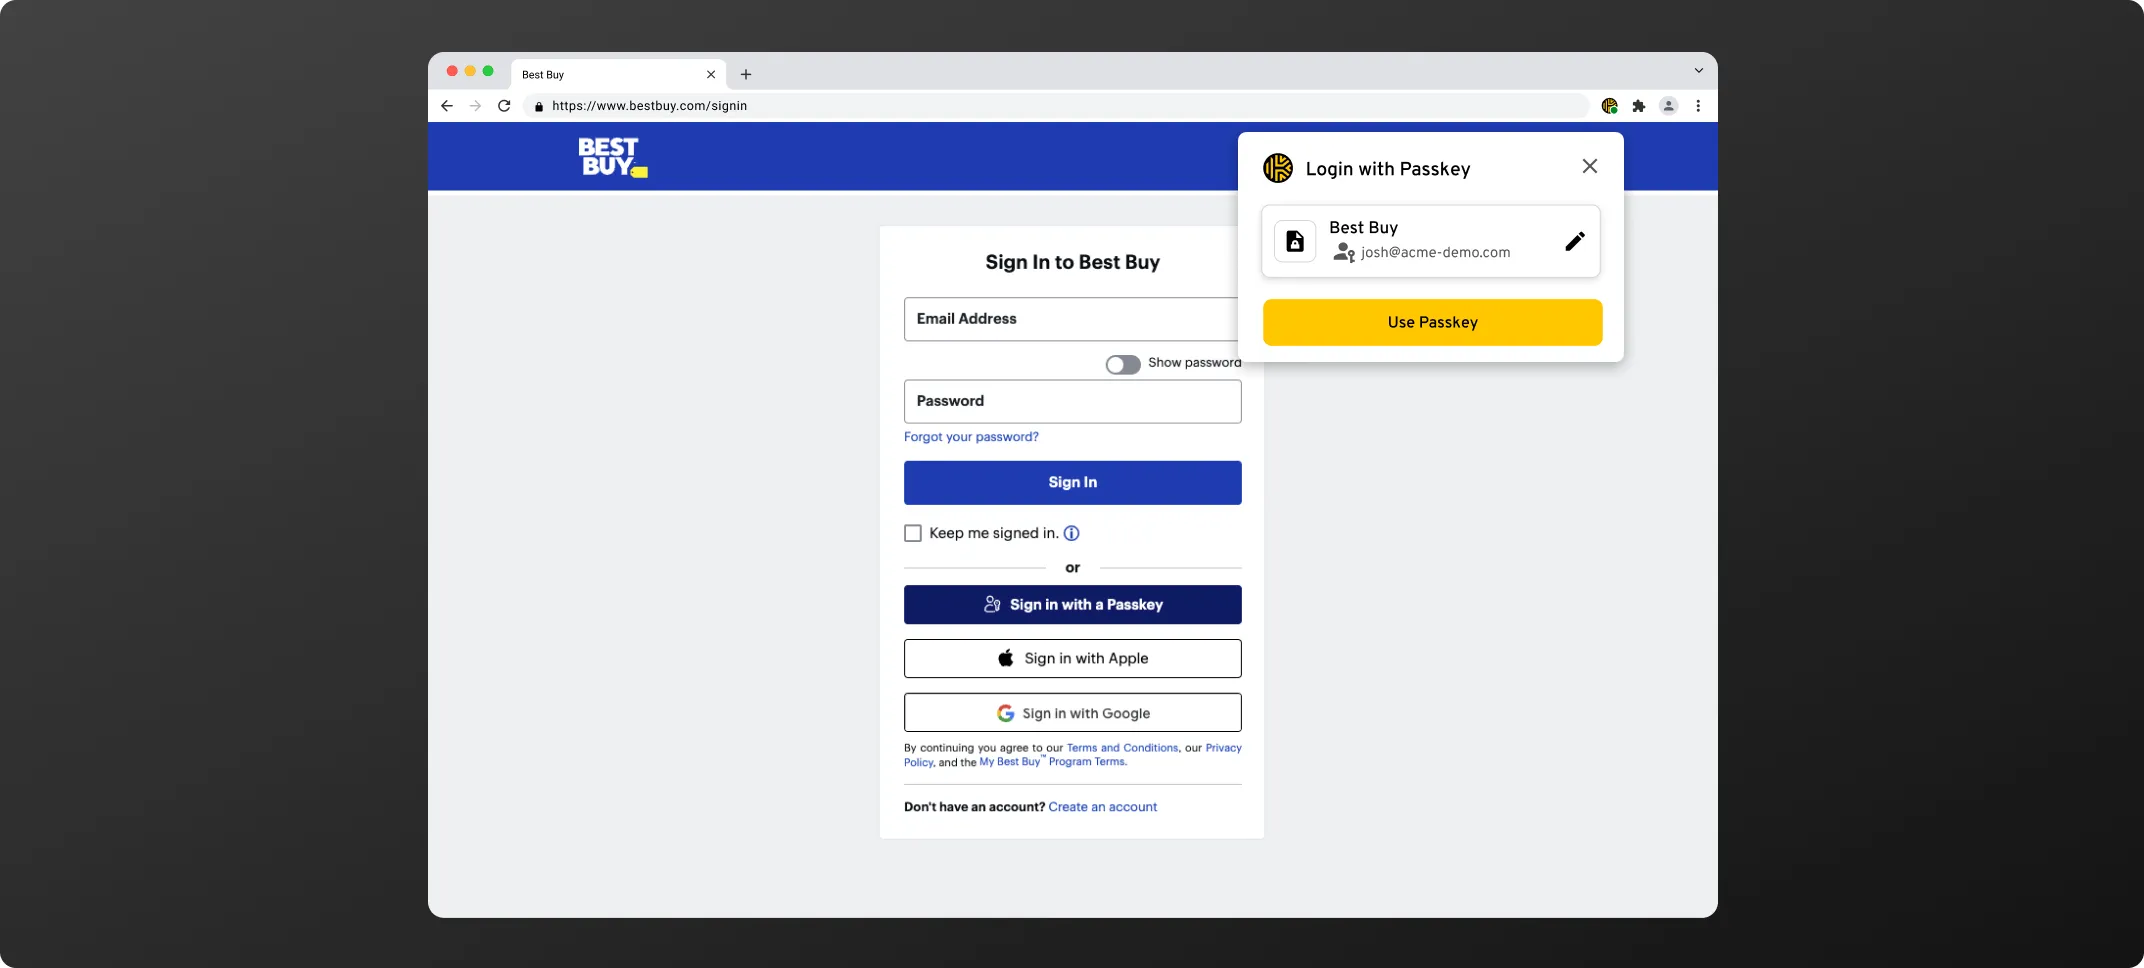
When clicking the "Create a Passkey" button, Keeper will intercept the request and ask you to save the passkey to your vault.
You must accept cookies to use Live Chat.